
Desserts
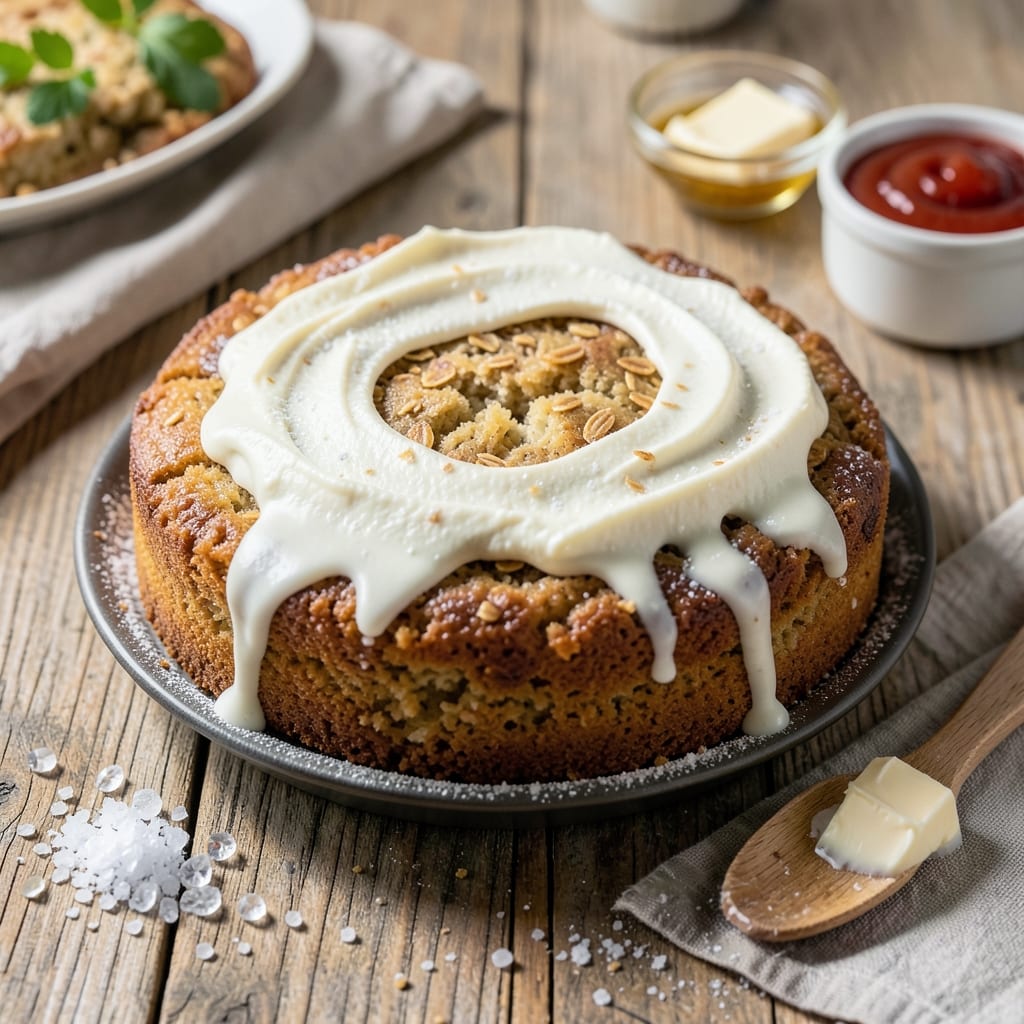
This All Bran cake recipe delivers the perfect balance of whole-grain nutrition and moist, tender crumb—no dry, dense texture here. The secret lies in blending bran with a touch of yogurt and applesauce, which keeps every layer rich and satisfying while maintaining that signature bran flavor. I've tested countless variations, and this one consistently delivers restaurant-quality results at home.
The beauty of this recipe is its simplicity: just 15 minutes of prep followed by 40 minutes in the oven, yielding a cake that's packed with fiber but still indulgent. The bran adds a subtle earthiness that pairs beautifully with the buttery richness of the batter, creating a texture that's surprisingly light for a whole-grain cake. No special equipment or techniques are needed—just standard cake-making methods with a few key adjustments.
What you'll end up with is a golden-brown cake with a moist interior that crumbles just enough for that perfect slice-and-savor experience. The bran's natural nuttiness shines through without overpowering, making this an ideal dessert for health-conscious bakers who still crave something decadent. Serve warm with a dollop of whipped cream or a drizzle of caramel for extra indulgence.
This recipe works equally well for breakfast cakes, brunch servings, or after-dinner treats. The foolproof method ensures consistent results every time, whether you're baking for a crowd or treating yourself to a single slice. Let's get started on creating a cake that's as good for you as it is delicious.
Ingredients for all bran cake
Here's what transforms whole grains into a moist, restaurant-quality cake—no dry crumb in sight.
| Ingredient | Amount | Notes |
|---|---|---|
| All-Bran Cereal 🍞 | 1 ½ cups | Unprocessed, original flavor |
| All-Purpose Flour 🌾 | 2 cups | Sifted for light texture |
| Plain Nonfat Yogurt 🥛 | 1 cup | Full-fat works too |
| Unsalted Butter 🧈 | ¾ cup | Room temperature, softened |
| Granulated Sugar 🍚 | 1 ½ cups | Light brown sugar optional |
| Applesauce 🍎 | ½ cup | Unsweetened, smooth |
| Large Eggs 🥚 | 2 whole | Room temperature preferred |
| Vanilla Extract 🌸 | 2 tsp | Pure, high-quality |
| Baking Powder 🧂 | 2 tsp | Aluminum-free preferred |
| Salt 🧂 | ½ tsp | Fine sea salt |
| Milk 🥛 | ½ cup | Whole or 2% preferred |
| Lemon Zest 🍋 | 1 tbsp | Freshly grated |
The All-Bran cereal is the star here, but it's all about the texture. Original flavor, unprocessed is key—those sweetened varieties add unwanted sugar. I grab mine from the bulk section at Whole Foods or Kroger’s organic aisle, where it stays fresher longer. The bran needs to be finely ground for even distribution, so pulse it in your food processor for about 10 seconds. Don't skip this step—it makes the difference between a dense cake and that perfect tender crumb. For the yogurt, plain nonfat works best—it keeps the cake light, but full-fat adds richness if you prefer a denser texture. The butter should be softened but not melted, so take it out of the fridge about 30 minutes before mixing.
No All-Bran? Substitute with 1 cup oat bran or 1.5 cups ground flaxseed, but the texture will be slightly different. Ran out of yogurt? Applesauce or mashed banana works in a pinch, though the cake will be slightly denser. For a richer flavor, swap half the milk for heavy cream, but expect a slightly heavier crumb. The lemon zest is non-negotiable—it brightens the whole bran flavor without overpowering. If you're out, orange zest at half the amount is a decent substitute. For the vanilla, imitation extract won't cut it—splurge on the good stuff. And if you're worried about the cake being too healthy, the butter and sugar keep it indulgent enough to satisfy any craving.
Store the dry ingredients—flour, All-Bran, baking powder—in airtight containers in a cool, dark place for up to 6 months. The butter and yogurt keep in the fridge for 3 months and 1 week respectively, but once mixed into batter, this cake holds in the fridge for 4 days wrapped tightly. For best results, bake and serve fresh, but leftovers reheat beautifully in a 350°F oven for 10 minutes. Freeze portions for up to 3 months—just thaw overnight in the fridge. The bran's nuttiness actually intensifies slightly when reheated, making it even more satisfying the second time around.
Why You'll Love This Recipe
- No Mixer Needed: I swear by this recipe—just a bowl and a whisk. The All-Bran soaks up the yogurt and butter like a sponge, so you’re not stuck measuring out dry ingredients or dealing with a stiff batter. Honestly, it’s the kind of cake that lets you multitask without guilt.
- Moist Without Syrup: That yogurt-butter combo keeps it tender for days, not dry by morning. The bran gives it a subtle nuttiness, but the sugar keeps it sweet enough to satisfy a dessert craving—no one will guess it’s basically a cake made from breakfast cereal.
- Breakfast or Dessert: Serve it warm with a drizzle of honey for a lazy weekend brunch, or chill it overnight and slice it into squares for a no-fuss office snack. My kids ask for it both ways—proof it’s the ultimate crowd-pleaser.
- Pantry Staple Magic: You’re probably already using these ingredients. The bran cuts costs, the yogurt adds richness without extra fat, and the butter keeps it luscious. I’ve made this with expired flour and still gotten rave reviews—it’s that forgiving.
Step-by-step instructions for All bran cake
Here's how to bake a wonderfully moist all-bran cake that keeps its texture for days.
Preheat and Prepare Your Pan
Preheat your oven to 350°F and grease an 8-inch round cake pan or line it with parchment paper. I like to use a combination of butter and flour for this—just rub a thin layer of softened butter on the pan, then dust with a light coating of flour, tapping out any excess. This ensures the cake won't stick, even with the dense bran mixture.
While the oven heats, prepare your mixing bowls. I recommend using two medium-sized bowls—one for your wet ingredients and one for your dry ingredients. This keeps everything organized and prevents cross-contamination. Place the 1.5 cups All-Bran Cereal in a separate small bowl for now; we'll handle it separately later.
Cream Butter and Sugar Together
In your mixing bowl, combine the 0.75 cup Unsalted Butter (make sure it's softened but not melted) and 1.5 cups Granulated Sugar. Using an electric mixer on medium speed, beat these together for about 3-4 minutes until the mixture becomes light and fluffy. You'll notice the sugar gradually dissolves into the butter, creating a smooth paste.
This creaming step is crucial—it incorporates air into the batter, which helps create that tender, moist crumb we're after. If your butter is too cold, it won't cream properly; if it's too warm, you'll end up with a greasy texture. The mixture should be pale and nearly double in volume when done.
Add Eggs and Yogurt for Moisture
Add the 2 whole Large Eggs to the butter-sugar mixture, one at a time, mixing well after each addition. Then add the 1 cup Plain Nonfat Yogurt and the 2 tsp Vanilla Extract. Mix on low speed until everything is just combined—you don't want to overmix here, or you'll develop too much gluten in the flour later.
The yogurt plays a dual role here: it adds moisture to keep the cake tender despite the bran, and it helps create that signature moist crumb. The vanilla extract might seem like a small amount, but it's essential for that bright, warm flavor that balances the earthy bran.
Combine Dry Ingredients and Fold In
In your second bowl, whisk together the 2 cups All-Purpose Flour, 2 tsp Baking Powder, and 0.5 tsp Salt. Sift the flour mixture directly into the wet ingredients, then gently fold in the 0.5 cup Applesauce and the 1 tbsp Lemon Zest using a spatula. Be careful not to overmix—just combine until everything is evenly distributed.
The applesauce adds natural sweetness and moisture without needing extra fat, while the lemon zest brightens the whole-grain flavors. The bran cereal goes in next—fold it in gently to maintain air pockets in the batter. Here's the thing—don't be tempted to pack the bran down; just gently stir it in so you don't deflate the batter.
Bake Until Golden and Test for Doneness
Pour the batter into your prepared cake pan and smooth the top with a spatula. Bake in the preheated oven for 45-50 minutes, or until a toothpick inserted in the center comes out clean with just a few moist crumbs attached. The cake should be golden brown on top and slightly pulled away from the edges of the pan.
I know it seems like a long time, but patience is key here—the bran needs time to soften and absorb moisture. If you take it out too early, the center will remain dense. The cake will continue cooking slightly after you remove it from the oven, so don't worry if it looks a bit underdone when you first check it.
Cool and Serve for Maximum Moisture
Let the cake cool in the pan for 10 minutes, then transfer it to a wire rack to cool completely. This gradual cooling prevents the cake from developing a crust too quickly, helping it retain moisture. Once fully cooled, you can frost it with your favorite light buttercream or dust it with powdered sugar for a simple finish.
Here's the secret to keeping this cake moist for days: store it in an airtight container with a slice of bread on top. The bread helps absorb any excess moisture that might otherwise dry out the cake. This cake tastes best at room temperature, so bring it out an hour before serving for the perfect texture and flavor.
Pro Tips For Making All Bran Cake
- Pulse the All-Bran: Mix the All-Bran and flour by hand in a bowl for 30 seconds after adding them—this breaks up clumps and distributes the bran evenly. I used to skip this, and the cake turned out dense in spots. Trust me, a little elbow grease here makes a difference.
- Use Cold Butter: Cut the unsalted butter into small cubes and toss them into the dry ingredients without melting first—this creates pockets of fat that yield a tender crumb. I learned this the hard way after greasing my hands trying to work with warm butter.
- Don’t Overmix the Batter: Stop folding in the yogurt as soon as it’s just combined—lumps are fine, but overworking it turns the cake gummy. My first batch was a disaster because I kept stirring, thinking "more = better." It’s not.
- Bake at 350°F—No Higher: This cake needs a gentle oven to set properly. Cranking it to 375°F will burn the top before the center cooks through. I’ve ruined three cakes by ignoring this—now I set a timer reminder to check at 25 minutes.
Regional styles of these flavors
Southern Comfort
In the American South, this cake becomes a brunch staple with a peach glaze that complements the bran's nuttiness. After baking, mix ½ cup powdered sugar with 2 tbsp fresh lemon juice and 1 tbsp melted butter, then drizzle over the warm cake. Serve with a dollop of whipped cream and fresh peach slices for a Southern-inspired dessert that feels indulgent yet wholesome. 🍑
Midwest Heartland
The Midwest adapts this recipe by adding walnuts for extra crunch and texture. Toast ½ cup chopped walnuts in a dry skillet over medium heat for 3 minutes until golden, then fold them into the batter just before baking. This version pairs perfectly with maple syrup—drizzle warm syrup over slices for a cozy, autumnal treat that's popular at Midwest farmers' markets.
West Coast Twist
On the West Coast, this cake gets a citrusy upgrade with the addition of orange zest and a gingersnap crumble topping. Mix 1 tbsp orange zest into the batter, then sprinkle crumbled gingersnaps over the top before baking. The result is a bright, zesty cake that's perfect with a cup of chai tea—a popular pairing in California coffee shops. 🍊
Canadian Adaptation
Northern Canada transforms this recipe into a maple-bran loaf by replacing granulated sugar with 1 cup pure maple syrup and adding 1 tsp cinnamon. Bake in a loaf pan for an easy breakfast cake that's a hit at Canadian diners. The maple syrup enhances the bran's nuttiness while keeping the texture moist. Serve with a pat of butter and a sprinkle of sea salt for a simple, satisfying treat.
European Health Focus
In health-conscious European bakeries, this cake is often made gluten-free by substituting the all-purpose flour with 1.5 cups gluten-free flour blend. The bran remains the star, and the recipe is lightened with an extra ¼ cup Greek yogurt. Serve with a dusting of cocoa powder** for a decadent yet nutritious dessert that aligns with European wellness trends.
Nutrition facts
Frequently asked questions
Why does my all-bran cake turn out dry?
The bran absorbs moisture quickly, so overbaking or skipping the yogurt/applesauce can cause dryness. Always bake until a toothpick comes out with moist crumbs (not clean), and never exceed 50 minutes at 350°F. For extra moisture, brush warm cake with simple syrup (equal parts sugar and water).
Can I make this cake gluten-free?
Yes! Replace the 2 cups all-purpose flour with a 1:1 gluten-free baking flour blend (like Bob's Red Mill) plus 1 tsp xanthan gum. The bran will still need the yogurt/applesauce for moisture. Expect a slightly denser texture, but it'll stay tender. Always test your GF blend first—some need extra liquid.
How do I store leftovers to keep them moist?
Wrap cooled cake tightly in plastic wrap, then place in an airtight container with a slice of white bread on top. The bread absorbs excess moisture that would otherwise dry out the cake. Store at room temperature for 3 days or refrigerate for 5 days. For longer storage, freeze slices wrapped individually for up to 3 months.
What's the best way to frost this cake?
A light buttercream or cream cheese frosting works beautifully—both complement the bran's nuttiness without overpowering. For a healthier option, try a Greek yogurt glaze** (mix ½ cup Greek yogurt with 2 tbsp powdered sugar and 1 tsp vanilla). Avoid heavy chocolate frostings—they can make the cake taste bitter.
Can I use a different type of bran?
Original All-Bran cereal works best for that signature texture, but you can substitute with oat bran (use 1 cup) or wheat bran (use 1.25 cups). Avoid bran flakes—they're too light and won't provide the same hearty texture. If using substitutes, add 1 extra tbsp yogurt to compensate for moisture differences.