
Desserts
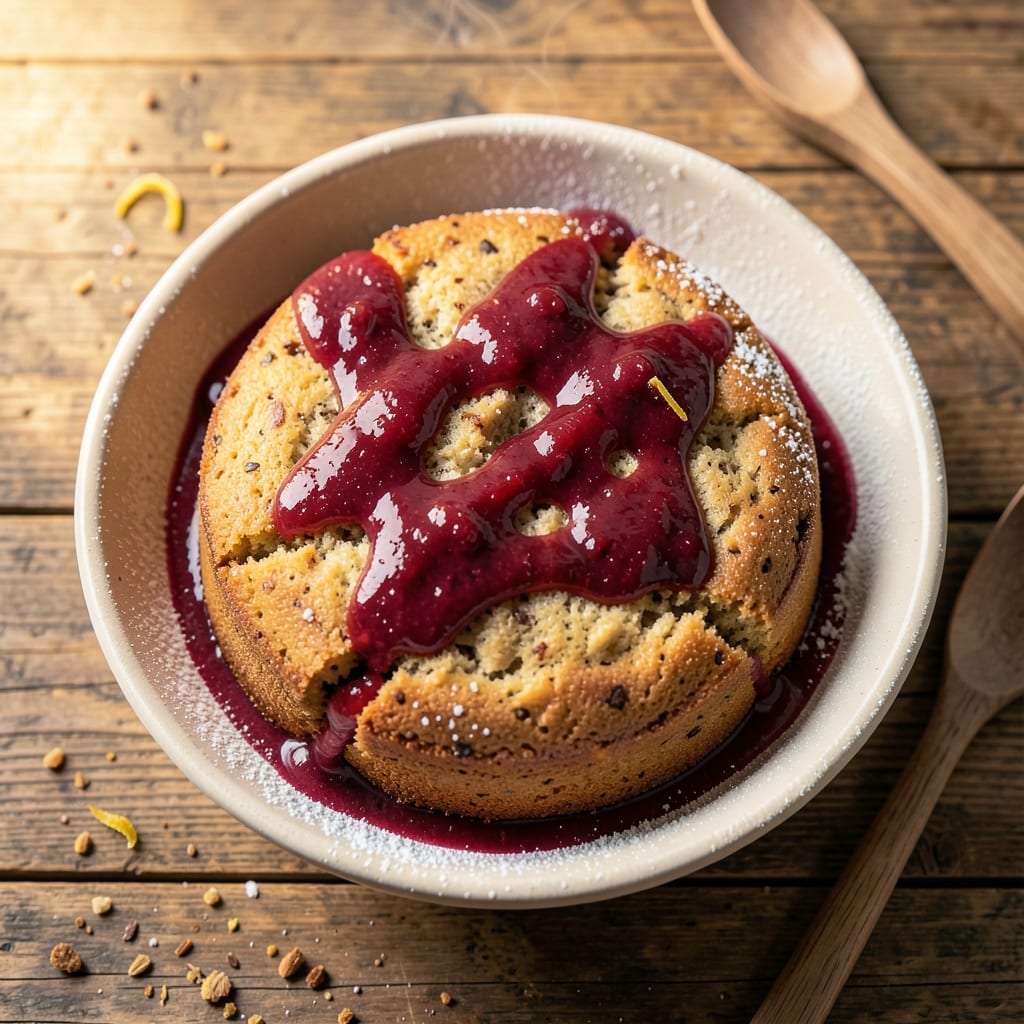
This all-purpose gluten-free flour cake recipe delivers the light, tender crumb you crave—without the gluten. After years of perfecting gluten-free baking, I’ve cracked the code for a cake that rises beautifully, stays moist, and satisfies even the most skeptical dessert lovers. The secret lies in the right flour blend and moisture balance, ensuring no dry or dense results.
The foundation uses a 1:1 gluten-free flour blend (like Bob’s Red Mill or King Arthur) combined with xanthan gum for structure, while ingredients like applesauce and Greek yogurt keep the texture tender and flavorful. Whether you prefer vanilla or chocolate, this recipe adapts effortlessly—no special equipment or cross-contamination risks required.
What you’ll achieve is a golden, evenly risen cake with a fine crumb and just the right amount of spring. The baking process is straightforward: mix, pour, bake, and enjoy a dessert that doesn’t compromise on texture or taste. Perfect for birthdays, holidays, or anytime you crave a classic cake without the gluten.
Serve it plain, with frosting, or dusted with powdered sugar—this cake stands up to any decorating style. The recipe also includes tips for adjusting moisture levels and avoiding common gluten-free baking pitfalls, so you’ll get it right every time.
Ingredients for all purpose gluten free flour cake
Grab these ingredients for a gluten-free cake that rises light and stays moist.
| Ingredient | Amount | Notes |
|---|---|---|
| 1:1 Gluten-Free Flour Blend 🌾 | 2 cups | Bob's Red Mill or King Arthur preferred |
| Xanthan Gum 🍞 | ½ tsp | Ensures proper structure |
| Unsalted Butter 🧈 | 1 cup | Softened to room temperature |
| Granulated Sugar 🍚 | 1 ½ cups | White or light brown |
| Large Eggs 🥚 | 2 whole | Room temperature preferred |
| Unsweetened Applesauce 🍎 | ½ cup | Adds moisture without oil |
| Plain Greek Yogurt 🍦 | ½ cup | Full-fat for best texture |
| Vanilla Extract 🌸 | 1 tbsp | Pure extract preferred |
| Baking Powder 🍞 | 1 tsp | Metal container only |
| Salt 🧂 | ½ tsp | Diamond Crystal preferred |
| Milk 🥛 | ½ cup | Any variety works |
| Powdered Sugar 🍚 | ¼ cup | For dusting or frosting |
The gluten-free flour blend is non-negotiable here—Bob’s Red Mill or King Arthur are your best bets, as they’re specifically formulated for baking. Xanthan gum is essential for structure; if your blend doesn’t include it, add it separately. For the butter, unsalted is key—it gives you control over the final flavor. I always buy Land O’Lakes unsalted butter from the grocery store’s dairy section, but any reputable brand works. The Greek yogurt adds moisture without making the cake dense, so full-fat is worth it—it also brings a subtle tang that balances the sweetness. If you’re using vanilla extract, pure Madagascar bourbon vanilla elevates the flavor, but imitation works in a pinch.
No applesauce? Pumpkin puree or mashed banana works equally well for moisture—just reduce the milk slightly to balance. Swapping Greek yogurt? Sour cream or buttermilk are solid alternatives, though the texture will shift a bit. For vanilla flavor without extract, vanilla bean paste adds flecks of real vanilla. If your flour blend lacks xanthan gum, psyllium husk powder can substitute at the same ratio. The powdered sugar can be swapped for confectioners’ sugar if you’re making a glaze or frosting—just sift it first to avoid lumps. And if you’re baking in a high-altitude area, reduce the baking powder by 1/4 tsp to prevent over-rising.
Store the dry ingredients (flour, baking powder, xanthan gum) in airtight containers away from heat and moisture—they’ll stay fresh for 6-12 months. The butter should be kept in its original wrapper or a sealed container in the fridge, where it’ll last up to a year. For the cake itself, wrap it tightly in plastic wrap and store at room temperature for 2-3 days or in the fridge for up to a week. If you’re making ahead, bake the cake, cool it completely, then freeze it wrapped in plastic and foil for up to 3 months. Thaw overnight at room temperature before serving.
Why You'll Love This Recipe
- Foolproof Mix-In: I swear by this blend—just toss the dry ingredients together, fold in the wet, and bake. No sifting, no stress, no guessing. The xanthan gum does all the heavy lifting while I do the easy part.
- Butter-Sugar Magic: That rich, creamy butter and sugar combo? It’s what makes this cake sing. The crumb stays tender, the edges have just enough snap, and honestly, it tastes like the cakes I grew up with—no sad, dry crumb here.
- Weekend or Weeknight: Slice it for breakfast with jam, serve it warm with ice cream, or pack slices for lunch. It’s my go-to for birthday cakes, potlucks, or when I just need something sweet without the fuss. (Yes, even on a Tuesday night.)
- Budget-Friendly Staples: You’re using pantry basics here—no specialty ingredients, no last-minute grocery runs. A box of gluten-free flour, butter, sugar, and eggs? That’s it. And leftovers? They disappear faster than I can say “second slice.”
Step-by-step instructions for perfect gluten-free cake
This method delivers a tender crumb and reliable rise every time—no special equipment needed.
Whisk Dry Ingredients for Even Distribution
In a medium bowl, sift together the 2 cups 1:1 gluten-free flour blend and 0.5 teaspoon xanthan gum. I find sifting prevents lumps that can lead to dense spots in the final cake. Add the 1 teaspoon baking powder and 0.5 teaspoon salt, then whisk gently to combine. This step ensures all your dry ingredients are evenly distributed before mixing with wet components.
Set this mixture aside temporarily. The gluten-free blend needs special attention because it lacks the natural structure of wheat flour. The xanthan gum acts like a binding agent, and we want it fully incorporated before adding liquids. If you notice any flour clumps after whisking, press them through a fine-mesh sieve to eliminate them completely.
Cream Butter and Sugar for Light Texture
In a separate large mixing bowl, combine the 1 cup softened unsalted butter and 1.5 cups granulated sugar. Using an electric mixer on medium-high speed, beat for 3-4 minutes until the mixture is light and fluffy, nearly doubling in volume. You'll know it's ready when the color becomes pale and ribbons form when you lift the beaters.
This creaming process incorporates air into the batter, which creates that classic cake texture. I press down on the butter mixture with a spatula during the first minute to ensure it's fully softened and to break up any potential lumps. If your butter hasn't softened properly, the cake will turn out dense rather than light and airy.
Add Eggs and Flavorings Gradually
Add the 2 whole large eggs, one at a time, mixing well after each addition. Then stir in the 1 tablespoon vanilla extract, 0.5 cup unsweetened applesauce, and 0.5 cup plain Greek yogurt. Mix on low speed just until combined—you should still see some streaks of flour in the mixture. The applesauce adds moisture without extra fat, while the Greek yogurt contributes protein for structure.
I always mix the wet ingredients separately before combining with the dry. This prevents overmixing the batter, which can lead to a tough cake. The applesauce and yogurt also help keep the cake moist during baking. After adding these ingredients, the mixture should be thick but pourable. If it looks too thin, we'll adjust with the dry ingredients in the next step.
Combine Wet and Dry Ingredients Gently
With the mixer on low speed, gradually add the dry ingredient mixture to the wet mixture. Mix just until the flour is incorporated and no dry streaks remain—this typically takes about 30-45 seconds. Avoid overmixing, which develops gluten and makes the cake tough. Then add the 0.5 cup milk and mix for another 10-15 seconds until fully combined.
Here's where the gluten-free flour's unique properties come into play. Unlike wheat flour, gluten-free blends can become gummy if overmixed. I use a silicone spatula to gently fold in any stubborn dry bits along the edges of the bowl. The batter should be smooth, thick, and slightly shiny. If it's too thick to pour easily, let it rest for 5 minutes while you prepare your baking pan.
Bake to Golden Perfection
Preheat your oven to 350°F and grease an 8-inch round cake pan or line it with parchment paper. Pour the batter into the prepared pan and smooth the top with a spatula. Bake for 30-35 minutes, until a toothpick inserted in the center comes out clean and the edges are lightly golden.
Gluten-free cakes can dry out more quickly than traditional cakes, so I recommend checking for doneness at the 25-minute mark. The center should spring back slightly when pressed gently with your finger. If the top browns too quickly, tent the pan with aluminum foil after 20 minutes to prevent over-browning. Let the cake cool in the pan for 10 minutes, then transfer to a wire rack to cool completely before frosting.
Pro Tips For Making All Purpose Gluten Free Flour Cake
- Mix Butter Cold: Mix the unsalted butter and sugar until it’s just combined—no need to fluff it into a light foam like wheat flour cakes. Gluten-free batters handle less air better, and overworking it can make your cake dense. Think "rough but creamy," not "smooth and airy."
- Weigh Your Flour: Scooping and packing gluten-free flour leads to inconsistent results—every brand packs differently. Use a kitchen scale for accuracy, and spoon the blend into the measuring cup, then level it off. This keeps your cake from turning out too dry or gummy.
- Skip Overmixing: Once you fold in the eggs, mix just until the batter comes together. Gluten-free flour releases starch easily, and overmixing turns your cake into a gluey mess. Stop when there’s one streak of flour left—no need to fight it.
- Bake at 325°F: Preheat your oven to 325°F, not 350°F like many wheat recipes. Gluten-free cakes bake faster and can dry out or burn on top if the heat’s too high. A toothpick test works, but check for doneness at 20 minutes—GF cakes often finish faster than they look.
Make-ahead tips for this all purpose gluten free flour cake
Pre-Bake Prep
Mix the batter the night before and store it in an airtight container in the fridge. This allows flavors to meld beautifully, and the batter will be perfectly chilled for baking the next day. I like to label the container with the date so I don’t forget—this batter keeps for up to 24 hours before baking. Just give it a quick stir before pouring into your pan. 🌙
Baking Ahead
Bake the cake up to 2 days in advance—this is where gluten-free baking shines. Once fully cooled, wrap the cake tightly in plastic wrap and store at room temperature. The cake will stay moist and tender for 3 days this way. If you’re prepping for a party, this is a game-changer—no last-minute baking stress! 🎉
Freezer-Friendly
For longer storage, bake the cake, cool it completely, then wrap it in plastic wrap followed by aluminum foil. Place it in a freezer-safe bag and freeze for up to 3 months. Thaw overnight in the fridge before serving. The texture remains perfect—no freezer drying here! I’ve even frosted cakes straight from the freezer after a quick thaw. ❄️
Frosting Prep
Make your frosting or glaze 1 day ahead and store it in the fridge. This gives flavors time to develop, and the frosting will be perfectly spreadable when you’re ready to assemble. For a quick glaze, mix ½ cup powdered sugar with 2 tablespoons milk and 1 teaspoon vanilla extract—it’s ready in minutes! 🎂
Layering Tips
If making a layered cake, assemble it 4-6 hours before serving to let the layers set. Place the cake on a wire rack over a tray to catch any drips, then refrigerate until ready to serve. This prevents soggy layers and makes slicing clean. Trust me, this step makes all the difference for presentation! ✨
Reheating Tricks
If your cake gets dry after storage, revive it by brushing with 1 tablespoon milk or orange juice and warming in the oven at 300°F for 5-10 minutes. This adds moisture without overcooking. For frosted cakes, microwave in 10-second bursts to soften the frosting gently. 🔥
Nutrition facts
Frequently asked questions
Can I substitute the gluten-free flour blend with almond flour?
Not recommended for this recipe. Almond flour has a much lower moisture content and different protein structure, which would make the cake dense and dry. The 1:1 gluten-free flour blend is specifically formulated to mimic wheat flour's properties, while almond flour works better in cookies or muffins where texture is less critical.
Why does my gluten-free cake turn out dense?
Overmixing the batter or skipping the xanthan gum are common culprits. Also, gluten-free flours absorb moisture differently—if your batter seems too thick, add 1 tablespoon milk at a time until pourable. Always preheat your oven fully and avoid opening it during the first 20 minutes of baking to prevent collapse.
How do I make this recipe chocolate instead of vanilla?
Replace 0.5 cup applesauce with 0.5 cup melted dark chocolate or cocoa powder, and add 1 teaspoon instant espresso powder to enhance chocolate flavor. For richer chocolate, swap 0.5 cup Greek yogurt with 0.5 cup sour cream. The batter will be thicker, so mix in 1 tablespoon milk if needed.
Can I bake this in a different pan size?
Yes, but adjust baking time. For a 9-inch round pan, bake 25-30 minutes (check at 25 minutes), and for a 6-inch pan, bake 35-40 minutes. The cake should spring back when pressed gently. Always use parchment paper or grease well to prevent sticking, especially with gluten-free batters.
What’s the best way to store leftovers?
Wrap cooled cake tightly in plastic wrap and store at room temperature for 2-3 days. For longer storage, freeze in an airtight container for up to 3 months. Thaw overnight in the fridge—microwaving can make gluten-free cakes dry. To revive stale slices, brush with warm milk and warm in the oven at 300°F for 5 minutes.