
Desserts
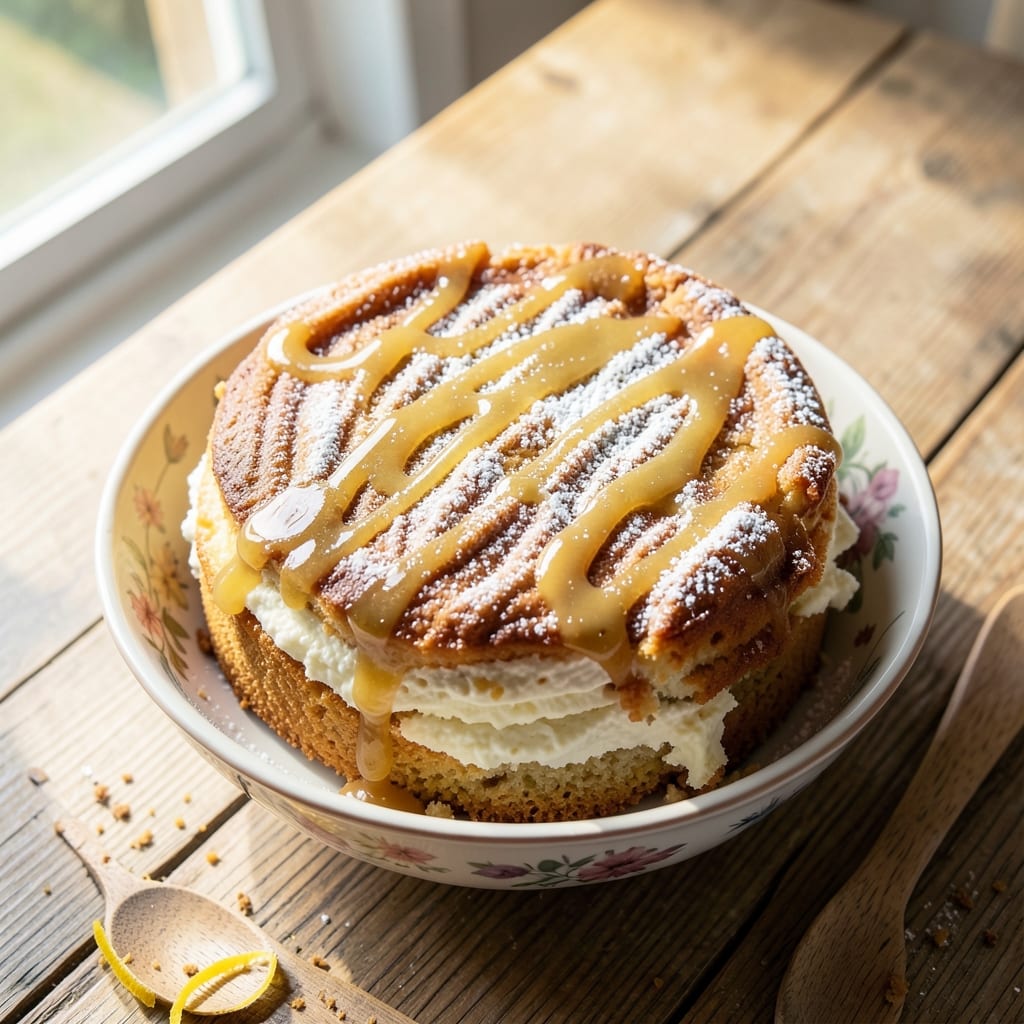
This allergy-friendly cake recipe delivers moist, egg-free, and dairy-free perfection without sacrificing texture or flavor. After years of testing substitutions, I finally cracked the code for a cake that bakes up tender, rich, and satisfying—no compromises. The secret lies in precise ingredient ratios and smart replacements that mimic traditional baking science. What sets this recipe apart is its versatility. You can bake it as a single-layer sheet cake, stack layers for an elegant dessert, or even make cupcakes. The foolproof method ensures consistent results every time, whether you're accommodating egg or dairy allergies or simply prefer plant-based ingredients. No one will guess it's allergy-friendly. The cake maintains that signature moist crumb we all love, thanks to a combination of applesauce and aquafaba that replaces eggs while adding natural sweetness and structure. Dairy-free butter and coconut oil create a rich, tender texture that holds up beautifully. The flavor is neutral enough to work with any frosting or filling. Perfect for birthdays, holidays, or just treating yourself. Let's get baking!
Ingredients for allergy friendly cake
Twelve ingredients to create a cake that's moist, tender, and allergy-free without compromise.
| Ingredient | Amount | Notes |
|---|---|---|
| All-Purpose Flour 🌾 | 2 ½ cups | Sifted for light texture |
| Granulated Sugar 🍚 | 1 ½ cups | White or light brown |
| Unsweetened Applesauce 🍎 | 1 cup | Unseasoned, unsweetened |
| Aquafaba 🥫 | ½ cup | Chickpea brine, whisked |
| Dairy-Free Butter 🧈 | 1 cup | Melted, full-fat preferred |
| Coconut Oil 🥥 | ¼ cup | Melted, refined or virgin |
| Vanilla Extract 🌿 | 2 tsp | Pure alcohol-free if preferred |
| Baking Powder 🍞 | 2 tsp | Aluminum-free for best rise |
| Baking Soda 🧂 | ½ tsp | Pure, no aluminum |
| Salt 🧂 | ½ tsp | Fine sea salt preferred |
| Unsweetened Almond Milk 🥛 | ½ cup | Room temperature |
| Lemon Juice 🍋 | 1 tbsp | Freshly squeezed |
| Xanthan Gum 🧪 | ¼ tsp | Ensures proper structure |
The flour and sugar are your foundation—King Arthur or Bob's Red Mill flour gives the best rise, but any all-purpose works. For sugar, Domino or C&H brands are reliable. The applesauce is non-negotiable here—unsweetened Mott's or store-brand works fine. Aquafaba? Save the brine from canned chickpeas—no need to buy specialty bottles. The dairy-free butter should be Miyoko's or Earth Balance—full-fat versions melt beautifully. Coconut oil matters too; refined keeps the flavor neutral, while virgin adds a slight tropical note if you're feeling adventurous. Grab a small bottle of alcohol-free vanilla if you're avoiding that too—Annie's is my go-to.
No applesauce? Mashed banana or pumpkin puree works in a pinch, but texture changes slightly. Skip the aquafaba? Flax eggs (1 tbsp ground flax + 3 tbsp water) can replace it, though the cake will be denser. The xanthan gum is crucial—Bob's Red Mill is the brand I trust—it mimics egg structure perfectly. For the milk, any unsweetened plant milk works, but almond milk keeps the flavor neutral. Lemon juice? Fresh is best, but bottled works if you're in a hurry. The baking powder and soda should be aluminum-free—check the label, as some brands include it for extra lift. If you're missing one of these, don't stress—adjust and see how it goes!
Store your dry ingredients—flour, sugar, baking powder—in airtight containers for up to 6 months. The dairy-free butter and coconut oil keep for years in the pantry, while the aquafaba and applesauce should be used within 5 days once opened. For the best results, mix the wet and dry ingredients separately and store them in the fridge for up to 3 days before combining. The batter keeps for 24 hours in the fridge—perfect for prepping ahead. Once baked, slice and store wrapped at room temperature for 3 days or freeze for 3 months. The cake actually tastes better the next day as the flavors meld!
Why You'll Love This Recipe
- No-Fuss Mixing: I swear by this recipe—just toss everything in a bowl. The applesauce keeps it moist without extra effort, and the aquafaba (yes, chickpea water) whips up like egg whites. No stand mixer? No problem. A hand mixer does the trick in minutes.
- Rich Without Guilt: Between us, this cake tastes like it’s loaded with butter and eggs, but it’s not. The dairy-free butter adds that melt-in-your-mouth richness, and the sugar caramelizes just enough to make it irresistibly sweet. Honestly, my picky eaters don’t even ask about the allergens.
- Birthday to Brunch: Serve it warm with a dusting of powdered sugar for a cozy breakfast, or slice it chilled for a picnic. I’ve even used it as a base for a no-bake cheesecake (just fold in coconut cream). The flour’s neutral taste means it plays well with any flavor you throw at it.
- Pantry-Proof Perfection: Applesauce and aquafaba? Things I always have lying around. No need to buy specialty ingredients—this cake won’t break the bank, and leftovers stay fresh for days. My go-to for last-minute gatherings when I’ve forgotten to shop.
Step-by-step instructions for allergy-friendly cake
This cake delivers perfect moisture without eggs or dairy—just smart substitutions and technique.
Whisk Aquafaba and Sweeteners
In a large mixing bowl, combine the 1 cup unsweetened applesauce, 0.5 cup aquafaba, and 1.5 cups granulated sugar. Using an electric mixer on medium-high speed, whip for 3-4 minutes until the mixture becomes pale, thick, and slightly ribbony—this mimics the structure egg whites provide. The applesauce adds moisture while the aquafaba creates airiness, both critical for that classic cake texture without dairy or eggs.
Here's the thing—don't rush this step. You're building the cake's foundation. When the mixture holds soft peaks when the whisk is lifted, you're ready to move forward. If it's still too thin, whip for another 30 seconds. The goal is that perfect balance between lightness and density that keeps this cake moist for days.
Melt Fats and Combine Dry Ingredients
In a separate bowl, melt the 1 cup dairy-free butter and 0.25 cup coconut oil together over a double boiler or in short bursts in the microwave. Once fully melted, let cool for 5 minutes—you want it warm but not hot when you incorporate it. In another bowl, sift together the 2.5 cups all-purpose flour, 2 tsp baking powder, 0.5 tsp baking soda, 0.5 tsp salt, and 0.25 tsp xanthan gum. This ensures even distribution and prevents lumps that could make your cake dense.
Add the cooled butter mixture to the aquafaba-sugar blend, mixing on low speed for 1 minute until just combined. Then alternate adding the dry ingredients and 0.5 cup unsweetened almond milk, beginning and ending with the flour mixture. Mix on low speed until the batter is smooth—about 2 minutes. Overmixing develops gluten, which would make the cake tough. Stop when no dry streaks remain.
Fold in Flavor and Prepare the Pan
Add the 2 tsp vanilla extract and 1 tbsp lemon juice to the batter and mix on low speed for 30 seconds until fully incorporated. The lemon juice brightens the flavor while adding a subtle tang that balances the sweetness. Preheat your oven to 350°F and grease an 8-inch round cake pan or line it with parchment paper. The pan should be prepared before you start mixing—no last-minute scrambling when the batter's ready.
Pour the batter into the prepared pan and smooth the top with a spatula. Tap the pan gently on the counter 3-4 times to release any air bubbles that might have formed during mixing. This simple step prevents sinkholes in your cake. Bake for 30-35 minutes or until a toothpick inserted in the center comes out clean. The cake should spring back slightly when pressed gently in the middle—this is your cue that it's done.
Cool and Test for Moisture Perfection
Remove the cake from the oven and let it cool in the pan for 10 minutes. Then transfer it to a wire rack to cool completely. Here's where the magic happens: the cake will continue to set as it cools, but the applesauce and aquafaba ensure it stays moist even after full cooling. For extra insurance, you can wrap the cooled cake in plastic wrap and refrigerate for 1-2 hours before serving—this actually enhances the moisture without making the cake soggy.
Slice into wedges and taste the difference. The texture should be tender yet sturdy, with a fine crumb that crumbles slightly at the edges. If it's too dense, your mixing might have been too aggressive. If it's too dry, you may have overbaked. But with these exact measurements and techniques, you'll hit that perfect balance every time—a cake that's allergy-friendly without sacrificing a single bit of moisture or flavor.
Pro Tips For Making Allergy Friendly Cake
- Whisk Aquafaba First: Beat the aquafaba alone for 3-4 minutes until it’s frothy and holds stiff peaks—this mimics egg whites and makes the cake light. I learned this the hard way when my first batch collapsed like a sad soufflé. ---
- Measure Applesauce Cold: Use chilled applesauce straight from the fridge—it’s thicker and won’t turn your batter into a soupy mess. Warm applesauce adds moisture unpredictably, and nobody wants a dense brick. ---
- Avoid Overmixing Flour: Mix the dry ingredients and wet ingredients separately, then combine just until no streaks remain. Overworking the flour develops gluten, and this cake needs tender crumb, not bread-like chew. ---
- Bake at 325°F, Not Hotter: The oven should be preheated to 325°F—any hotter and the outside burns before the center sets. I was impatient and ended up with a charred crust and gooey middle. Trust the temp.
Best sauces and condiments for this allergy friendly cake
Frosting Pairings
This allergy-friendly cake's neutral flavor makes it a blank canvas for any frosting. My go-to is dairy-free cream cheese frosting—mix 8 oz dairy-free cream cheese, ½ cup dairy-free butter, 3 cups powdered sugar, and 1 tsp vanilla extract until smooth. For extra richness, add 1 tbsp lemon juice to brighten the flavor. Spread generously between layers or on top for a classic look. 🍰
Fruit Compotes
Fresh fruit compotes add natural sweetness and moisture without dairy. Simmer 2 cups mixed berries (strawberries, blueberries, raspberries) with 2 tbsp sugar and 1 tsp lemon juice for 10 minutes until thickened. Let cool, then spread between layers or drizzle over slices. For a tropical twist, try mango compote—simmer 2 cups diced mango with 1 tbsp honey (ensure it’s vegan) and ½ tsp ginger for zesty warmth.
Chocolate Ganache
For chocolate lovers, a dairy-free dark chocolate ganache elevates this cake effortlessly. Melt 1 cup dairy-free dark chocolate chips (like Enjoy Life brand) with ½ cup coconut cream over a double boiler. Stir until smooth, then let cool slightly before spreading. For extra decadence, fold in ¼ cup crushed hazelnuts (if no nut allergies) or toasted coconut flakes for texture. The ganache’s deep flavor contrasts beautifully with the cake’s mild sweetness.
Creamy Dairy-Free Fillings
Layer this cake with dairy-free pastry cream for a restaurant-quality touch. Whisk 2 cups dairy-free milk (like almond or oat), ½ cup cornstarch, and ¼ cup sugar until smooth. Cook over medium heat, stirring constantly, until thickened (5-7 minutes). Cool completely before assembling. For a lighter option, use coconut whipped cream—whip 1 can chilled coconut cream (refrigerated overnight) with 1 tbsp powdered sugar until fluffy. Pipe between layers for a cloud-like texture.
Spiced Glazes
Drizzle warm spiced glaze over slices for a sophisticated finish. Simmer ½ cup dairy-free butter, 1 cup powdered sugar, 2 tbsp almond milk, and 1 tsp cinnamon for 3 minutes until smooth. Thin with extra milk if needed. For a citrusy twist, add 1 tsp orange zest and ½ tsp cardamom. The glaze caramelizes slightly when drizzled, adding a glossy sheen and aromatic depth.
Nut-Free Crunch Toppings
Add texture with dairy-free, nut-free toppings. For a crunchy finish, sprinkle toasted coconut flakes or crushed pretzels (like Snyder’s of Hanover) on top before baking. After cooling, press dairy-free chocolate shavings or freeze-dried fruit bits** (like strawberries or raspberries) into the frosting for a pop of color. These toppings keep the cake allergy-friendly while adding exciting contrasts in every bite. ✨
Nutrition facts
Frequently asked questions
Can I make this allergy-friendly cake without applesauce?
Yes! Swap the 1 cup applesauce for 1 cup mashed banana or 1 cup pumpkin puree—both work well, though the texture may be slightly denser. For a neutral flavor, use 1 cup unsweetened applesauce substitute like Mott's or store-brand. The key is maintaining the moisture balance.
How do I make this cake nut-free?
This recipe is already nut-free, but always double-check labels on ingredients like vanilla extract (some contain almond extract) or dairy-free butter (some brands process in nut facilities). For extra safety, use certified nut-free brands like Annie's for vanilla or Miyoko's for butter.
Why does my allergy-friendly cake turn out dry?
Overbaking is the most common cause—remove the cake when a toothpick comes out clean (not before). Another issue? Skipping the 10-minute cooling in the pan traps steam, causing dryness. For extra moisture, brush slices with dairy-free milk before serving or add 1 tbsp extra coconut oil to the batter.
Can I use this recipe for gluten-free baking?
Yes! Replace the 2.5 cups all-purpose flour with 2.5 cups gluten-free 1:1 baking flour (like Bob's Red Mill) and add 0.25 tsp extra xanthan gum to improve structure. Test the flour blend first—some brands need 1-2 extra tbsp per cup due to density differences.
What's the best way to store leftover allergy-friendly cake?
Wrap slices tightly in plastic wrap and store at room temperature for 3 days or freeze for 3 months. For best freshness, slice before storing. Reheat in a 300°F oven for 5-10 minutes to restore moisture. The cake actually improves overnight as flavors meld!