
Desserts
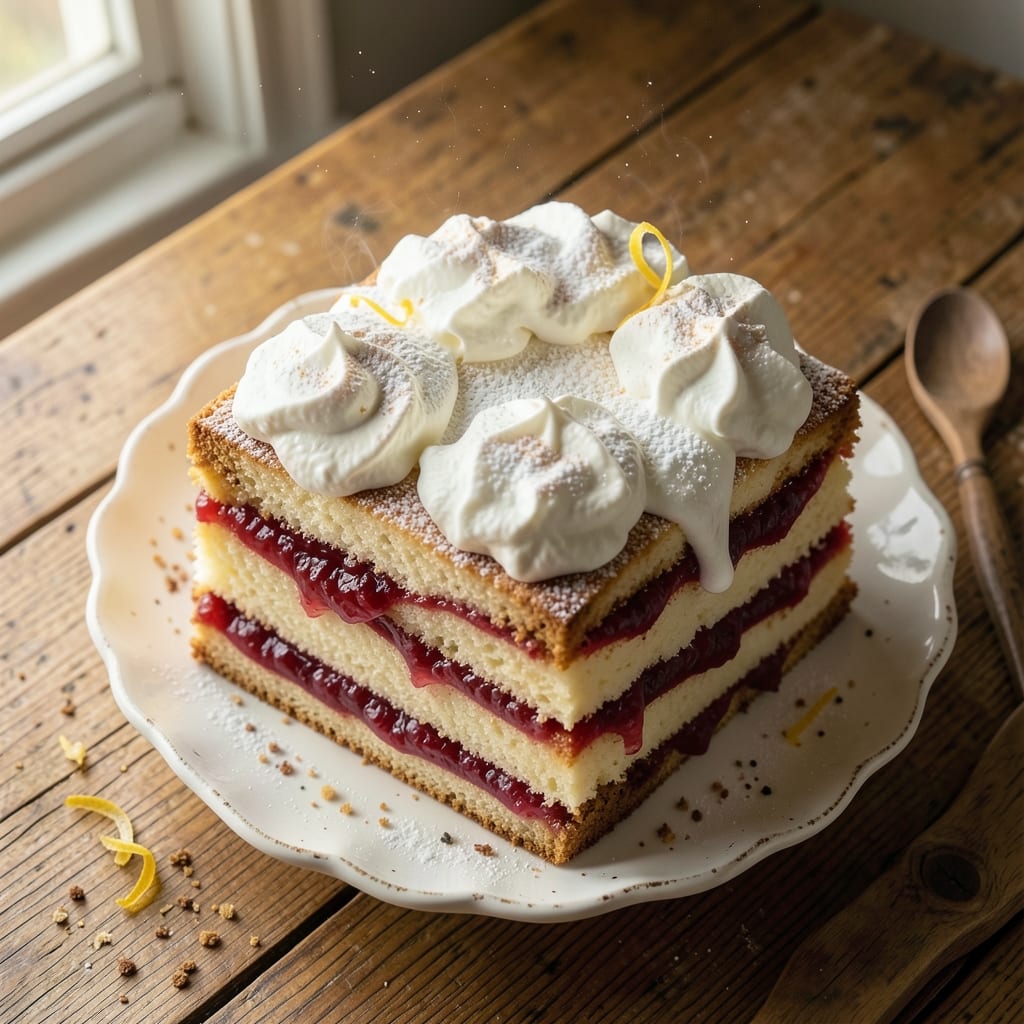
This 1920s icebox cake recipe brings back the charm of Depression-era desserts with layers of sponge cake, jam filling, and whipped cream—no icebox required. The original method relied on chilling in a cool pantry, but modern fridges speed up the process without sacrificing that vintage texture. I’ve recreated it using simple ingredients and techniques that were staples in 1920s kitchens, like canned fruit preserves and homemade whipped cream.
The beauty of this no-bake dessert lies in its simplicity and versatility. Thin layers of sponge cake (or pound cake) are stacked with jam or custard filling, then topped with whipped cream and decorative nuts or fruit. The chilling time—originally overnight—can be shortened to just a few hours in today’s refrigerators, making it perfect for last-minute gatherings or nostalgic treats. It’s a dessert that feels both elegant and effortless, just like the 1920s intended.
What makes this recipe special is its adaptability. While traditional versions used butter-heavy cakes and heavy cream, modern twists allow for lighter sponge cakes or dairy-free whipped cream. The result is still the same: a creamy, layered masterpiece that’s as satisfying today as it was nearly a century ago. The secret to success? Patience in layering and a steady hand for even slices—worth the effort for a dessert that tastes like stepping back in time.
Serve this cake chilled for the best texture, and don’t forget the garnish—whether it’s toasted nuts, fresh berries, or a dusting of powdered sugar. It’s the kind of dessert that feels like a hug, perfect for holidays, potlucks, or just because. Let’s bring a piece of 1920s history to your table with this timeless recipe.
Ingredients for 1920s icebox cake
Twelve simple ingredients bring back 1920s charm with creamy layers and nostalgic flavors.
| Ingredient | Amount | Notes |
|---|---|---|
| Sponge Cake Layers 🍰 | 2 whole | Store-bought or homemade, 8x8-inch size |
| Strawberry Jam 🍓 | 1 ½ cups | High-quality canned or homemade preserves |
| Heavy Whipping Cream 🥛 | 2 cups | Cold, full-fat for best whipping |
| Granulated Sugar 🍚 | ½ cup | For sweetening whipped cream |
| Vanilla Extract 🌿 | 1 tbsp | Pure, high-quality vanilla |
| Powdered Sugar 🍬 | 2 tbsp | For dusting layers |
| Toasted Sliced Almonds 🌰 | ½ cup | For garnish, lightly toasted |
| Unsalted Butter 🧈 | ¼ cup | Softened, for binding layers (optional) |
| Lemon Juice 🍋 | 1 tsp | Fresh, for brightening filling |
| Ground Cinnamon 🌶️ | ½ tsp | For dusting between layers |
| Milk 🥛 | ¼ cup | For adjusting cream consistency |
| Whipped Cream Stabilizer 🧂 | ½ tsp | Optional, like powdered sugar |
The cake layers are the foundation—store-bought works perfectly, but homemade sponge cake adds that vintage touch. Betty Crocker's classic yellow cake or Pillsbury's pound cake are my go-to for convenience, but if you're feeling ambitious, a simple butter cake with a hint of vanilla makes all the difference. For the jam, Welch's or Bonne Maman are reliable, but homemade preserves elevate the whole dish. The whipped cream needs to be cold, so chill the bowl and beaters for 15 minutes before whipping—trust me, it makes a world of difference. Toast the almonds in a dry pan for just 2 minutes until golden; they should smell amazing and not burn.
No strawberry jam? Raspberry or apricot preserves work beautifully—just adjust the sweetness with a pinch of sugar if needed. Running short on almonds? Pecans or walnuts add a different but equally delicious crunch. The butter between layers is optional, but it helps bind everything together like the original recipe intended. If you're avoiding dairy, vegan whipped cream (like So Delicious brand) works surprisingly well. The lemon juice in the filling brightens up the flavors, so if you're using a very sweet jam, you might want to reduce it to half a teaspoon. And if your cream isn't holding its shape? Add a tiny bit of powdered sugar or 1 teaspoon of cornstarch as a stabilizer.
This cake tastes even better the next day, so make it ahead if you can—it keeps for 3-4 days in the fridge, covered tightly. For freezing, assemble the cake without the whipped cream, wrap it in plastic, and freeze for up to 2 months. Just add the whipped cream and garnish when you're ready to serve. The whipped cream can be made 2 days ahead if you store it in an airtight container with a thin layer of plastic wrap pressed directly on the surface. When you're ready to serve, give it a quick whip to fluff it up again. And remember, the longer it chills, the more those flavors meld together—just like in the 1920s!
Why You'll Love This Recipe
- No-Fuss Layers: I’ll be real—this cake is basically assembled, not baked. Just slice store-bought sponge cake, slap on that jam, and fold in whipped cream. No mixing bowls, no waiting for layers to set—just stack, chill, and enjoy. (Yes, even on a Tuesday night.)
- Jam-Soaked Magic: That strawberry jam isn’t just filling—it’s the star. The sponge absorbs it overnight, turning every bite into a burst of sweet-tart flavor. Honestly, the first time I tried it, I nearly licked the plate clean.
- Party-Proof Any Day: Need dessert for a picnic? A last-minute birthday? This cake holds up like a champ. Wrap it in parchment, toss it in a cooler, and it’ll still taste fresh hours later. (My book club’s secret weapon.)
- Budget-Friendly Luxury: Here’s what sold me—it’s way cheaper than boxed cake mixes or bakery slices, but no one guesses. The whipped cream adds richness without breaking the bank, and you can use whatever jam you have. Leftovers? They disappear faster than you can say “icebox.”
Step-by-step instructions for 1920s icebox cake assembly
This classic dessert comes together beautifully with just a few simple layers and patience.
Prepare the Strawberry Filling
In a medium bowl, combine the 1.5 cups strawberry jam with the 1 tsp lemon juice. Stir until smooth and fully blended. This brightens the flavor and balances the natural sweetness of the jam. If the jam is particularly thick, you can gently warm it in a small saucepan over low heat for 1-2 minutes, stirring constantly, until it reaches a spreadable consistency. Let it cool completely before using—this ensures clean layers without soggy cake.
Here's the thing—this filling is what makes the cake truly nostalgic. The tangy lemon cuts through the richness of the jam, creating that perfect balance that 1920s home cooks perfected. If you're using homemade jam, taste it first—you might want to add a pinch of ground cinnamon (about ¼ teaspoon) to deepen the flavor and tie into the traditional spice notes of the era.
Layer and Assemble the Cake
Place one of the sponge cake layers on a flat serving plate or cake stand. Spread half of the strawberry filling evenly over the cake layer, leaving about ¼ inch border around the edges. This prevents the filling from oozing out when you cut slices later. Use a small offset spatula to smooth the filling—you want an even layer that's about ⅛ inch thick.
Dust the top of the filling with 1 tablespoon of powdered sugar—this creates a barrier that keeps the next layer from getting soggy. Place the second sponge cake layer on top and gently press down to adhere. Here's where the magic happens: the powdered sugar acts like a little insurance policy against a messy cake. If you're using the ¼ cup softened unsalted butter, spread a thin layer over the top cake before adding the final whipped cream topping—this adds richness and helps bind everything together.
Create the Whipped Cream Topping
In a large mixing bowl, combine the 2 cups heavy whipping cream, ½ cup granulated sugar, 1 tablespoon vanilla extract, and ½ teaspoon whipped cream stabilizer. Using a hand mixer or stand mixer fitted with the whisk attachment, beat on high speed for 3-4 minutes until soft peaks form. The mixture should look thick and glossy, with peaks that hold their shape when the whisk is lifted. This is your cue that the cream is ready—if it's still too runny, chill the bowl in the refrigerator for 5 minutes and beat again.
For that authentic 1920s touch, fold in ½ cup toasted sliced almonds just before serving. The nuts add a delightful crunch that contrasts perfectly with the soft cake and cream. If you want to take it one step further, sprinkle the remaining 1 tablespoon powdered sugar over the top before adding the almonds—this gives the cake that classic "snow-dusted" look that was all the rage in the 1920s.
Chill and Set
Spread the whipped cream evenly over the top of the cake, creating a smooth, even layer. If you're feeling fancy, you can pipe the cream into swirls or rosettes using a pastry bag fitted with a star tip—this adds a decorative touch that would've been very much in style during the Roaring Twenties. Cover the cake with plastic wrap and refrigerate for at least 4 hours, or ideally overnight. This chilling time is what transforms the cake from a simple assembly into a true icebox cake—creamy, cool, and perfectly set.
I know it's tempting to dive in right away, but trust me on this one. The longer it chills, the better the texture becomes. The cake layers will soften slightly, the whipped cream will firm up just enough to hold its shape, and the flavors will meld together beautifully. When you're ready to serve, let the cake sit at room temperature for 10-15 minutes before slicing—this makes for cleaner cuts and prevents the whipped cream from sliding off your plate.
Pro Tips For Making 1920s Icebox Cake
- Chill the Layers Properly: Don’t just slap those sponge layers in the fridge—wrap them tightly in plastic wrap first, then refrigerate for at least 4 hours (overnight is ideal). I learned this the hard way when my cake absorbed moisture and turned soggy because the layers weren’t fully set. Cold, dry layers hold their shape when you stack them.
- Use Room-Temp Cream: Heavy whipping cream whips up smoother and stiffer when it’s 60°F or warmer—take it out of the fridge 30 minutes before whipping. Cold cream? You’ll end up with butter. Trust me, this makes a real difference in how your frosting holds up between layers.
- Spread Jam Thinly: Slather that strawberry jam like you’re frosting a cookie—not like you’re filling a sandwich. Too much jam = a mushy middle. Aim for a thin, even layer (about ¼ inch thick), or your cake will collapse under the weight of the cream.
- Sweeten the Cream Right: Mix the sugar into the cream before whipping—it dissolves better and gives you a smoother, more stable frosting. I used to add it after, and the sugar would clump, leaving a grainy texture. Also, skip the vanilla if your jam’s already flavored—double vanilla turns this dessert into a dessert-overload.
Best sauces and condiments for this recipe
Classic Strawberry Jam
The star of this icebox cake is the strawberry jam filling, which brings that authentic 1920s sweetness. I recommend using Welch's Grape Jelly as a backup if strawberry isn't available—it was a common pantry staple during the era. For extra brightness, mix 1 teaspoon lemon juice into the jam before spreading. If your jam is thick, warm it gently in a saucepan with 1 tablespoon water until spreadable, then cool completely. This prevents soggy layers and ensures clean slices. 🍓
Creamy Vanilla Whipped Cream
The whipped cream topping is where the magic happens—it should be light, fluffy, and perfectly sweet. Beat 2 cups heavy whipping cream with ½ cup granulated sugar and 1 tablespoon vanilla extract until soft peaks form. For stability, add ½ teaspoon powdered sugar or 1 teaspoon cornstarch if needed. Chill the bowl and beaters for 15 minutes before whipping to get the best texture. Fold in ½ cup toasted sliced almonds just before serving for that classic crunch. 🥛
Butter Binding Layer
For an extra-rich, old-school touch, spread a thin layer of softened unsalted butter (about ¼ cup) between the cake layers. This was a common technique in 1920s recipes to keep the cake moist and add richness. If you're avoiding dairy, vegan butter works surprisingly well. The butter helps bind the layers together, preventing the filling from oozing out when sliced. It’s optional but totally worth it for that authentic texture. 🧈
Powdered Sugar Dusting
Dusting each layer with powdered sugar (about 1 tablespoon per layer) creates a barrier that keeps the cake from getting soggy. This was a clever trick in vintage recipes to maintain structure. Sprinkle it lightly over the jam filling before adding the next cake layer, and again over the whipped cream topping for that classic "snow-dusted" look. For extra flair, mix in ½ teaspoon ground cinnamon with the powdered sugar—it adds warmth and ties into 1920s spice trends. ✨
Modern Twists on Classics
Want to put a contemporary spin on this dessert? Swap the strawberry jam for raspberry or apricot preserves for a fruity twist. Use coconut whipped cream (like So Delicious brand) for a dairy-free option, or add white chocolate shavings for a modern touch. If you're feeling adventurous, replace the almonds with pecans or walnuts for a different crunch. These adaptations keep the recipe nostalgic while making it accessible for today’s tastes. 🌟
Nutrition facts
Frequently asked questions
Why is it called an "icebox cake"?
This cake earned its name because it was traditionally stored in an icebox (an early refrigerator) to chill and set properly. Before modern fridges, households used iceboxes filled with blocks of ice to keep food cool. The cake's layers needed this chilling time to develop its signature creamy texture and clean slices.
Can I make this cake without an icebox?
Modern refrigerators work perfectly—just chill the cake for 4-6 hours instead of overnight. The key is patience: longer chilling (up to 24 hours) gives the best texture, but even 2 hours will work in a pinch. The cake will still taste delicious!
What if my whipped cream doesn't hold its shape?
This happens when the cream isn't cold enough or has too much sugar. Chill your bowl and beaters for 15 minutes before whipping, and use powdered sugar (not granulated) as a stabilizer. If it's still too runny, add ½ teaspoon cornstarch or fold in 1 tablespoon whipped cream stabilizer.
Can I use store-bought cake layers?
Yes! Store-bought pound cake or yellow cake works perfectly—just slice it into ½-inch thick layers for even distribution. For extra authenticity, look for vintage-style cakes with a slightly denser texture. Avoid overly moist cakes that might make the layers soggy.
How do I prevent the filling from leaking?
Leave a ¼-inch border around the edges when spreading the jam, and dust each layer with powdered sugar before adding the next. The butter layer (optional) also helps bind everything together. If you're in a hurry, use apricot jam—it's thicker and less likely to ooze.