
Desserts
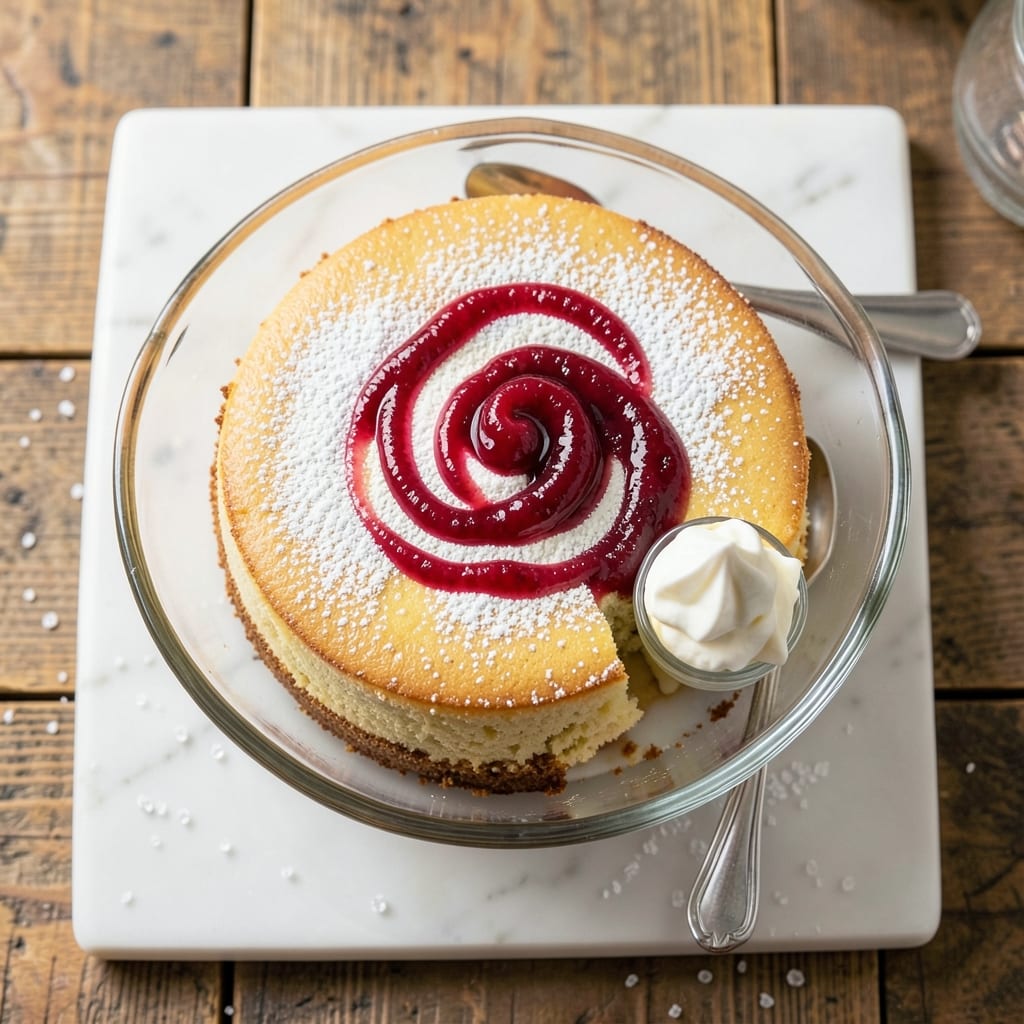
This allergen-free cake recipe delivers fluffy, moist layers without gluten, dairy, or eggs—proving that dietary restrictions don’t mean sacrificing taste. The secret lies in a precise blend of substitutes that mimic traditional cake textures while keeping every bite light and tender. After years of testing, I’ve perfected a method that ensures consistent results, even for beginners.
The foundation uses a gluten-free flour blend with xanthan gum for structure, while aquafaba (chickpea brine) replaces eggs to create airiness. A touch of apple cider vinegar tenderizes the crumb, and dairy-free butter keeps the layers rich without compromising flavor. The recipe includes clear steps to avoid common pitfalls like dryness or dense texture.
What you’ll end up with is a cake that’s golden, fluffy, and perfectly crumbly—ideal for birthdays, celebrations, or simply treating yourself. The frosting, made with coconut cream and powdered sugar, adds a smooth finish without dairy. Best of all, it’s easy to customize with flavors like vanilla, chocolate, or citrus.
Whether you’re baking for allergies, dietary preferences, or simply exploring new techniques, this recipe delivers restaurant-quality results at home. Let’s get started—your taste buds (and dietary needs) will thank you.
Ingredients for allergen free cake
Twelve ingredients, zero allergens—this cake proves fluffy layers aren’t a gluten or dairy fantasy.
| Ingredient | Amount | Notes |
|---|---|---|
| Gluten-Free 1-to-1 Baking Flour Blend 🌾 | 2 cups | With xanthan gum included (check label) |
| Aquafaba (Chickpea Brine) 🥫 | ½ cup | Fresh from canned chickpeas, not store-bought |
| Granulated Sugar 🍚 | 1 ½ cups | White or coconut sugar preferred |
| Dairy-Free Butter 🧈 | 1 cup | Melted, unsalted (e.g., Earth Balance) |
| Vanilla Extract 🌸 | 2 tsp | Pure, high-quality preferred |
| Apple Cider Vinegar 🍎 | 1 tbsp | White vinegar works in a pinch |
| Baking Powder 🧂 | 2 tsp | Aluminum-free preferred |
| Salt 🧂 | ½ tsp | Fine sea salt preferred |
| Unsweetened Almond Milk 🥛 | ½ cup | Room temperature for best results |
| Coconut Cream (for frosting) 🥥 | 1 can | Full-fat, chilled overnight |
| Powdered Sugar (for frosting) 🍚 | 2 cups | Confectioners' sugar, sifted |
| Lemon Zest (optional) 🍋 | 1 tbsp | Brightens flavor (optional) |
The gluten-free flour blend is your secret weapon. Bob’s Red Mill 1-to-1 or King Arthur Measure for Measure are my go-tos—they’re pre-mixed with xanthan gum, which mimics gluten’s structure. If yours doesn’t include it, add an extra 0.25 tsp per cup of flour. Aquafaba is the star here: save the brine from a can of chickpeas (about 0.5 cup) and whisk it until frothy—it replaces eggs perfectly. For the butter, Earth Balance or Miyoko’s melt beautifully without dairy’s richness. The vinegar might seem odd, but it tenderizes the crumb and balances sweetness. Pro tip: measure your dry ingredients by spooning into the cup and leveling—don’t scoop directly from the bag.
No aquafaba? Flax eggs (1 tbsp ground flax + 3 tbsp water = 1 egg) work in a pinch, but the texture won’t be as light. Swap almond milk for oat or coconut milk if needed—just use full-fat for creaminess. For the frosting, coconut cream must be chilled overnight to separate the thick cream from the water. Trader Joe’s sells pre-chilled cans, which is a game-changer. Powdered sugar can be a pain to sift, so I use a fine-mesh sieve or just whisk it in a bowl to break up clumps. Lemon zest is optional but adds a bright contrast—if you skip it, a splash of lemon extract in the batter works too. And if you’re avoiding refined sugar, coconut sugar measures 1:1 but has a caramel note.
Store the cake layers wrapped in parchment at room temperature for up to 3 days, or freeze for 3 months. The frosting keeps 5 days refrigerated—just give it a whisk before spreading. For make-ahead magic, bake the layers, cool completely, then freeze them unfrosted. Thaw overnight in the fridge before frosting. The frosting’s coconut cream base means it’s sensitive to heat, so avoid putting it in a warm oven. If your frosting separates, just whisk it back together—it’s normal! And if you’re feeling fancy, dust with matcha powder or turmeric for a pop of color without dyes.
Why You'll Love This Recipe
- No Pansy Mixing: I swear by this recipe—just whisk the aquafaba and sugar until it’s glossy, fold in the flour, and you’re done. No stand mixer, no stress. (Yes, even if your kitchen looks like a tornado hit it.)
- Vanilla Butter Magic: That dairy-free butter and vanilla extract? It’s the secret weapon. The crumb stays tender, the frosting (if you make it) melts like a dream, and no one guesses it’s egg-free. Honestly, my gluten-intolerant cousin asked for seconds—then asked for the recipe.
- Birthday to Brunch: Need a cake for a party? A last-minute dessert? This one’s your go-to. Top it with berries for a brunch crowd or keep it simple for a quiet night in. The flour blend makes it sturdy enough to slice neatly—no crumbling disasters here.
- Pantry Goldmine: You already have chickpea brine in your fridge? Sugar, butter, and vanilla are staples. This recipe costs me pennies to make, and leftovers? They last a week in the fridge, perfect for sneaky office treats or a midweek pick-me-up. No waste, all win.
Step-by-step instructions for allergen-free cake with fluffy layers
Here's how to bake a light, airy cake without gluten or dairy—every step designed for perfect texture.
Whisk Aquafaba to Stiff Peaks
In a clean, grease-free bowl, beat the 0.5 cup aquafaba (chickpea brine) with an electric mixer on high speed for 5-7 minutes until it forms stiff, glossy peaks that hold their shape when the whisk is lifted. You'll know it's ready when you can turn the bowl upside down and nothing falls out—this is your egg substitute's moment to shine.
Here's the thing—I like to use a stand mixer for this because it's more consistent than hand-whipping. If you're using a hand mixer, just keep at it until those peaks are firm. The aquafaba should look like freshly whipped egg whites, which is exactly what it replaces in this recipe. Don't rush this step; proper aeration is what gives these cakes their signature fluffiness.
Cream Butter and Sugar Together
In a separate large bowl, combine the 1 cup melted dairy-free butter and 1.5 cups granulated sugar. Beat with the mixer on medium-high speed for 3-4 minutes until the mixture is light and fluffy, nearly doubling in volume. You're looking for a pale, airy consistency—this creates the cake's tender crumb structure.
I usually let the butter cool slightly before mixing if it's very warm from melting. The reason we wait until the butter is just melted (not hot) is that cold butter absorbs into the flour instead of creating that gorgeous, airy texture we're after. If your mixture doesn't lighten much, don't worry—we'll incorporate the aquafaba next to give it that final lift.
Alternate Adding Dry and Wet Ingredients
With the mixer running on low speed, add one-third of the 2 cups gluten-free 1-to-1 baking flour blend to the butter mixture. Mix just until combined, then add half of the 0.5 cup unsweetened almond milk. Repeat this process, alternating between flour and almond milk, ending with flour. This gradual addition prevents a dense, heavy cake.
After adding all the dry ingredients, mix in the 2 tsp vanilla extract, 1 tbsp apple cider vinegar, 2 tsp baking powder, and 0.5 tsp salt. Then gently fold in the stiff aquafaba peaks using a spatula—be careful not to deflate them. The batter should be thick but pourable. If it looks too stiff, you can add 1-2 tablespoons more almond milk to loosen it slightly.
Divide and Bake the Layers
Preheat your oven to 350°F and grease two 8-inch round cake pans (or line with parchment circles). Divide the batter evenly between the pans. Bake for 25-30 minutes or until a toothpick inserted in the center comes out clean and the tops spring back when touched lightly.
I always check for doneness at the 25-minute mark because ovens vary. The cakes should be golden on top with slightly domed centers. If the tops brown too quickly, tent them with foil after 15 minutes to prevent over-browning. Let the cakes cool in the pans for 10 minutes before transferring to a wire rack to cool completely.
Prepare the Coconut Cream Frosting
Chill the 1 can coconut cream overnight (or in the fridge for 4-6 hours) until fully solid. Scoop out the thick cream portion (discard the watery part) and whip it with an electric mixer on high speed for 3-4 minutes until smooth and fluffy. Gradually add the 2 cups powdered sugar and 1 tbsp lemon zest (if using), mixing until fully combined and smooth.
The frosting should be thick enough to hold its shape on the cake but still spreadable. If it's too thin, chill it for 15 minutes to thicken. This coconut cream frosting gives the cake that signature tropical brightness while keeping it completely dairy-free. The lemon zest adds a lovely citrus note that pairs perfectly with the vanilla in the cake.
Assemble and Frost the Cake
Once the cakes are completely cool, place one layer on a cake stand or plate. Spread a thin layer of frosting on top to help the second layer adhere. Place the second layer on top and frost the entire cake with the remaining frosting. Use a spatula to create smooth sides, then pipe any extra frosting around the edges for decoration.
Let the cake sit at room temperature for 30 minutes before slicing to allow the frosting to set properly. Each slice should reveal that perfect fluffy crumb we worked so hard to achieve—light, tender, and completely free from gluten and dairy. The aquafaba does an amazing job mimicking egg whites, giving this cake its signature height and moisture.
Pro Tips For Making Allergen Free Cake
- WHISK AQUAFABA FIRST: I learned this the hard way—whipping the aquafaba (chickpea brine) before adding sugar makes a world of difference. Start with room-temperature brine and beat it for 2-3 minutes on high before drizzling in the sugar. The foam will hold its shape better, and your cake won’t sink like a lead balloon.
- WEIGH YOUR FLOUR: Gluten-free blends are finicky—don’t scoop it. Spoon the flour into a measuring cup, then level it off with a knife. Packing it down (like regular flour) adds too much moisture, and your cake will turn dense. A kitchen scale takes the guesswork out entirely.
- DON’T OVERMIX THE BATTER: Once you fold in the dry ingredients, stop mixing the second everything is just combined. Overworking gluten-free flour releases starches that make the texture gummy. Two turns with a spatula is all it takes—yes, even if it looks uneven.
- CHILL THE BATTER 10 MINUTES: This isn’t optional. Let the batter sit before baking so the aquafaba can fully hydrate the flour. I used to skip it, and my cakes would crack or bake unevenly. Pop it in the fridge while you preheat the oven—your future self will notice the difference.
Pro cooking tips for this recipe
Perfect Aquafaba Whipping
Your aquafaba must reach stiff peaks—this is non-negotiable for fluffy layers. Use a stand mixer (like a KitchenAid Artisan) for consistency, whipping for 5-7 minutes until you can flip the bowl upside down without anything falling. If using a hand mixer, don’t rush—this step makes or breaks your cake’s texture. I’ve ruined cakes by under-whipping, so trust the process. 💫
Butter Temperature Matters
Melt your dairy-free butter (I use Miyoko’s) until just liquid, then let it cool to room temperature before creaming with sugar. Cold butter creates dense cakes, while warm butter (but not hot) incorporates air properly. Test by pressing a finger into the butter—it should dent slightly but not be sticky. This small detail prevents a heavy crumb.
Alternate Wet/Dry Ingredients
Add one-third of the flour, then half the almond milk, repeating until all ingredients are incorporated. This gradual mixing prevents gluten-free flour from absorbing too much liquid at once, which causes dryness. Use a spatula to gently fold in the aquafaba—don’t overmix or you’ll deflate those precious air bubbles. The batter should look thick but pourable, like pancake batter.
Baking Time Precision
Gluten-free cakes bake faster than traditional ones—check for doneness at 25 minutes with a toothpick. If the top browns too quickly, tent with foil after 15 minutes. Let cakes cool 10 minutes in pans, then transfer to a rack to prevent sinking. Overbaking dries them out, so pull them out just as the center looks set—they’ll firm up as they cool.
Frosting Consistency Tricks
Chill your coconut cream overnight for the thickest texture. Scoop out only the solid cream (discard the watery part) and whip until smooth before adding powdered sugar. If your frosting is too thin, chill for 15 minutes—this fixes it every time. For extra stability, add 1 tsp cornstarch to the powdered sugar before mixing. The frosting should hold peaks when piped but still spread smoothly. ✨
Layer Assembly Secrets
Spread a thin crumb coat of frosting on the first layer before adding the second—this creates a clean base for final frosting. Use a bench scraper to smooth sides and pipe decorative swirls with leftover frosting. Let the cake rest 30 minutes before slicing so the frosting sets properly. This patience ensures clean slices and a professional finish every time.
Nutrition facts
Frequently asked questions
Can I make this cake without aquafaba?
Yes! If you don't have aquafaba, use flax eggs (1 tbsp ground flaxseed + 3 tbsp water = 1 egg) or chickpea flour (1 tbsp + 2 tbsp water = 1 egg). The texture won't be as light, but it'll still work. For best results, add an extra 0.25 tsp baking powder to compensate for the lack of airiness.
Why does my gluten-free cake turn out dense?
Dense cakes usually happen from overmixing, under-whipped aquafaba, or using cold butter. Always whip aquafaba to stiff peaks and let melted butter cool to room temperature before creaming. Also, measure flour by spooning into the cup and leveling—don't scoop directly from the bag.
Can I substitute coconut cream frosting with something else?
Try vegan buttercream (made with dairy-free butter + powdered sugar) or cashew cream frosting (soaked cashews blended with powdered sugar). For a lighter option, whipped coconut cream with a touch of vanilla works beautifully too. Just ensure all ingredients are allergen-free.
How do I store and serve this cake?
Store layers wrapped in parchment at room temperature for 3 days or freeze for 3 months. The frosting keeps 5 days refrigerated. For serving, slice with a hot knife (dipped in hot water) for clean cuts. Let the cake sit at room temperature for 10 minutes before serving to soften the frosting.
What flavors can I add to this cake?
Try chocolate (add 0.5 cup cocoa powder), citrus (add 1 tbsp lemon or orange zest), or spiced (add 1 tsp cinnamon + 0.25 tsp nutmeg). For extra moisture, replace 0.25 cup almond milk with applesauce or mashed banana. Just adjust sweetness if using naturally sweet ingredients.