
Desserts
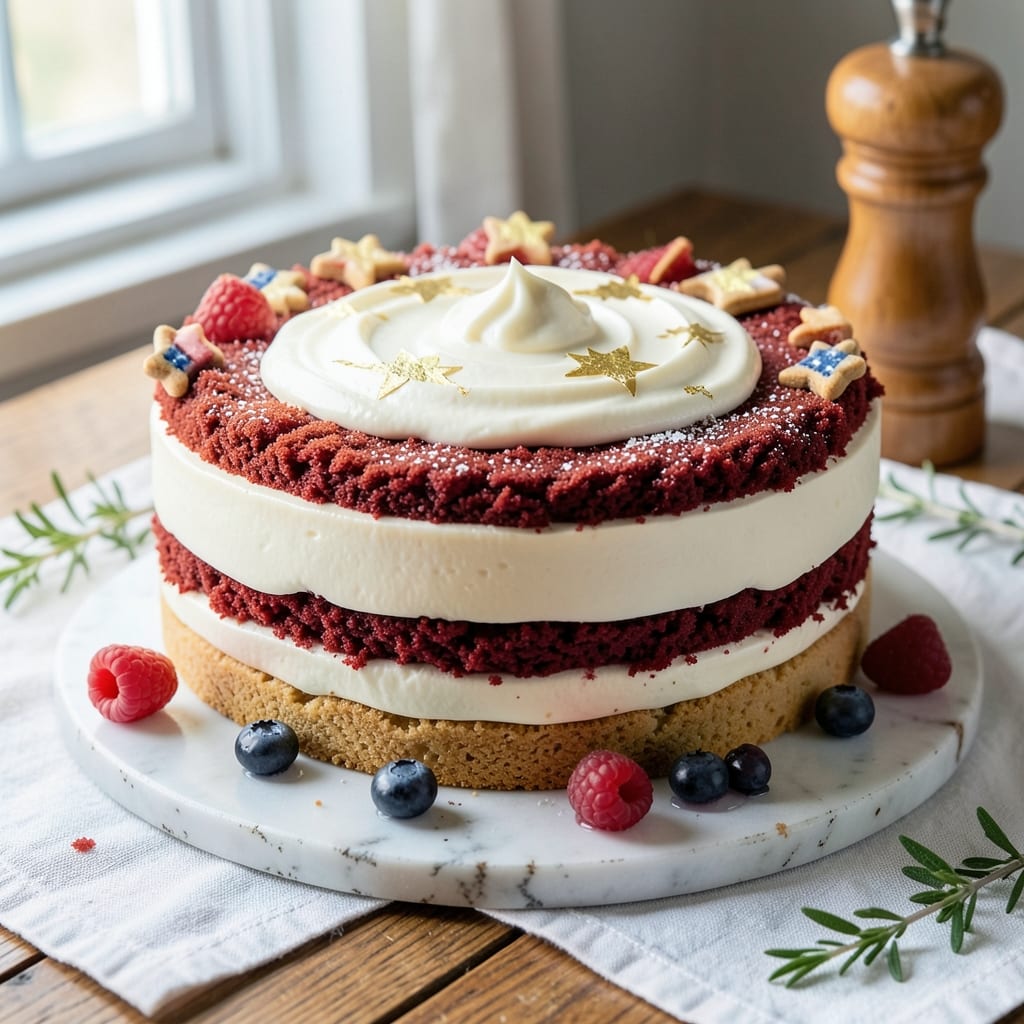
This 4th of July cookie cake recipe delivers the perfect balance of crispy edges and soft centers, topped with star-spangled frosting that screams patriotic celebration. 🌟 The secret lies in a buttery cookie base that bakes to golden perfection while staying tender inside, creating the ideal canvas for vibrant red, white, and blue decorations. This isn't just dessert—it's the centerpiece of your holiday spread, designed to impress guests while being simple enough for any home baker to master.
The magic begins with a foolproof cookie dough that spreads just enough to create those coveted crispy edges, while the interior remains soft and chewy. Once cooled, you'll spread a smooth vanilla buttercream frosting that doubles as your blank canvas for festive decorations. The contrast between the crispy top and creamy frosting is what makes this cookie cake truly special—it's the kind of texture combination that keeps everyone reaching for seconds.
What sets this recipe apart is how easily it transforms into a showstopper with minimal effort. A few red and blue food coloring drops, some star-shaped sprinkles, and a little patience for cooling ensure your cake looks as patriotic as it tastes. The frosting stays perfectly smooth, making it ideal for piping borders or writing "Happy 4th" in bold letters. This is the dessert that turns a backyard BBQ into a full-blown celebration.
Perfect for feeding a crowd or serving as a festive centerpiece, this cookie cake requires just 30 minutes of active prep time followed by baking and cooling. The best part? It stays fresh for up to 3 days, so you can enjoy the leftovers without the stress. Let's get baking—your holiday table deserves this star-spangled showstopper.
Ingredients for 4th of july cookie cake
These ingredients create a showstopping 4th of July cookie cake with crispy edges and patriotic flair.
| Ingredient | Amount | Notes |
|---|---|---|
| All-Purpose Flour 🌾 | 3 cups | Sifted for light texture |
| Unsalted Butter 🧈 | 1 cup | Cold, cubed for best results |
| Granulated Sugar 🍚 | 1 ½ cups | White or light brown |
| Large Eggs 🥚 | 2 whole | Room temperature |
| Vanilla Extract 🌿 | 1 tbsp | Pure, high-quality extract |
| Baking Soda 🧂 | ½ tsp | For crispy edges |
| Salt 🧂 | ½ tsp | Fine sea salt |
| Vanilla Buttercream Frosting 🍰 | 3 cups | Smooth, room temperature |
| Red Food Coloring 🎨 | 1 tsp | Gel-based for vibrant color |
| Blue Food Coloring 🎨 | 1 tsp | Gel-based for vibrant color |
| Star-Shaped Sprinkles ⭐ | ½ cup | Patriotic colors |
| Parchment Paper 📄 | 1 sheet | For easy release |
The butter is non-negotiable here—use high-quality unsalted and keep it cold for those perfect crispy edges. King Arthur or Gold Medal flour bakes up lighter, but any all-purpose will work. For the sugar, I always grab Domino brand—it dissolves smoothly and gives that perfect golden crust. Eggs should be room temperature, so take them out of the fridge 30 minutes before baking. The vanilla extract? Nothing but pure—skip the imitation stuff. You'll notice the difference in flavor right away.
No vanilla buttercream on hand? Mix 1 cup softened butter with 3 cups powdered sugar and 2 tbsp milk for a quick substitute. Want to skip the food coloring? Use natural options like beet powder for red and blue spirulina, though they're harder to find. The sprinkles can be any festive shape—Trader Joe's has great patriotic options if you want to save time. For the cookie dough, don't overmix—just until combined. That's what keeps it tender inside while crisping up perfectly.
This cake needs 24 hours to set properly before decorating, so plan ahead. Store leftovers in an airtight container with parchment between layers for 3 days. The frosting stays fresh for 5 days if kept refrigerated. I always make a double batch of dough—one for the cake, one for extra cookies. The sprinkles? Keep them in a sealed container to prevent them from drying out or losing their vibrancy.
Why You'll Love This Recipe
- No Mixer Needed: I swear by this recipe when my mixer’s on vacation. Cream the butter and sugar by hand—it’s just a few minutes of elbow grease, and the result is that perfect, cloud-like texture you’d expect from a stand mixer.
- Red, White & Creamy: That vanilla extract? It’s the secret weapon here. The dough’s got just enough sweetness to balance the classic cookie flavor, and when you add a red velvet swirl or white chocolate drizzle, it’s like a mini fireworks show in every bite.
- Party in a Pan: Between us, this is my go-to for any summer celebration—not just the 4th. Double the batter for a crowd, or halve it for a cozy picnic. The cookie cake holds up better than store-bought, and everyone thinks you slaved over it.
- Budget-Friendly Magic: Flour, butter, sugar—these are pantry staples that won’t break the bank. Plus, leftovers? They’re even better the next day, sliced and served with a glass of milk or a scoop of ice cream. (Yes, even on a Tuesday night.)
Step-by-step instructions for 4th of July cookie cake
Let's bake a showstopping cookie cake with crispy edges and vibrant patriotic frosting!
👨🍳 Step 1: Cream Butter and Sugar for Maximum Fluffiness
In a stand mixer fitted with the paddle attachment, beat the 1 cup unsalted butter (cold, cubed) and 1.5 cups granulated sugar on medium speed for 3-4 minutes. You're aiming for a light, fluffy texture that nearly doubles in volume and becomes pale in color. This creaming process incorporates air, which creates those beautiful crackly tops we love.
I press down on the butter occasionally with a spatula to ensure all the sugar crystals are fully incorporated. You'll know it's ready when the mixture looks like whipped buttercream and leaves clean streaks on the bowl. Don't rush this step—proper creaming makes all the difference in texture.
👨🍳 Step 2: Mix in Eggs and Dry Ingredients
Add the 2 whole large eggs one at a time, mixing on low speed for 30 seconds after each addition. Then stir in the 1 tablespoon vanilla extract and mix for another 10 seconds. The mixture might look slightly curdled, but that's normal.
In a separate bowl, whisk together the 3 cups all-purpose flour, 0.5 teaspoon baking soda, and 0.5 teaspoon salt. With the mixer on low speed, gradually add the dry ingredients to the wet mixture until just combined—you should still see a few flour streaks. Over-mixing develops gluten and makes cookies tough. The dough should be soft and slightly sticky but hold together when pressed.
🔥 Step 3: Bake the Cookie Cake for Perfect Crispy Edges
Preheat your oven to 350°F and line a 9-inch round cake pan with the parchment paper. Press the dough evenly into the pan, creating a smooth, level surface about 1-inch thick. Bake for 18-22 minutes until the edges are deep golden brown and the top looks slightly underdone in the center—it'll firm up as it cools.
Here's the thing—don't overbake! The cake should pull away from the edges but still feel slightly soft in the center when you press it gently. If it looks too pale after 18 minutes, cover loosely with foil and bake another 2-3 minutes. Let it cool completely in the pan before removing—this prevents crumbling.
🥘 Step 4: Create the Star-Spangled Frosting
In a medium bowl, take 1.5 cups of the 3 cups vanilla buttercream frosting and tint it with 1 teaspoon red food coloring for a vibrant red layer. In another bowl, tint the remaining 1.5 cups frosting with 1 teaspoon blue food coloring for a rich blue layer. Use gel-based coloring to avoid thinning the frosting.
Spread the red frosting evenly over the cooled cookie cake, then carefully pipe or spread the blue frosting on top to create a marbled effect. I like to use a spatula to create swirls for that classic patriotic look. Press the 0.5 cup star-shaped sprinkles gently into the frosting while it's still soft for easy placement.
⏰ Step 5: Chill and Slice for Perfect Serving
Refrigerate the frosted cake for at least 1 hour before slicing. This chilling time lets the frosting set properly and makes clean cuts possible. When ready, use a sharp knife dipped in hot water between each slice to create those clean, professional-looking cuts.
The contrast between the crispy cookie base and the smooth, vibrant frosting is what makes this cake truly special. Each bite delivers that perfect combination of buttery cookie texture and sweet vanilla frosting—plus those beautiful red, white, and blue accents that scream "4th of July"!
Pro Tips For Making 4th Of July Cookie Cake
- CHILL THE DOUGH: Mix the butter and sugar until it’s light and fluffy—not pale, not greasy, but with a ribbon that holds for 2 seconds. Then, let the whole bowl sit uncovered in the fridge for 10 minutes. I used to skip this, and my cookie cakes always spread like pancakes into a sad, flat mess. That pause lets the gluten relax, so your layers stay distinct and tall.
- WEIGH THE FLOUR: Scoop-and-sweep? Nope. Use a kitchen scale for the flour—1 cup of all-purpose isn’t always 120g, and packed vs. spooned makes a difference. I learned this after my first batch turned dense and dry. For a cookie cake, precision here keeps the texture tender without being cakey. (Yes, even if you’re impatient like me.)
- BAKE LOW AND SLOW: Preheat the oven to 350°F—no higher, no lower—and bake the cake in the center rack. I used to blast it at 375°F for "faster results," but the edges burned before the middle set. A lower temp ensures even baking without a crispy crust that hides the soft, cookie-y interior. Check at 30 minutes; it’s done when the edges pull away but the center still jiggles slightly.
- SALT THE BUTTER: Toss in a pinch of salt (about ¼ teaspoon) with the butter and sugar at the start. The recipe calls for unsalted butter, and this small addition cuts through the sweetness and balances the vanilla. I was skeptical until I tried it—now it’s non-negotiable for me. (Your future self will notice the difference.)
Pro cooking tips for perfect results
Creaming Perfection
For that signature crispy edge with a tender center, cream your butter and sugar at medium speed for 3-4 minutes until the mixture is pale and fluffy. Use a stand mixer with paddle attachment—it incorporates more air than hand mixing. I press down on the butter with a spatula every 30 seconds to break up any large lumps and ensure even distribution. This step is non-negotiable for achieving that crackly top texture that makes this cookie cake special. 🔥
Dough Consistency
Your dough should be soft, slightly sticky, and hold together when pressed—think of it like wet sand that clumps when squeezed. If it's too dry, add 1 teaspoon milk at a time; if too sticky, chill for 15 minutes before baking. I always test consistency by pressing a small amount between my fingers—it should hold shape without crumbling. Overmixing develops gluten, so stop as soon as the flour disappears. The goal is tender cookies, not tough ones.
Baking Time
Bake your cookie cake for 18-22 minutes at 350°F until the edges are deep golden brown but the center still looks slightly underdone. The cake will continue firming up as it cools. I use a toothpick test—it should come out with a few moist crumbs, not wet batter. If the top browns too quickly, tent loosely with foil after 18 minutes to prevent over-browning while allowing the center to cook through.
Frosting Technique
For that professional marbled effect, divide your frosting into two bowls—one for red and one for blue. Use gel food coloring to avoid thinning the frosting with liquid. Spread the red layer first, then pipe or spread the blue layer on top while the red is still slightly soft. Use a spatula or offset knife to gently swirl the colors together for that classic star-spangled look. Press sprinkles in while the frosting is still soft for easy placement.
Chilling Secrets
Never skip the 1-hour chilling time before slicing—this is what makes the difference between clean cuts and crumbly messes. The frosting needs time to set fully, and the cake needs to firm up. I place mine on a wire rack in the fridge to prevent any soggy bottoms. For extra stability, you can even chill for 2 hours if you're serving it at a party. The longer it chills, the cleaner your slices will be. ✨
Knife Trick
For perfectly clean slices, dip your knife in hot water between each cut and wipe it dry. This prevents the frosting from sticking and creates those professional-looking edges. I also rotate the cake slightly with each slice to maintain even thickness. The first cut is always the hardest—after that, the rest will glide through like butter. This little trick makes your cookie cake look like it came from a bakery, not your kitchen. 💫
Nutrition facts
Frequently asked questions
Can I make this cookie cake gluten-free?
Yes, but with some adjustments! Replace the 3 cups all-purpose flour with a 1:1 gluten-free baking flour blend like Bob's Red Mill or King Arthur. You may need to add 1 extra tablespoon of xanthan gum to improve texture. Keep in mind the cake might be slightly denser, and the crispy edges will be less pronounced. Test with a small batch first to adjust consistency.
How do I store leftovers without drying out the frosting?
Store your cookie cake in an airtight container with parchment paper between layers to prevent drying. Keep it at room temperature for up to 2 days, or refrigerate for 3 days. To refresh the frosting, let it sit at room temperature for 10-15 minutes before serving. For longer storage, freeze individual slices (without frosting) for up to 1 month.
What if my cookie cake spreads too much in the oven?
This usually happens when the dough is too warm or the butter melts too quickly. Chill your dough for 15-20 minutes before baking, and press it into the pan more firmly to create a thicker center. Also, make sure your oven is fully preheated to 350°F before adding the cake. A 9-inch round pan is ideal—don't use a larger one without adjusting baking time.
Can I make this ahead of time for a party?
Bake the cookie cake 1 day ahead and store it (unfrosted) in an airtight container at room temperature. Frost it just before serving to keep the colors vibrant. For a 2-day ahead version, bake, cool completely, wrap tightly in plastic wrap, and refrigerate. Bring to room temperature before frosting and decorating.
How can I make the frosting look more professional?
For a polished look, use a piping bag with a star tip to create clean borders or write "Happy 4th" in bold letters. Chill the frosting for 30 minutes before piping to make it firmer. For extra shine, brush the finished cake with a tiny bit of corn syrup diluted with water (1:1 ratio) and let it dry completely. This creates a subtle gloss without affecting flavor.