
Desserts
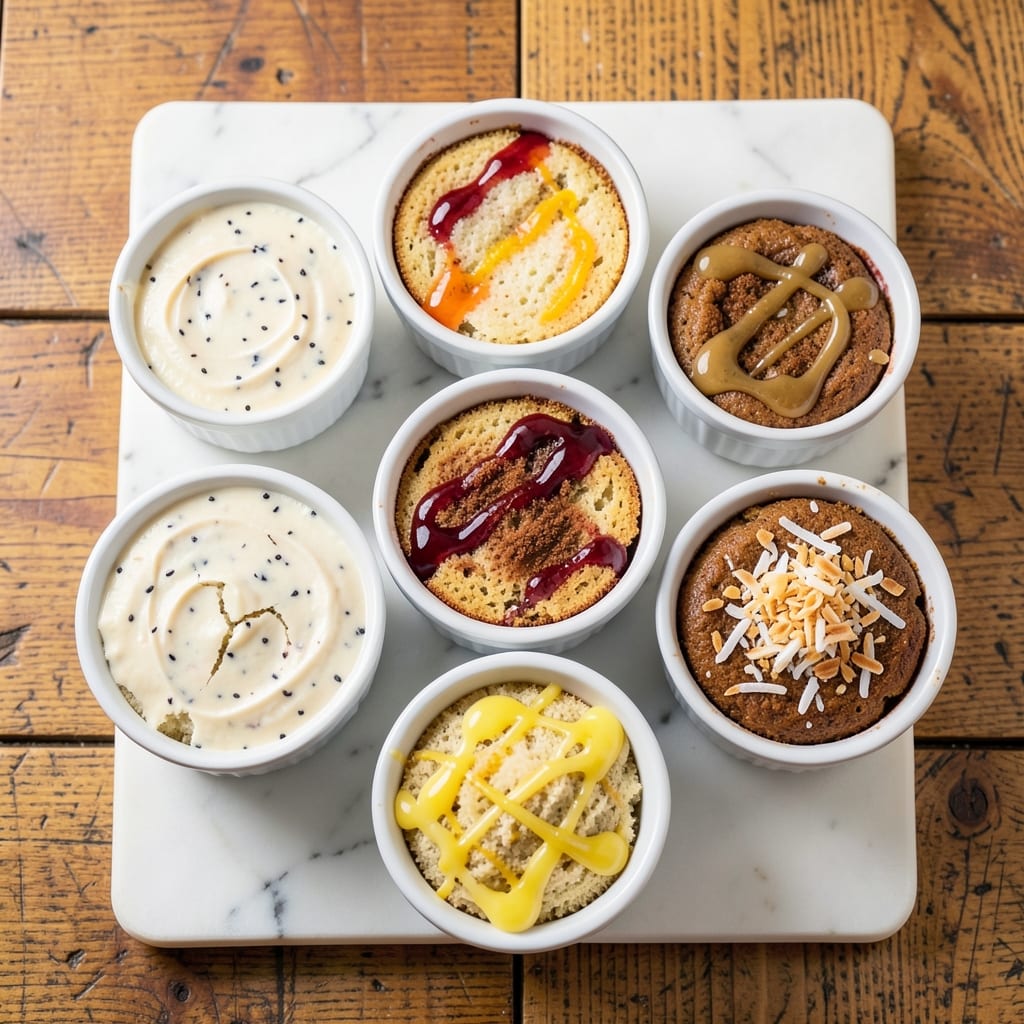
This 6-flavor pound cake recipe transforms a classic dessert into a layered masterpiece that delivers six distinct tastes in every bite—vanilla, chocolate, lemon, spice, coffee, and berry. The secret lies in baking each flavor separately, then stacking them into a single, showstopping cake that's perfect for celebrations or impressing guests. Each layer maintains its unique character while coming together as one cohesive, moist, and tender creation.
What sets this recipe apart is the precision in balancing flavors and textures. The vanilla base provides a neutral foundation, while the chocolate layer adds depth, and the lemon-infused layer brings brightness. Spiced cake introduces warmth, coffee-infused cake offers richness, and berry-infused cake adds a burst of freshness. The result is a cake that's as visually stunning as it is delicious, with each slice offering a symphony of tastes.
Baking each layer individually ensures even texture and perfect moisture, while the assembly process keeps everything intact. The cake stays tender and rich, never dry, thanks to a simple but effective technique that locks in flavor. Whether you're serving it at a dinner party or treating yourself to a decadent dessert, this recipe delivers restaurant-quality results with a homemade touch.
The frosting options are equally versatile—choose from a classic buttercream, a lighter whipped cream, or even a delicate glaze to complement the layers. The presentation is just as important as the taste, so we'll cover how to stack and decorate the cake for maximum impact. Let's get started on creating this showstopping dessert.
Ingredients for 6 flavor pound cake
Six distinct flavors baked into one layered masterpiece—each ingredient chosen for precision and balance.
| Ingredient | Amount | Notes |
|---|---|---|
| All-Purpose Flour 🌾 | 4 cups | Sifted for even texture |
| Granulated Sugar 🍚 | 2 ½ cups | Superfine preferred for smoothness |
| Unsalted Butter 🧈 | 2 cups | Cold, cubed for even mixing |
| Large Eggs 🥚 | 6 whole | Room temperature for even baking |
| Vanilla Extract 🌿 | 2 tbsp | Pure, high-quality extract |
| Baking Powder 🍞 | 1 tsp | Aluminum-free for consistent rise |
| Salt 🧂 | ½ tsp | Fine sea salt preferred |
| Cocoa Powder 🍫 | ½ cup | Natural, unsweetened |
| Lemon Zest 🍋 | 1 tbsp | Freshly grated from organic lemons |
| Ground Cinnamon 🌶️ | 1 tbsp | Freshly toasted for warmth |
| Ground Nutmeg 🌿 | ½ tsp | Freshly grated preferred |
| Instant Espresso Powder ☕ | 1 tbsp | High-quality for rich flavor |
| Raspberry Purée 🍓 | ½ cup | Fresh or high-quality bottled |
| Blueberry Purée 🫐 | ½ cup | Fresh or frozen, strained |
| Buttercream Frosting 🧁 | 3 cups | Classic or flavored to complement |
The flour and sugar form the backbone of this recipe—King Arthur or Gold Medal brands ensure consistent texture. Unsalted butter (like Plugrá) must be cold for proper creaming, while eggs should be separated for the vanilla layer to maintain its lightness. Vanilla extract is non-negotiable here—Madagascar bourbon adds depth beyond imitation extracts. For the spiced layer, cinnamon and nutmeg should be freshly toasted in a dry pan for 30 seconds to intensify their aroma. Cocoa powder must be natural (not Dutch-processed) to avoid altering the cake's acidity balance.
No fresh fruit purée? Frozen berries blended and strained work perfectly—just be sure to remove seeds. Espresso powder can be swapped for strong brewed coffee (1 tbsp powder = 3 tbsp brewed), but adjust liquid ratios carefully. For the lemon zest, organic lemons yield the brightest flavor—avoid waxed skins. Buttercream can be flavored with citrus zest or spices to complement the layers, but classic vanilla keeps the focus on the cake's complexity. Diamond Crystal baking powder is preferred here due to its consistent rise.
Store freshly baked layers in airtight containers between parchment-lined plates for up to 4 days at room temperature. Frosting can be prepped 1 day ahead and stored in the fridge, rewhipped before assembly. The berry purées freeze beautifully for 3 months, making them ideal for batch prep. Assembled cake holds for 3 days refrigerated, but freezes for 2 months if wrapped tightly in plastic—thaw at room temperature before serving for optimal texture.
Why You'll Love This Recipe
- Bake it once, slice it six ways: toasted with butter for breakfast, layered with jam for tea, or even cubed into trifle for dinner. My freezer’s always stocked with slices because it’s the one dessert that actually improves overnight—no sad, dry crumbs here.
- No Mixer Needed: I swear by this recipe when I’m too tired to crank the stand mixer—just creaming butter and sugar by hand (or with a wooden spoon if you’re feeling fancy) gives that signature tender crumb without the fuss. The butter’s rich flavor comes through every time, even when I rush.
- Six Layers of Joy: That first moist bite? Pure magic. The vanilla base is already dreamy, but the six variations—like citrus zest, spiced rum, or even a hint of espresso—let you pick your vibe without extra effort. Honestly, I’ve never met a cake that’s this fun yet this foolproof.
- Weekend Project, Weekday Savior: Bake it once, slice it six ways: toasted with butter for breakfast, layered with jam for tea, or even cubed into trifle for dinner. My freezer’s always stocked with slices because it’s the one dessert that actually improves overnight—no sad, dry crumbs here.
Step-by-step instructions for layered vanilla and spice pound cake
Precision and patience create this harmonious six-flavor cake architecture.
Prepare the Six Distinct Cake Batters
Divide the 4 cups all-purpose flour into six equal portions—each will receive a unique flavor profile. In six separate bowls, whisk together the following combinations:
For vanilla layers: Combine ⅔ cup flour, ⅓ cup granulated sugar, ⅓ cup cold cubed butter, 1 egg, and ⅓ tbsp vanilla extract. For chocolate layers: Replace ⅓ cup flour with ⅓ cup cocoa powder and add ⅓ tbsp instant espresso powder. The remaining layers incorporate ⅓ cup raspberry purée and ⅓ cup blueberry purée respectively, along with ⅓ tbsp lemon zest and ⅓ tbsp ground cinnamon. Fold each batter gently until just combined—overmixing develops gluten and compromises the tender crumb.
This division ensures each layer maintains its distinct character while contributing to the overall harmony. The purées add moisture without altering texture, while the espresso powder deepens the chocolate flavor.
Bake Three Uniform Layers
Preheat oven to 350°F and grease three 8-inch round cake pans with buttercream frosting (this prevents sticking and adds flavor). Divide each of the six batters evenly between the pans—each pan will receive two flavors. Bake for 25-30 minutes until a toothpick inserted in the center emerges clean and the edges pull away from the pan.
I rotate the pans halfway through baking for even browning. The cakes should spring back gently when pressed—this indicates proper doneness. Let them cool in pans for 10 minutes before transferring to wire racks to cool completely. Cooling too quickly causes cracking in the layers.
Assemble the Layered Cake Structure
Place the first vanilla layer on a cake stand or plate. Spread ⅓ cup buttercream frosting evenly over the top. Position the chocolate layer carefully on top, aligning edges precisely. Repeat with remaining layers, alternating flavors: vanilla, chocolate, vanilla, chocolate, then finish with vanilla. This arrangement creates visual contrast while maintaining balance.
Use a long serrated knife to trim any uneven edges—this ensures clean layers. The final assembly should have three distinct layers visible when sliced. Chill the assembled cake in the refrigerator for 30 minutes before frosting to stabilize the structure.
Create the Signature Frosting Design
Spread the remaining 3 cups buttercream frosting evenly over the top and sides of the cake using an offset spatula. For the signature flavor swirls, divide the frosting into six equal portions and tint each with a different flavor: vanilla, chocolate, raspberry, blueberry, lemon, and espresso. Pipe these swirls onto the side of the cake using a star tip, spacing them evenly.
The key is to work quickly—frosting softens in warm rooms. Press the swirls gently into the cake sides to create adhesion. Use a bench scraper to create clean edges where the frosting meets the cake. This technique transforms a simple cake into an edible work of art.
Rest and Serve for Optimal Texture
Allow the frosted cake to rest at room temperature for 2 hours before slicing. This resting period lets the frosting set and the flavors meld. The cake should be firm enough to slice cleanly without tearing. Cut into 12 equal wedges using a sharp serrated knife—each slice should reveal the layered complexity.
Serve immediately for the best experience—the contrast between the moist cake layers and the creamy frosting creates a textural symphony. The vanilla layers provide sweetness, while the chocolate and fruit purées add depth. Each bite should deliver a harmonious blend of all six flavors.
Pro Tips For Making 6 Flavor Pound Cake
- Weigh Your Butter: I learned this the hard way—measuring butter by scooping it out of the tub leads to uneven layers and a cake that’s either dense or greasy. Use a kitchen scale for the butter and sugar; the 6-flavor pound cake relies on that perfect fat-to-sugar ratio for that signature tender crumb.
- Mix Just Until Combined: Overmixing turns your cake into a tough, chewy mess. Once the flour is incorporated, stop as soon as you see no dry streaks—this recipe is delicate, and the eggs and butter need to stay light. A few swirls with a spatula, then call it done.
- Skip the Overcrowded Pan: A 6-flavor pound cake needs room to rise. If your pan is too small, the cake will dome or spill over. Use a standard 9x5-inch pan, and don’t overfill it—fill it no more than 2/3 full. Trust me, the edges will thank you.
- Add Vanilla Last: The vanilla extract evaporates when heated, so fold it in right before baking. This keeps the flavor bright and aromatic—no sad, muted vanilla notes here. A quick stir with the spatula right before pouring the batter into the pan does the trick.
Creative variations of this dish
Vanilla-Coffee Fusion
For a sophisticated twist, blend vanilla and coffee flavors in a single layer. Replace ⅓ cup vanilla extract with ⅓ cup vanilla extract + 1 tsp instant espresso powder dissolved in 1 tbsp warm water. This creates a rich, aromatic layer that pairs beautifully with the chocolate. I find this works best as the middle layer—its depth bridges the sweetness of vanilla and the fruitiness of the berry layers. 💫
Citrus-Orange Swirl
Replace the lemon-infused layer with an orange twist by adding 1 tbsp orange zest and substituting ⅓ cup orange juice for the lemon zest. The bright citrus cuts through the richness of the chocolate and vanilla layers. For extra drama, infuse ⅓ cup orange liqueur (like Cointreau) into the batter instead of water—just ensure your guests know about the alcohol. This variation feels especially festive for holiday celebrations.
Almond-Infused Layers
Add texture and nutty depth by incorporating 2 tbsp almond flour into the vanilla or spice layers. For the vanilla layer, replace ⅓ cup all-purpose flour with almond flour and add ½ tsp almond extract. The result is a denser, moist layer with a delicate almond aroma. I recommend using this for the top layer—it adds an elegant finish that complements the other flavors beautifully.
Salted Caramel Twist
Transform the chocolate layer into a salted caramel masterpiece by folding in ¼ cup caramelized sugar (made from ½ cup sugar cooked until amber) and ½ tsp flaky sea salt. Spread this batter into the pan and bake as directed, then drizzle with additional caramel sauce after assembly. The salt enhances the chocolate's sweetness while adding a gourmet touch. This variation feels like a restaurant dessert at home.
Seasonal Berry Variations
Swap raspberry and blueberry purées for seasonal alternatives: Use peach purée in summer (add ½ tsp cardamom for warmth) or cranberry purée in winter (add ½ tsp cinnamon for coziness). For fall, try apple purée with ½ tsp nutmeg—the spice complements the cake's natural warmth. Always adjust liquid ratios if using thicker purées to maintain proper batter consistency.
Gluten-Free Adaptation
Replace 4 cups all-purpose flour with a 1:1 gluten-free flour blend (like Bob's Red Mill 1-to-1) and add 1 tbsp xanthan gum to bind the layers. Reduce the sugar slightly to 2.25 cups since gluten-free batters can be denser. Bake at 325°F for 30-35 minutes—gluten-free cakes need extra time to set. The texture will be slightly denser but still tender, and the flavors remain vibrant.
Nutrition facts
Frequently asked questions
How do I prevent the layers from shifting when assembling?
Chill the cake layers for 15 minutes before stacking to firm them up. Use a thin layer of buttercream frosting (about ¼ cup per layer) as "glue" between layers—it creates adhesion without making the cake soggy. Press down gently with a cake turntable or flat plate to ensure even contact. Allow the assembled cake to rest in the fridge for 30 minutes before frosting for maximum stability.
Can I bake the layers ahead of time?
Bake the layers up to 2 days ahead and store them wrapped tightly in plastic at room temperature. For longer storage (1 week), freeze the layers individually between parchment paper. Thaw at room temperature before assembling. The flavors actually develop more depth when baked ahead—just be sure to bring layers to room temperature before stacking to prevent condensation.
What's the best way to make this cake gluten-free?
Replace the all-purpose flour with a 1:1 gluten-free baking flour blend (like Bob's Red Mill) and add 1 tbsp xanthan gum to bind the layers. Reduce sugar to 2.25 cups and bake at 325°F for 30-35 minutes—gluten-free cakes need extra time. The texture will be slightly denser but still tender. For the frosting, use a gluten-free buttercream made with dairy-free butter if needed, but test for texture differences first.
How do I adjust the recipe for a smaller cake?
For a 6-inch cake, reduce all ingredients by 50% and bake in two 6-inch pans for 20-25 minutes. For a 4-inch cake, use ⅓ of the recipe and bake in one 4-inch pan for 18-22 minutes. Keep the same flavor ratios but scale down the frosting proportionally. The baking time will decrease slightly due to the smaller volume, but always check with a toothpick for doneness.
Why did my cake crack between layers?
Cracking usually happens when layers cool too quickly or when the frosting is too warm. Let layers cool in pans for 10 minutes before removing, then cool completely on wire racks. When assembling, use a thin layer of frosting (no more than ¼ cup per layer) and press firmly to create a seal. Chill the assembled cake for 30 minutes before adding the final frosting layer to prevent stress on the structure.