
Desserts
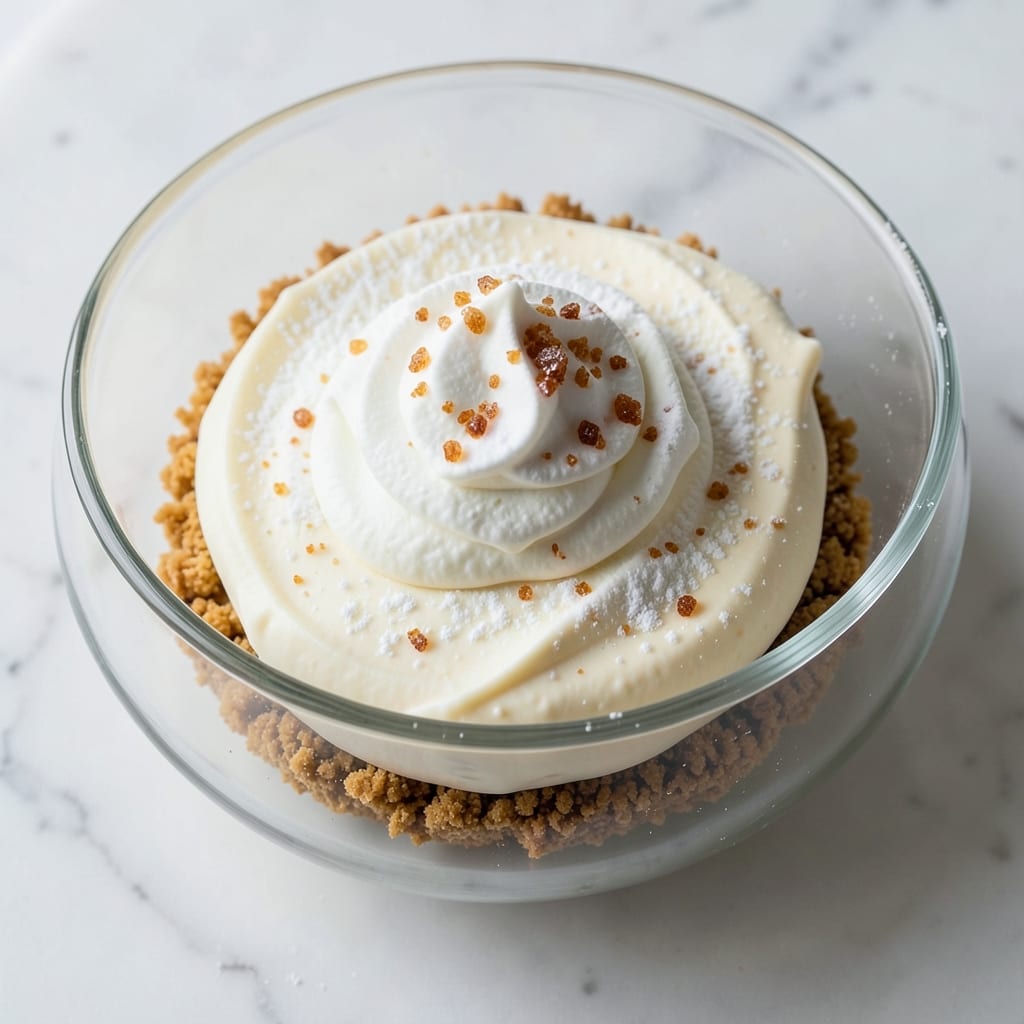
This Aldi no-bake cheesecake recipe delivers restaurant-quality dessert with minimal effort—no oven, no fuss, and just 15 minutes of prep time. The secret lies in a sturdy graham cracker crust and a velvety cream cheese filling that sets perfectly in the fridge. I developed this version after realizing store-bought graham crackers and cream cheese could create something just as impressive as homemade—without the extra cost or cleanup.
The beauty of this recipe is its foolproof nature: no baking skills required, no risk of overmixing, and no waiting for an oven to preheat. The crust gets pressed into place while the filling whips together in minutes, then chills until firm—typically 4 hours, though I’ve rushed it in 2 for emergencies. The result? A creamy, smooth texture with a clean break, topped with fresh berries or whipped cream for that final touch of elegance.
What makes this recipe stand out is how it transforms basic pantry staples into something special. Aldi’s affordable graham crackers and cream cheese keep costs low without sacrificing quality, while the no-bake method means no energy bills or oven space wasted. Whether you're hosting a last-minute gathering or craving a quick treat, this cheesecake delivers restaurant-quality results with minimal effort.
Serve it chilled with a sprinkle of powdered sugar or fresh fruit for a dessert that feels indulgent but requires almost no active time. The filling stays lighter than traditional baked cheesecakes, making every slice feel fresh and satisfying. Let’s get started—your taste buds (and your oven) will thank you.
Ingredients for aldi no bake cheesecake
Graham crackers, cream cheese, and a few pantry staples—this no-bake cheesecake is foolproof and restaurant-worthy.
| Ingredient | Amount | Notes |
|---|---|---|
| Aldi Large Graham Crackers 🍪 | 1 ½ cups | Crushed into fine crumbs |
| Unsalted Butter 🧈 | ½ cup | Melted, cooled slightly |
| Granulated Sugar 🍚 | ½ cup | For crust sweetness |
| Aldi Cream Cheese 🧀 | 16 oz | Room temperature, full-fat |
| Heavy Whipping Cream 🥛 | 1 cup | Cold, full-fat preferred |
| Powdered Sugar 🍚 | ½ cup | For filling sweetness |
| Vanilla Extract 🌿 | 1 tbsp | Pure, high-quality |
| Lemon Juice 🍋 | 1 tbsp | Freshly squeezed |
| Salt 🧂 | ¼ tsp | Fine sea salt |
| Dark Chocolate Chips 🍫 | ¼ cup | Optional, for swirl |
| Fresh Berries 🍓 | 1 ½ cups | For topping (strawberries, raspberries) |
| Whipped Cream 🥛 | ½ cup | Optional garnish |
Aldi’s graham crackers are the secret weapon here—they’re sturdy enough to hold the filling without getting soggy, and their buttery flavor pairs perfectly with the cream cheese. Grab the large 16-ounce box from the baking aisle, and crush them into fine crumbs by pulsing in a food processor or pressing with a rolling pin. For the butter, melt it but don’t let it get greasy—just enough to soften so it blends seamlessly. The cream cheese? Room temperature is non-negotiable—cold lumps will make your filling grainy. I always buy the Aldi brand because it’s smooth and affordable, but any full-fat cream cheese works. Pro tip: Let it sit out for 30 minutes before mixing.
No powdered sugar? Granulated sugar works in a pinch, though it won’t dissolve as smoothly. Short on vanilla? Almond extract at half the amount adds depth, but pure vanilla is best. The lemon juice brightens everything—use freshly squeezed if you’ve got it, but bottled works too. For the chocolate swirl, melt the chips with 1 tbsp butter and drizzle into the filling before chilling. Want extra richness? Fold in 2 tbsp sour cream with the cream cheese. And if you’re feeling fancy, toast the crushed graham crackers with 1 tbsp brown sugar before mixing with butter for a caramelized crust.
This cheesecake is all about patience—it needs 4 hours in the fridge to set properly, but trust me, it’s worth it. The filling stays lighter than baked cheesecake, almost like a mousse, with clean slices every time. Store leftovers in an airtight container with parchment between layers to keep them fresh for 3-4 days. Freeze for up to 1 month if you’re prepping ahead. For serving, let it sit at room temperature for 10 minutes before slicing—it’ll hold together better. The berries and whipped cream can wait until the last minute, so no stress there. And if you’re short on time? 2 hours in the freezer works in a pinch, though texture won’t be as perfect.
Why You'll Love This Recipe
- No Oven Needed: I’ve made this cheesecake when my oven’s occupied (or when I’m too tired to turn it on). The graham cracker crust gets pressed together in minutes—no baking, no waiting, just layer after layer of buttery crunch.
- Creamy Without Compromise: That Aldi cream cheese? Rich, tangy, and thick—it whips up silky smooth, not grainy. The heavy cream folds in light, so every bite has that perfect balance of dense center and fluffy top. (Honestly, my friends keep asking for the recipe.)
- Party-Ready in Hours: Bring it to a potluck, holiday gathering, or even a last-minute date night. It sets in the fridge overnight, so you’re not stuck assembling it while guests arrive. Plus, the graham crust holds up—no soggy bottoms here.
- Budget-Friendly Luxury: You’re using Aldi’s cream cheese and graham crackers, so the cost is a fraction of store-bought. A single batch feeds 10, and leftovers? Even better—it tastes just as good the third day (if it lasts that long).
Step-by-step instructions for Aldi no-bake cheesecake
Here's how to assemble this creamy, no-fuss dessert with layers that set perfectly every time.
Prepare the Graham Cracker Crust
Place the 1.5 cups Aldi Large Graham Crackers in a food processor or strong zip-top bag. Pulse until you achieve fine, sand-like crumbs—no large pieces should remain. This texture ensures a sturdy base that won't crumble during assembly.
Transfer the crumbs to a medium bowl and mix in the 0.5 cup melted unsalted butter (cooled slightly) and 0.5 cup granulated sugar. Use a silicone spatula to combine until evenly moistened—every crumb should be coated. Press this mixture firmly into the bottom of an 8-inch springform pan, creating an even layer about ¼-inch thick. Chill in the refrigerator while you prepare the filling.
Whip the Cream Cheese Filling
In a large mixing bowl, beat the 16 oz room-temperature Aldi cream cheese on medium speed until completely smooth—no lumps should remain. This step is crucial; cold cream cheese won't blend properly. Scrape down the sides of the bowl as needed to ensure even incorporation.
Gradually add the 1 cup cold heavy whipping cream while continuing to mix on medium speed. The mixture should begin to lighten in color and thicken slightly. Add the 0.5 cup powdered sugar, 1 tbsp vanilla extract, 1 tbsp lemon juice, and 0.25 tsp salt, mixing just until combined. If using, fold in the 0.25 cup dark chocolate chips at this stage for a subtle swirl effect.
Assemble and Chill the Cheesecake
Pour the cream cheese mixture over the chilled crust, spreading it evenly to the edges. Gently tap the pan on the counter to release any air bubbles that may have formed. This ensures a smooth surface when sliced. Cover the pan with plastic wrap and refrigerate for at least 4 hours—or overnight for best results.
Here's the thing—patience matters. The filling needs this time to fully set and develop its creamy texture. If you're short on time, you can speed this up by placing the pan in the freezer for 2 hours, but the texture won't be quite as luscious.
Top and Serve
Once fully set, remove the cheesecake from the refrigerator and release the springform pan. Arrange the 1.5 cups fresh berries on top in an even layer, pressing them gently into the surface. This creates a beautiful presentation and adds a fresh contrast to the creamy filling.
For an extra touch, pipe or dollop the 0.5 cup whipped cream around the edges and on top of the berries. Serve immediately or return to the refrigerator for up to 2 hours before serving. Each slice should have that perfect balance of creamy, tangy filling with the buttery crunch of the crust beneath.
Pro Tips For Making Aldi No Bake Cheesecake
- Pulse, Don’t Grind: Aldi’s large graham crackers are tougher than they look—blast them in the food processor in 2-second bursts, not continuous pulses, or you’ll end up with graham cracker dust instead of crumbs. Dump the crumbs into a bowl and sift out the stray bits by hand if needed; this keeps your crust from turning into a fine powder that won’t hold together. ---
- Soften Cream Cheese Slowly: I learned this the hard way—tossing cold Aldi cream cheese blocks into a warm bowl of sugar makes them seize up like stubborn glue. Instead, cut the cream cheese into 1-inch cubes, microwave them for 10 seconds, then let them sit for 30 seconds before mixing. This ensures smooth, lump-free filling every time. ---
- Whip Cream to Stiff Peaks: Heavy whipping cream is finicky—if you underwhip, your cheesecake will be dense; overwhip, and it’ll look like shaving foam. Stop folding the cream into the cheese mixture when it holds a peak that just wobbles slightly when you lift the whisk. It’ll settle as you mix, but this gives you the perfect light texture. ---
- Chill in Layers: Skip the 6-hour fridge wait by dividing your cheesecake into two chilling phases. After assembling, pop it in the freezer for 1 hour to set the layers, then transfer to the fridge for the remaining 4–5 hours. This prevents the filling from sliding out of the crust while you wait. (Yes, even if you’re impatient like me.)
Common mistakes when making perfect results
Skipping the Chill Time
This is the #1 mistake I see—rushing the 4-hour chill because you're impatient. The filling needs this time to fully set and develop its signature creamy texture. If you cut into it too soon, you'll end up with a runny mess that won't hold its shape. I've tried the 2-hour freezer trick, and while it works in a pinch, the texture is more like a pudding than a cheesecake. Trust the process and let it chill properly. 🧊
Overmixing the Filling
Once you've added all the ingredients to the cream cheese mixture, resist the urge to overmix. Beat just until combined—about 30-45 seconds after everything is incorporated. Overmixing introduces air, which can cause the filling to develop a grainy texture or even curdle slightly. I've learned this the hard way after accidentally turning my smooth filling into a lumpy disaster. Use a spatula to gently fold in any last-minute additions like chocolate chips. 🥄
Using Cold Cream Cheese
Room-temperature cream cheese is absolutely critical for a smooth filling. Cold cream cheese will create lumps that are nearly impossible to blend out, no matter how long you mix. Take 30 minutes to let your cream cheese sit at room temperature before starting. I always test it by pressing my finger into the center—if it leaves a slight indentation, it's ready. Pro tip: Microwave it for 10 seconds if you're truly in a hurry, but be careful not to overheat it. 🧀
Uneven Crust Pressing
An uneven crust can lead to filling leakage or a crumbly base. Press the graham cracker mixture firmly and evenly into your pan, creating a ¼-inch thick layer. Use the bottom of a measuring cup to press down any stubborn spots. I like to chill the crust for 15 minutes before adding the filling to give it extra stability. This prevents the crust from breaking apart when you cut slices. 🍪
Not Prepping Ingredients First
Having all your ingredients prepped and measured before you start saves time and prevents mid-recipe scrambling. Measure out your graham crackers, melt your butter, and let your cream cheese come to room temperature all before you begin mixing. I keep a small bowl of each ingredient ready on my counter so I can assemble everything in one smooth motion. This no-bake method is supposed to be easy—don't make it stressful by being unprepared. ⏱️
Using Low-Quality Graham Crackers
Not all graham crackers are created equal. The Aldi Large Graham Crackers have just the right balance of buttery flavor and sturdy texture to hold up to the filling. Cheaper or softer brands can turn soggy or crumble apart. If you must substitute, look for graham crackers with a high butterfat content. I've tried the store-brand versions, and they just don't hold up the same way. Stick with quality ingredients for the best results. 🏆
Nutrition facts
Frequently asked questions
Can I use store-brand cream cheese instead of Aldi's?
Yes, but the texture might differ slightly. Aldi's cream cheese is known for its smooth, full-fat consistency which works perfectly for this recipe. If using store-brand, opt for full-fat versions and ensure it's completely room temperature to avoid lumps. The flavor will be similar, but the texture might be slightly denser.
How do I know when the cheesecake is fully set?
The cheesecake should be fully set when it's firm enough to hold its shape but still creamy when cut. Gently press the center with your finger—if it springs back slowly, it's ready. The edges should be completely solid, and there should be no wobble when you move the pan. This usually takes 4 hours in the fridge.
Can I make this cheesecake without a springform pan?
Use an 8-inch round cake pan with removable sides or even a pie dish. Line the bottom with parchment paper for easy removal. If you don't have removable sides, press the crust firmly into the pan and let it set for an extra 15 minutes before adding the filling to prevent sticking.
What are some good toppings besides berries?
Fresh berries are classic, but you can also try caramel sauce, toasted nuts (like pecans or walnuts), chocolate ganache, or even a sprinkle of cinnamon sugar. For a tropical twist, use mango or pineapple chunks. Just add toppings right before serving to keep them fresh and vibrant.
Can I make this cheesecake ahead of time?
Yes! This cheesecake actually tastes better the next day. Assemble it up to 24 hours in advance and store it in an airtight container in the fridge. The flavors meld together beautifully. For serving, let it sit at room temperature for 10 minutes before slicing to prevent crumbling.