
Desserts
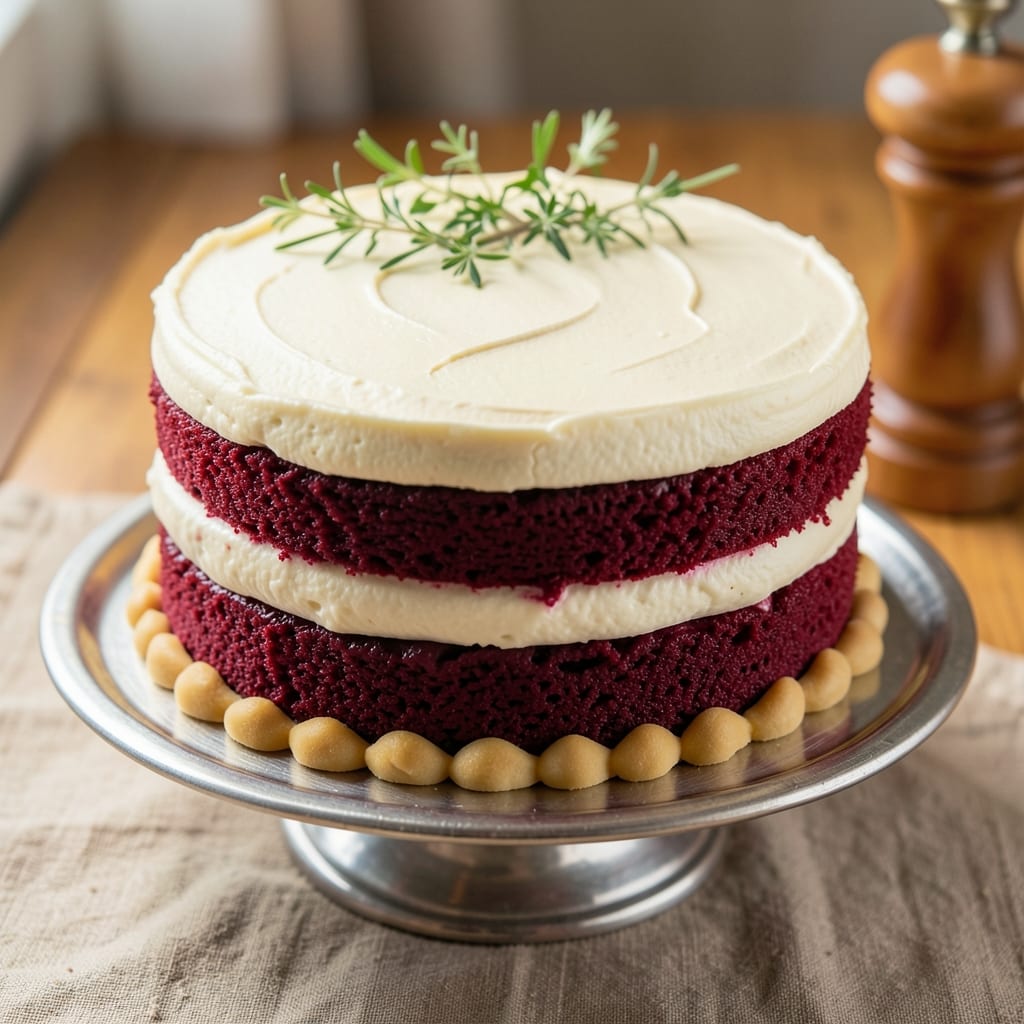
This all-natural red velvet cake delivers the signature tangy-sweet flavor without artificial dyes or preservatives—just pure cocoa, beet juice, and buttermilk for that iconic red hue. The secret lies in properly creaming the butter and sugar, then gently folding in the wet ingredients to maintain that signature tender crumb. I developed this recipe after years of experimenting with natural alternatives, and it never fails to impress—moist, rich, and perfectly balanced between cocoa depth and buttermilk tang.
The beauty of this method is its simplicity: no special equipment, no complicated techniques, just a few quality ingredients and precise timing. The beet juice provides natural color and subtle earthiness, while the cocoa powder delivers that deep chocolate flavor without overpowering the cake. What makes this recipe stand out is the buttermilk's role—it tenderizes the crumb while adding that signature tang that defines red velvet.
By the time it emerges from the oven, you'll have a cake with a tender yet sturdy crumb, just enough moisture to keep it fresh, and that perfect balance of sweetness and acidity. The frosting—made with natural ingredients—complements rather than competes with the cake's flavor, creating a dessert that's both elegant and approachable. This is the kind of cake that tastes homemade, even when you're feeding a crowd.
Whether you're baking for a celebration or just craving a classic, this recipe delivers restaurant-quality results with simple techniques. The frosting can be adjusted for cream cheese or buttercream preferences, and the cake keeps well for up to five days when stored properly. Let's get started on creating your perfect all-natural red velvet cake.
Ingredients for all natural red velvet cake
Twelve quality ingredients deliver restaurant-quality red velvet—no artificial dyes or shortcuts here.
| Ingredient | Amount | Notes |
|---|---|---|
| Unsalted Butter 🧈 | 1 cup | Softened to room temperature |
| Granulated Sugar 🍚 | 2 cups | Superfine preferred for smooth texture |
| Natural Cocoa Powder 🍫 | ¾ cup | Unsweetened, high-quality Dutch-processed |
| Beet Juice 🍠 | ¼ cup | Freshly extracted, vibrant red |
| Large Eggs 🥚 | 2 whole | Room temperature for even mixing |
| Buttermilk 🥛 | 1 cup | Fresh, full-fat preferred |
| Vanilla Extract 🌿 | 2 tsp | Pure, high-quality vanilla |
| Baking Soda 🧂 | 1 tsp | Not baking powder |
| Salt 🧂 | ½ tsp | Fine sea salt preferred |
| All-Purpose Flour 🌾 | 2 cups | Sifted, plus extra for pan |
| Cream Cheese 🧀 | 8 oz | Room temperature for frosting |
| Powdered Sugar 🍚 | 3 cups | Sifted for smooth frosting |
| Heavy Whipping Cream 🥛 | ½ cup | Cold, for whipped topping |
The cocoa powder and beet juice are non-negotiable for that signature color and depth. Valrhona or Guittard cocoa powders deliver the richest flavor, while fresh beet juice from local farmers markets or organic brands like Trader Joe's ensures vibrant color without artificial additives. For the buttermilk, Cultivate brand is my go-to—it's consistently tangy and creamy. The butter should be European-style if possible (like Plugrá), as it has higher fat content for better flavor. Sift your flour and cocoa together to eliminate lumps and ensure a tender crumb.
No beet juice? Raspberry puree or red food coloring made from beet powder works in a pinch, though the flavor will differ slightly. Substituting buttermilk? Mix 1 cup milk with 1 tbsp vinegar or lemon juice and let it sit for 5 minutes. For the frosting, Neufchâtel cheese adds even more richness than regular cream cheese. If you're avoiding dairy, vegan cream cheese works but may alter the texture slightly. The powdered sugar should be sifted before mixing to prevent graininess in the final frosting. For extra tang, add 1 tsp lemon zest to the frosting mixture.
Store the cake layers at room temperature in an airtight container for up to 3 days, or freeze for up to 3 months wrapped tightly in plastic. The frosting can be made 1 day ahead and stored in the fridge, then whipped back to fluffiness before assembly. For best results, assemble the cake 4 hours before serving to allow flavors to meld. If transporting, wrap each layer individually in plastic wrap to maintain moisture and structure.
Why You'll Love This Recipe
- No-Fuss Mixing: I swear by this recipe because it’s just three bowls and a whisk—no food processor, no sifter, no stress. The beet juice does all the color work while you fold in the cocoa powder, and the butter comes to room temp in the time it takes to boil water for coffee.
- Velvet Magic: That deep cocoa-beet combo? It’s like someone took classic red velvet and gave it a moody, sophisticated upgrade. The sugar caramelizes just enough to balance the earthy cocoa, and the eggs keep it light—no dense, heavy cake vibes here.
- Party Ready: Honestly, this cake handles everything. Serve it with cream cheese frosting for a birthday, slice it into squares for a potluck, or even pack it for a picnic. (Yes, even on a Tuesday night.) The natural ingredients mean no weird aftertaste, so it’s safe for guests with sensitivities too.
- Budget-Friendly Luxury: I make this all the time because it’s ridiculously cost-effective—beet juice is cheap, butter and sugar stretch far, and the cocoa powder gives that gourmet feel without the price tag. Plus, leftovers? They stay moist for days, so I’m never scrambling to bake last-minute.
Step-by-step instructions for all-natural red velvet cake
A deep cocoa base and tangy buttermilk create this velvety texture—follow these precise steps for perfect layers.
Cream Butter and Sugar to Light Ribbon Stage
In a stand mixer fitted with the paddle attachment, beat the 1 cup unsalted butter and 2 cups granulated sugar on medium speed for 3-4 minutes. You're aiming for a light, fluffy texture—the mixture should nearly triple in volume and leave clean ribbons when the paddle is lifted. This aeration creates the cake's signature tender crumb.
Stop occasionally to scrape down the sides of the bowl with a silicone spatula. I press the spatula against the bowl to ensure no sugar or butter sticks to the sides—this guarantees even mixing. The sugar should dissolve completely, and the butter should be fully incorporated with no visible lumps.
Incorporate Wet Ingredients and Beet Juice
Add the 2 whole large eggs, one at a time, mixing on low speed after each addition until fully combined. Then stir in the 1 cup buttermilk, 2 teaspoons vanilla extract, and 0.25 cup beet juice. The beet juice adds natural color and subtle earthiness without artificial dyes.
Mix on low speed for another 30 seconds until just combined. Here's the thing—overmixing develops gluten, which can make the cake dense. You'll see the batter thicken slightly as the buttermilk reacts with the baking soda, which you'll add next. The mixture should be smooth but still slightly thin at this stage.
Combine Dry Ingredients and Fold Gently
In a separate bowl, whisk together the 2 cups all-purpose flour, 1 teaspoon baking soda, and 0.5 teaspoon salt. Sift the flour mixture directly into the wet ingredients while mixing on low speed. This prevents lumps and ensures even distribution of the leavening agents.
Mix on low speed for 20-30 seconds until just combined—you should still see small streaks of flour. The reason we don't overmix is that gluten development makes red velvet cake tough instead of tender. Scrape the bowl one final time to ensure all ingredients are evenly incorporated before proceeding.
Bake in Prepared Pans for Even Rise
Preheat your oven to 350°F and grease two 9-inch round cake pans with butter or line them with parchment paper. Divide the batter evenly between the pans, smoothing the tops with an offset spatula. Tap each pan firmly on the counter 3-4 times to remove any air bubbles that could cause uneven rising.
Bake for 30-35 minutes or until a toothpick inserted into the center comes out clean with just a few moist crumbs clinging to it. The edges should be golden brown, and the top should spring back when gently pressed. Rotate the pans halfway through baking for even heat distribution—this prevents one side from browning faster than the other.
Cool and Prepare Cream Cheese Frosting
Allow the cakes to cool in their pans for 10 minutes, then transfer them to a wire rack to cool completely. While they cool, beat the 8 ounces cream cheese and 3 cups powdered sugar together in a stand mixer until smooth and creamy. Add the 0.5 cup cold heavy whipping cream and mix until light and fluffy—this should take about 2-3 minutes on medium speed.
Spread the frosting between the cooled cake layers and on the top and sides. Here's where it gets fun—use a long spatula to create a smooth surface. Chill the frosted cake in the refrigerator for 30 minutes before slicing. This resting period allows the frosting to set slightly, making clean cuts easier and preventing crumbs.
Pro Tips For Making All Natural Red Velvet Cake
- Whisk Eggs Cold: Crack eggs straight from the fridge into a separate bowl first—room temperature eggs can turn your batter into a sad, lumpy mess. I learned this the hard way when my cake ended up dense as a brick after overmixing cold yolks into warm butter. ---
- Sift the Cocoa: Natural cocoa powder is a clump magnet. Sift it directly into your dry ingredients to avoid pockets of dry powder in your cake—those turn into crumbly spots. I used to just scoop and measure, and my cake never looked uniform. ---
- Bake Until Springy: Check doneness by pressing the center—it should bounce back slowly, not immediately. Overbaking dries out the cake, and underbaking leaves it gummy. Pull it out when the edges are set but the middle still has a slight wobble. ---
- Reduce Beet Juice Heat: Simmer beet juice until it’s thick enough to coat the back of a spoon—about half the original volume. This concentrates the color and flavor without making your cake soggy. I skipped this once and ended up with a cake that tasted like beet soup.
Storing and reheating your all natural red velvet cake
Room-Temp Storage
Store your fully assembled cake at room temperature in an airtight container for up to 3 days. I wrap mine in plastic wrap first, then place it in a Ziploc container to maintain moisture. The frosting stays fresh this way, though the cake may dry out slightly after 2 days—just add a sprinkle of water before serving if needed. 💫
Fridge Preservation
For longer storage, refrigerate the cake (unfrosted layers) for up to 5 days. Wrap each layer individually in plastic wrap and place them in a Glad container. When ready to serve, let the layers sit at room temperature for 30 minutes before frosting. The cold temperature helps preserve the moisture, but the frosting will firm up—whip it back to fluffiness with a hand mixer before assembly.
Freezer Longevity
Freeze the cake layers (unfrosted) for up to 3 months by wrapping them tightly in plastic wrap and aluminum foil. I double-wrap the layers to prevent freezer burn. When ready to bake, thaw overnight in the fridge, then proceed with frosting as directed. The texture remains tender, though the frosting may need re-whipping after thawing. 🧊
Frosting Make-Ahead
Prepare the cream cheese frosting up to 1 day ahead and store it in the fridge. When ready to use, whip it back to fluffiness with a hand mixer—it may thicken slightly but returns to its original consistency. I keep the heavy whipping cream cold until the final mixing to ensure it whips properly. This shortcut saves time on baking day while maintaining the frosting's signature lightness.
Reheating Slices
If you've stored slices in the fridge, warm them for 10-15 seconds in the microwave on 50% power to soften the frosting without drying out the cake. Cover the slice with a damp paper towel to prevent the frosting from melting unevenly. For a stovetop approach, warm the slice on a baking sheet in a 200°F oven for 3-4 minutes—this gently reheats the entire slice evenly. 🔥
Transport Tips
For events, transport the cake layers separately in a Domino's cake carrier box. Wrap each layer in plastic wrap and place them in the box with a layer of parchment paper between them. Assemble the cake at your destination—this keeps it sturdy and prevents smudging. If transporting a frosted cake, use a Styrofoam cake carrier with a lid to protect the frosting from temperature changes during transit.
Nutrition facts
Frequently asked questions
Why does this recipe use beet juice instead of food coloring?
Beet juice provides natural color without artificial dyes or additives. It also adds subtle earthiness that complements the cocoa's depth, while maintaining the signature red velvet flavor. The recipe was developed to replicate that classic look using only wholesome ingredients.
Can I make this cake without buttermilk?
Yes! Mix 1 cup milk with 1 tablespoon vinegar or lemon juice, then let it sit for 5 minutes to curdle. This homemade buttermilk substitute works perfectly for the tangy flavor and tender crumb. The key is letting it thicken before using.
How do I prevent my cake from cracking?
Cracking often happens when the cake cools too quickly. Let it cool in the pan for 10 minutes before transferring to a wire rack, and avoid opening the oven door too soon. Also, make sure your oven is fully preheated to 350°F—even heat distribution is critical for even rising.
Can I substitute regular cocoa powder for Dutch-processed?
Dutch-processed cocoa gives the richest flavor and darkest color, but you can use natural cocoa powder if that's what you have. Just add 1/4 teaspoon baking soda to the dry ingredients to neutralize the acidity. The texture will be slightly different, but still delicious!
How do I make this cake gluten-free?
Replace the all-purpose flour with a 1:1 gluten-free baking flour blend (like Bob's Red Mill). Add 1/2 teaspoon xanthan gum to help bind the ingredients. The cake will still be tender, though the crumb may be slightly denser than traditional red velvet.