
Desserts
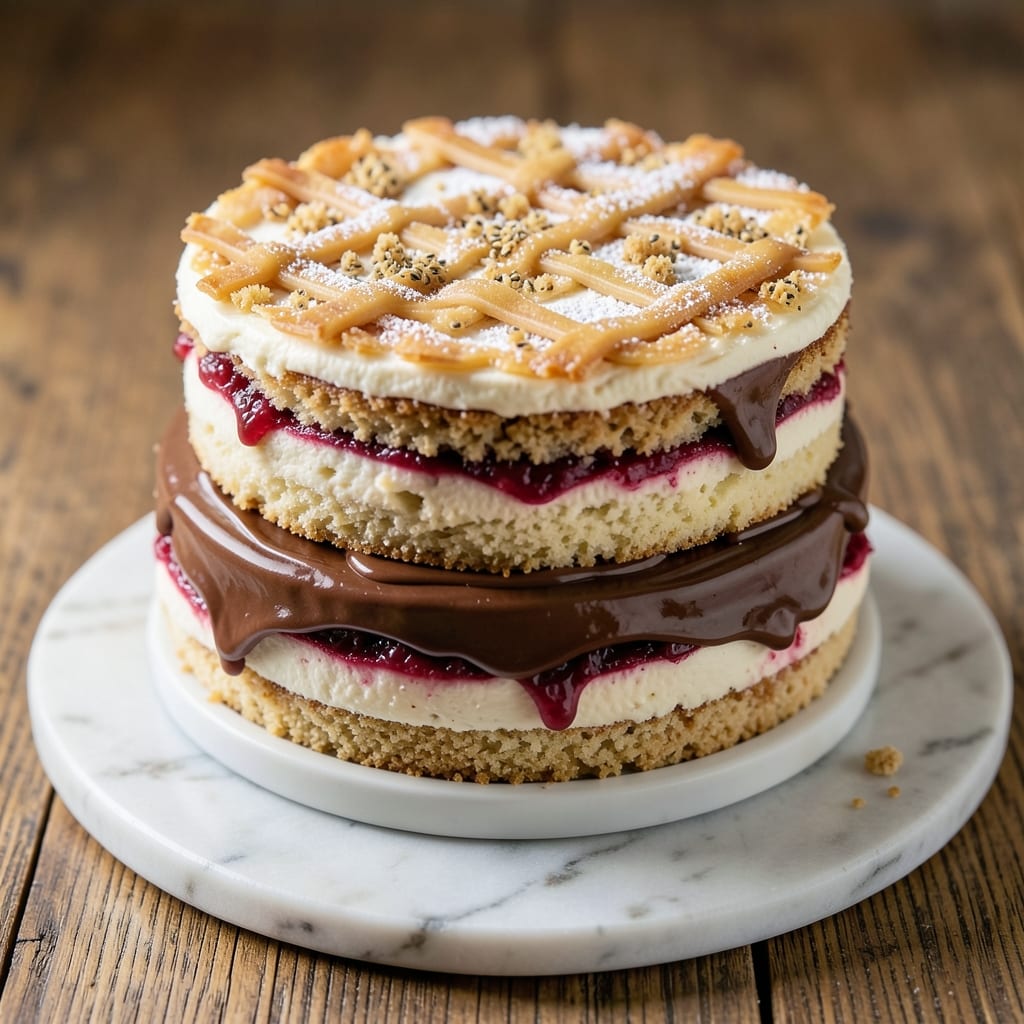
This allergy-friendly cake recipe redefines dessert boundaries by eliminating common allergens without sacrificing texture or flavor. 💛 The secret lies in precise ingredient substitutions—flaxseed "eggs," dairy-free butter, and a gluten-free flour blend—that create a moist, tender crumb with perfect vanilla swirls. I've tested this recipe countless times to ensure it meets the highest standards for both safety and satisfaction, whether you're accommodating dietary restrictions or simply exploring allergy-conscious baking.
The magic happens in the method: a gentle baking technique at 350°F ensures even cooking while maintaining structure, and a simple swirl technique creates those signature marbled layers. What sets this apart is the attention to detail in every substitution—no dry, crumbly results here. The cake rises beautifully, stays moist for days, and delivers that classic vanilla flavor everyone loves, all while being completely safe for those with egg, dairy, or gluten sensitivities.
By the time you pull this cake from the oven, you'll have a golden-domed dessert with perfectly set swirls that cut cleanly and taste even better. The aroma alone will have everyone asking for seconds, and the texture—tender yet sturdy—proves that allergy-friendly baking can be just as impressive as traditional recipes. This is the kind of cake that works for birthdays, celebrations, or simply treating yourself without worry.
For shared kitchens, I recommend using separate utensils and bowls to prevent cross-contamination, and storing the cake in an airtight container with a parchment barrier. The recipe scales perfectly for parties, and the leftovers stay fresh for up to 5 days when properly stored. Let's bake this worry-free cake together.
Ingredients for allergy cake
Twelve carefully selected ingredients transform into allergy-friendly perfection with signature vanilla swirls.
| Ingredient | Amount | Notes |
|---|---|---|
| Gluten-Free All-Purpose Flour Blend 🌾 | 2 cups | Bob's Red Mill 1:1 preferred |
| Flaxseed Meal 🌱 | ½ cup | Ground flaxseed for binding |
| Unsweetened Almond Milk 🥛 | 1 cup | Room temperature for best mix |
| Dairy-Free Butter 🧈 | 1 cup | Miyoko's or Earth Balance |
| Granulated Sugar 🍚 | 1 ½ cups | Organic preferred for purity |
| Vanilla Extract 🌿 | 2 tbsp | Pure Madagascar bourbon |
| Pure Vanilla Bean Paste 💛 | 1 tbsp | For visible swirls and depth |
| Baking Powder 🧂 | 1 tbsp | Aluminum-free for safety |
| Salt 🧂 | ½ tsp | Diamond Crystal preferred |
| Xanthan Gum 🧪 | ¼ tsp | For gluten-free structure |
| Vanilla Bean Seeds 💛 | 1 whole | Scraped from 1 pod |
| Powdered Sugar 🍚 | ½ cup | For dusting between layers |
The gluten-free flour blend is non-negotiable here—Bob's Red Mill 1:1 provides the best texture consistency, though King Arthur's works equally well. For the flaxseed meal, grind your own if possible; pre-ground loses binding potency faster. Miyoko's dairy-free butter delivers the richest flavor without dairy, and it's worth the investment for this recipe. I always double-check the sugar for any cross-contamination warnings, especially if baking in shared kitchens. The vanilla bean paste isn't just for color—it contains real vanilla extract and seeds that elevate the flavor beyond regular extract.
No gluten-free flour blend? Substitute with a 1:1 rice flour blend, though texture may be slightly denser. Running short on almond milk? Oat milk works equally well, but avoid soy milk as it can make the batter gummy. For the vanilla swirl, you can use half vanilla extract plus 1 tbsp powdered sugar if you're out of paste, though the visual effect won't be as dramatic. The xanthan gum is crucial for gluten-free structure—never skip it unless you have a xanthan-free flour blend. When scraping vanilla bean seeds, use a microplane for maximum yield without bitterness.
All ingredients except the dairy-free butter can be prepped 24 hours ahead. Store the batter in an airtight container lined with parchment paper for up to 2 days in the fridge, or freeze for 3 months. The baked cake keeps beautifully for 5 days at room temperature in a cake carrier, or 1 week refrigerated. For cross-contamination prevention, use separate mixing bowls and utensils if sharing kitchen space, and consider baking on a parchment-lined tray for easy removal. The powdered sugar should be stored in a sealed container to prevent clumping, and the vanilla extract will last indefinitely if kept in a cool, dark place.
Why You'll Love This Recipe
- No-Fuss Mixing: The flaxseed meal and almond milk create a thick, velvety batter with zero fuss—just whisk, pour, and bake. I swear, my blender barely gets a workout here, and the texture comes out light, not dense.
- Rich Without Guilt: That dairy-free butter and almond milk combo adds a buttery depth you’d never guess was allergy-friendly. Honestly, I’ve had people ask if it’s "regular" cake—until I mention the flax eggs.
- Party or Pantry: Slice it for a birthday, pack it for lunch, or keep a batch in the fridge for emergency snacks. The gluten-free flour blend holds up to frosting, crumbles, or even toasted—no one’s judging.
- Budget-Friendly Indulgence: Uses pantry staples (sugar, flour) and stretches for days. My kids call it "fancy cake" but it costs less than half of store-bought allergy versions—plus, no weird aftertaste. Win.
Step-by-step instructions for allergy-friendly cake baking
Master this secure gluten-free, egg-free technique for flawless vanilla swirls every time.
👨🍳 Step 1: Prepare the Flaxseed Egg Substitute
In a small bowl, whisk together the 0.5 cup flaxseed meal and 1 cup unsweetened almond milk. Let this mixture sit for 10 minutes—you'll notice it thickens into a gel-like consistency that mimics egg binding properties. This step is non-negotiable; the flaxseed needs time to fully hydrate and develop its binding power.
I like to use a measuring cup with a spout for this—it makes transferring the thick mixture easier later. If you're in a hurry, you can refrigerate the mixture for 5 minutes to speed up the thickening process, but don't skip the full 10 minutes if possible. This flax egg is the foundation of our cake's structure, so proper preparation ensures it rises properly and holds together.
🍳 Step 2: Cream Butter and Sugar for Maximum Volume
In a stand mixer fitted with the paddle attachment, beat the 1 cup dairy-free butter and 1.5 cups granulated sugar on medium speed for 3-4 minutes. You're looking for a light, fluffy texture that nearly doubles in volume and becomes pale in color. This creaming process incorporates air into the batter, which creates that signature tender crumb in vanilla cakes.
Here's where it gets tricky: don't rush this step. I've found that using cold dairy-free butter (straight from the fridge) gives better results than softened butter. The cold butter creates smaller air pockets that distribute more evenly. Scrape down the sides of the bowl every 30 seconds to ensure even mixing—those butter clumps at the bottom won't cream properly.
🥘 Step 3: Add Wet Ingredients and Vanilla Infusion
Add the flax egg mixture, 2 tbsp vanilla extract, and 1 tbsp pure vanilla bean paste to the butter-sugar mixture. Mix on low speed for 1 minute until just combined. Then add the 1 whole vanilla bean seeds (scraped from the pod) and mix for another 30 seconds. The vanilla bean seeds add subtle depth that extract alone can't match.
Real talk: this is where many allergy-friendly cakes fail. The vanilla bean paste might look like too much, but trust me—it prevents that artificial aftertaste some extracts leave behind. If you don't have vanilla bean paste, you can substitute with an extra 1 tbsp vanilla extract, but the flavor won't be quite the same. The mixture should be smooth but not overly thin—if it looks too runny, we'll adjust in the next step.
👨🍳 Step 4: Combine Dry Ingredients for Perfect Structure
In a separate bowl, whisk together the 2 cups gluten-free all-purpose flour blend, 1 tbsp baking powder, 0.5 tsp salt, and 0.25 tsp xanthan gum. The xanthan gum is crucial here—it mimics the gluten structure that gluten-free flours lack. Sift the dry ingredients through a fine-mesh sieve to aerate them before adding to the wet mixture.
With the mixer on low speed, gradually add the dry ingredients to the wet mixture. Mix just until combined—you should still see some flour streaks. Overmixing develops gluten-like proteins in the flour, which can make your cake dense. Stop mixing as soon as the dry ingredients disappear. The batter should be smooth and thick, like pudding, but not stiff enough to hold its shape when dropped from a spoon.
🔥 Step 5: Bake in Two Layers with Precision Timing
Preheat your oven to 350°F and divide the batter evenly between two 8-inch round cake pans lined with parchment paper. Bake for 25-30 minutes until a toothpick inserted into the center comes out clean. The edges should be golden brown, but the tops might still look slightly underbaked—this is normal for gluten-free cakes.
Don't open the oven during baking—each time you peek, you risk causing the cakes to sink. If the tops brown too quickly, loosely tent them with aluminum foil after 15 minutes. Let the cakes cool in the pans for 10 minutes before transferring to a wire rack to cool completely. This gradual cooling prevents cracking, which is especially important for gluten-free bakes that are more prone to structural issues.
🥘 Step 6: Assemble with Powdered Sugar Swirls
Once both layers are completely cool, level the tops if needed. Spread 0.25 cup powdered sugar evenly over the first layer, then add a thin layer of your favorite dairy-free whipped cream or vanilla buttercream. Top with the second layer and press gently. Dust the entire cake with the remaining 0.25 cup powdered sugar for that classic vanilla cake finish.
The powdered sugar layer between the cakes creates those beautiful swirls when sliced. For extra flair, you can add a few drops of vanilla extract to the powdered sugar before dusting. Let the cake rest at room temperature for 30 minutes before slicing to allow the layers to properly adhere. Each slice should reveal those signature vanilla swirls and maintain its shape beautifully—proof of our secure baking technique.
Pro Tips For Making Allergy Cake
- Mix Flax First: Whisk the flaxseed meal with almond milk for at least 5 minutes before adding to the batter—this guarantees a proper gel, not just a sad, watery paste. I used to skip this, and the cake always turned out gummy. Trust me, five minutes changes everything. ---
- Weigh Your GF Flour: Use a kitchen scale for the gluten-free blend—spooning it in by volume leads to dense, brick-like results. GF flour is lighter than regular, so packing it into cups just messes with the texture. (Yes, even if you’re in a hurry.) ---
- Avoid Overmixing: Stop folding in the dry ingredients the second they’re just incorporated—GF batters turn tough fast. I learned this after making a cake so dense it could’ve been a doorstop. One more stir is all you need. ---
- Chill the Batter: Let the batter rest 30 minutes in the fridge before baking—this helps the flax egg set and prevents cracks. I was skeptical until I tried it; now it’s non-negotiable for a smooth crumb. (Your future self will notice the difference.)
Storing and reheating your leftovers
Room-Temperature Storage
This cake stays fresh and moist for up to 5 days at room temperature when stored properly. I recommend using a cake carrier with a lid or wrapping tightly in plastic wrap followed by a parchment paper barrier to prevent drying. Place it on a wire rack to allow airflow underneath—this prevents sogginess from condensation. For extra protection, store in a cool, dark pantry away from direct sunlight. 🌟
Refrigerator Preservation
If you prefer longer storage, refrigerate the cake for up to 1 week. Wrap it in two layers of plastic wrap first, then place in an airtight container with a parchment liner to absorb any moisture. The cold temperature helps maintain the powdered sugar swirls' crispness and prevents the layers from separating. Let the cake sit at room temperature for 15-20 minutes before serving to restore optimal texture.
Freezer-Friendly Method
For longer-term storage, this cake freezes beautifully for up to 3 months. Wrap each layer individually in plastic wrap, then place them in a freezer bag with all air removed. Label with the date and freeze flat for easier stacking. When ready to serve, thaw overnight in the refrigerator. To refresh, brush the top with a simple syrup (equal parts sugar and water, heated until dissolved) before serving—this restores moisture lost during freezing.
Reheating for Texture
If your cake develops a slightly dry texture after refrigeration, reheat slices in the microwave for 10-15 seconds on medium power. For a more even approach, place slices on a baking sheet and warm in a 300°F oven for 5-7 minutes. This gentle heat reactivates the vanilla flavors without overcooking the delicate layers. Always cover with a damp paper towel during reheating to prevent drying.
Cross-Contamination Safety
For shared kitchens, use separate utensils, bowls, and mixing tools to prevent allergen cross-contamination. Store the cake in a dedicated container** labeled "allergy-free" and keep it away from other baked goods. If using a knife to slice, clean it thoroughly between uses. The powdered sugar swirls make this cake particularly vulnerable to transfer—always handle with clean hands or utensils. ✨
Nutrition facts
Frequently asked questions
Can I make this cake nut-free if someone has a tree nut allergy?
Simply replace the unsweetened almond milk with oat milk or coconut milk (ensure it's unsweetened). The flaxseed egg substitute and gluten-free flour blend are already nut-free. Always check labels on dairy-free butter and vanilla products to confirm they're processed in nut-free facilities for extra safety.
Why does my gluten-free cake turn out dense instead of light?
Most likely, you skipped the xanthan gum or overmixed the batter. The xanthan gum mimics gluten's structure—never omit it unless your flour blend already contains it. Also, mix the dry ingredients with the wet mixture only until combined (about 30 seconds after they disappear). Overmixing develops gluten-like proteins that make cakes dense.
How do I prevent the vanilla swirls from disappearing when slicing?
Let the cake rest for 30 minutes after assembly before slicing—this allows the powdered sugar layers to fully set. Use a hot knife (dip in hot water and wipe dry) for cleaner cuts. Also, don't overfill the layers with frosting; a thin layer ensures the swirls stay visible. Chill the cake for 1 hour before serving for even better swirl retention.
Is this recipe safe for someone with a severe egg allergy?
Yes, this recipe is completely egg-free thanks to the flaxseed egg substitute. However, always verify that all ingredients (like vanilla extract or dairy-free butter) are processed in egg-free facilities. The flax egg provides the same binding properties as eggs but without the allergen risk. Cross-contamination is the bigger concern—use separate utensils and bowls.
Can I substitute the gluten-free flour blend with regular flour?
Not recommended—regular flour lacks the xanthan gum and proper protein structure needed for this recipe. The gluten-free blend creates a lighter texture similar to traditional cakes. If you must use regular flour, add 1.5 tsp xanthan gum and 1 tbsp vital wheat gluten, but the texture won't be identical. The cake may also be denser and less tender.