
Desserts
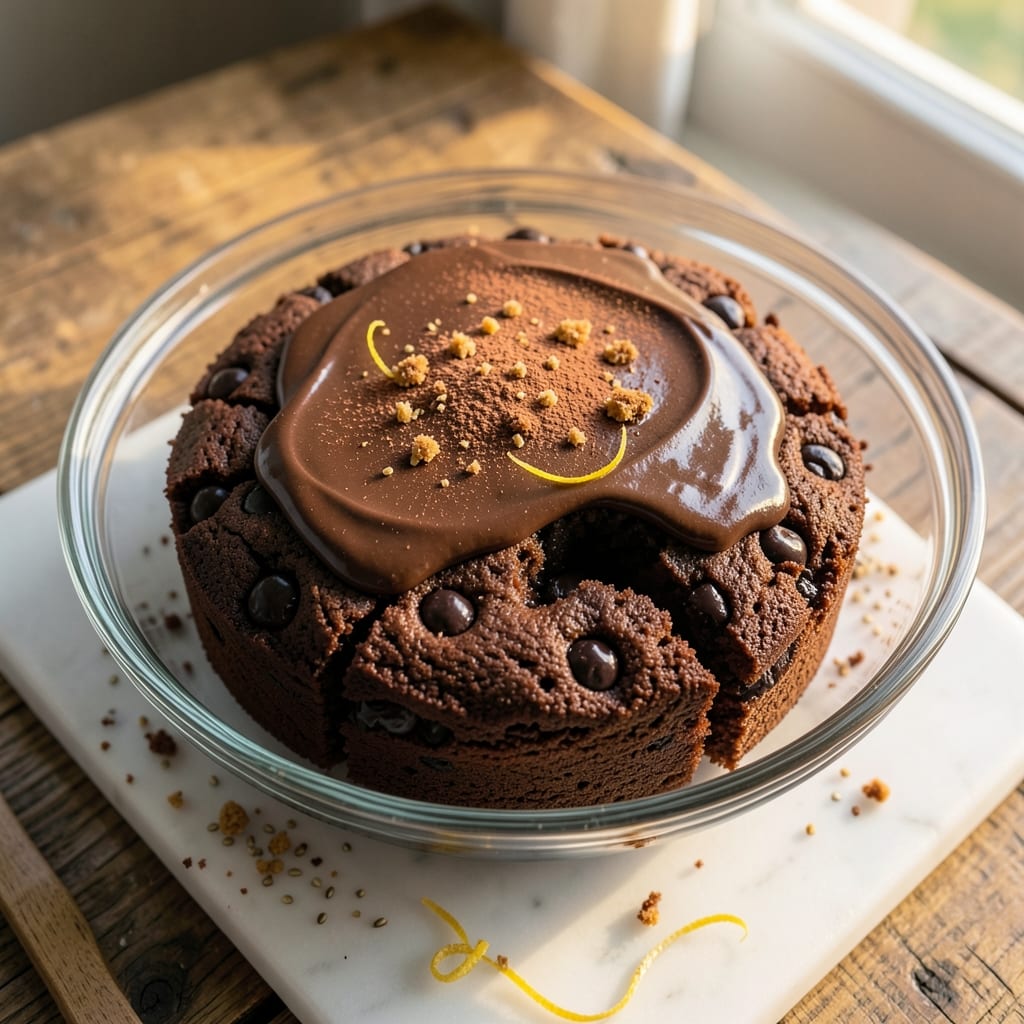
This allergy-free chocolate cake delivers the perfect balance of moist layers and a crispy top without eggs, dairy, or gluten. After years of perfecting allergy-friendly baking, I’ve developed a recipe that meets dietary needs without sacrificing texture or flavor. The secret lies in flax eggs for binding and dairy-free butter that mimics rich, velvety results.
The foundation of this cake starts with a simple yet effective substitution method—flax eggs replace traditional eggs for moisture, while dairy-free butter ensures a tender crumb. No special equipment is needed, just a standard 9-inch pan and a few key techniques to guarantee that crispy top you crave. The cake bakes up with a golden crust that contrasts beautifully with its fudgy interior.
What sets this recipe apart is its foolproof approach to texture—no dry crumb or greasy aftertaste. Every bite offers a perfect harmony of chocolatey richness and a slight crispness at the edges, making it ideal for birthdays, celebrations, or simply satisfying a chocolate craving. The flavor is deep and indulgent, proving allergy-free desserts can be just as satisfying as traditional ones.
Whether you're baking for someone with dietary restrictions or simply want a reliable recipe, this cake delivers restaurant-quality results at home. With straightforward instructions and minimal ingredients, you’ll have a showstopping dessert ready in under an hour. Let’s get baking!
Ingredients for allergy free chocolate cake
Eleven simple ingredients transform into a restaurant-quality allergy-free chocolate cake with perfect texture.
| Ingredient | Amount | Notes |
|---|---|---|
| All-Purpose Flour (Gluten-Free 1:1 Blend) 🌾 | 1 ½ cups | Ensures proper texture without gluten |
| Dairy-Free Dark Chocolate Chips 🍫 | 1 ½ cups | 70% cocoa or higher for rich flavor |
| Unsweetened Applesauce 🍎 | ½ cup | Replaces eggs for moisture |
| Dairy-Free Butter (e.g., Earth Balance) 🧈 | ¾ cup | Melted for rich, velvety texture |
| Granulated Sugar 🍚 | 1 ¼ cups | Ensures proper sweetness balance |
| Ground Flaxseed 🌱 | ¼ cup | Mixed with water for flax eggs |
| Baking Powder 🧂 | 1 tsp | Ensures proper rise |
| Salt 🧂 | ½ tsp | Enhances chocolate flavor |
| Vanilla Extract 🌿 | 1 tbsp | Pure Madagascar bourbon preferred |
| Hot Water 💧 | ½ cup | Activates baking powder for crispy top |
| Powdered Sugar (Optional) 🍚 | ¼ cup | For dusting the crispy top |
The gluten-free flour blend is non-negotiable for proper texture—King Arthur or Bob’s Red Mill brands deliver consistent results. For chocolate chips, Enjoy Life brand ensures no cross-contamination with allergens. The dairy-free butter must be high-fat content (like Earth Balance) to mimic traditional butter’s richness. Freshly ground flaxseed yields better binding than pre-ground, so grind it yourself if possible. The hot water technique creates that coveted crispy top—don’t skip this step for that restaurant-quality finish.
No applesauce? Mashed banana or pumpkin puree works in a pinch, though flavor may shift slightly. Substitute dairy-free butter with coconut oil if needed, but texture may be slightly denser. For chocolate chips, chopped dairy-free chocolate bars work if you’re in a bind. The flax eggs (ground flaxseed + water) must be rested for 5 minutes before mixing to maximize binding potential. If you prefer a smoother texture, blend the chocolate chips into the batter for a fudgier result.
Store baked cake in an airtight container at room temperature for 3 days or refrigerated for 5 days to maintain moisture. The crispy top stays best at room temperature—reheat slices for 10 seconds in the microwave if refrigerated. Freezes beautifully for 3 months when wrapped tightly in plastic and foil. For extra indulgence, drizzle with dairy-free chocolate sauce before serving.
Why You'll Love This Recipe
- No-Fuss Mixing: I swear by this recipe—just toss everything in one bowl. No sifting, no extra steps, just dump the gluten-free flour blend, fold in the applesauce, and let the dark chocolate chips do their magic. Honestly, my kids think I’m a baking genius, and I’m just stirring.
- Rich Without Guilt: That applesauce keeps it moist, but the dairy-free butter and dark chocolate chips? Pure decadence. It’s got this deep, fudgy richness that still feels light—no heavy aftertaste, just pure chocolate satisfaction.
- Birthday or Breakfast: Serve it warm with vanilla ice cream for a birthday celebration, or slice it cold for a quick breakfast with coffee. Here’s what sold me—it works just as well in a lunchbox as it does on a fancy plate.
- Budget-Friendly Leftovers: Uses pantry staples (seriously, check your fridge first) and keeps beautifully for days. I’ll be real: the second slice is even better than the first because the flavors meld overnight. Plus, it’s cheaper than takeout—win.
Step-by-step instructions for allergy-free chocolate cake
This method delivers a perfectly moist interior with that coveted crispy top—every time.
Prepare the Flax Egg and Melt the Butter
In a small bowl, combine the 0.25 cup ground flaxseed with the 0.5 cup hot water. Stir vigorously and let sit for 5 minutes until it thickens into a gel-like consistency resembling an egg. This flax egg provides the moisture and binding properties typically found in traditional eggs.
While that thickens, melt the 0.75 cup dairy-free butter in a microwave-safe bowl in 30-second intervals, stirring between each, until completely smooth. The butter should be warm but not hot—just cool enough to handle. This melted butter creates the rich, velvety texture that makes this cake irresistible. Let it cool slightly before using to prevent overmixing the batter later.
Mix Dry Ingredients and Combine Wet Components
In a large mixing bowl, whisk together the 1.5 cups all-purpose flour (gluten-free 1:1 blend), 1 tsp baking powder, and 0.5 tsp salt. Sift the mixture once to eliminate any potential lumps, which is crucial for achieving that light, airy texture. Set aside the dry ingredients for now.
In a separate medium bowl, combine the 1.25 cups granulated sugar, 0.5 cup unsweetened applesauce, melted butter, and 1 tbsp vanilla extract. Mix until fully incorporated, creating a smooth, homogenous wet mixture. The applesauce replaces eggs while maintaining moisture, and the vanilla extract enhances the chocolate flavor profile. This step ensures all wet ingredients are properly blended before combining with the dry ingredients.
Combine Wet and Dry Ingredients
Gradually add the dry ingredients to the wet mixture, mixing on low speed with an electric mixer or by hand using a spatula. Mix just until combined—do not overmix—as this can develop gluten in the gluten-free flour and result in a dense cake. Stop mixing as soon as the batter comes together, leaving a few streaks of flour visible. The goal is to maintain a light, tender crumb.
Fold in the 1.5 cups dairy-free dark chocolate chips by hand using a silicone spatula. Ensure they are evenly distributed throughout the batter. The chocolate chips will melt slightly during baking, creating pockets of rich, gooey chocolate in every bite. Avoid overmixing at this stage—gentle folding preserves the cake's moisture and texture.
Prepare the Cake Pan and Bake
Preheat your oven to 350°F. Generously grease an 8-inch round cake pan with baking spray or a thin layer of dairy-free butter, then line the bottom with parchment paper for easy removal. The pan should be prepared thoroughly to prevent the cake from sticking, especially important for allergy-friendly recipes where traditional butter isn't an option.
Pour the batter into the prepared pan and smooth the top with a spatula. Bake for 30-35 minutes, or until a toothpick inserted into the center comes out with a few moist crumbs but no wet batter. The cake should have a deep golden brown top with slight cracking, indicating it's developed that coveted crispy crust while remaining moist underneath. Rotate the pan halfway through baking for even heat distribution.
Cool and Serve
Remove the cake from the oven and let it cool in the pan for 10 minutes. Then transfer it to a wire rack to cool completely. This gradual cooling process prevents the cake from developing a soggy bottom. Once fully cooled, dust the top generously with the optional 0.25 cup powdered sugar using a fine-mesh sieve for that professional finish.
Slice the cake into 8 equal wedges and serve immediately. The interior should be moist and tender, while the top remains crispy. For best results, serve at room temperature, allowing the flavors to fully develop. This allergy-friendly chocolate cake delivers all the richness and texture of traditional recipes without compromising on quality.
Pro Tips For Making Allergy Free Chocolate Cake
- Measure Flour Right: Fill your gluten-free 1:1 blend cup with the flour, then level it with a knife—don’t scoop. I used to pack it down like regular flour, and the cake turned dense. This blend needs air, not compression. ---
- Melt Butter Slowly: Warm your dairy-free butter in the microwave for 20-second bursts, stirring between each, until just melted—not hot. Overheating turns it greasy, and the cake ends up oily instead of tender. ---
- Fold Chips Gently: Toss the chocolate chips into the batter, then use a spatula to fold them in just until distributed. Dumping them in and mixing hard breaks them into dust, which ruins the texture. ---
- Test Doneness Early: Check the cake at 25 minutes with a toothpick—it should come out with a few moist crumbs, not wet batter. Gluten-free cakes dry out fast, so pull it sooner rather than later.
Troubleshooting this dish
Dense Crumb Fix
If your cake turns out dense instead of moist, the issue is likely overmixing or insufficient leavening. First, ensure you're using fresh baking powder—old baking powder loses potency. Also, whisk the dry ingredients just until combined, and fold in chocolate chips gently to avoid developing gluten in the gluten-free flour. For extra lift, add ½ tsp extra baking powder or ¼ tsp cream of tartar to the dry mix. 💡
Cracked Top Solutions
Excessive cracking usually means the cake dried out too quickly. To prevent this, reduce oven temperature to 325°F and bake for 40-45 minutes instead of 350°F. Also, cover the cake loosely with foil after 20 minutes to trap moisture. For a crispy top without cracks, brush the batter with a thin layer of dairy-free milk before baking—this creates a protective barrier. 🌟
Dry Texture Prevention
Dry cake often results from overbaking or using too much flour. Always check for doneness with a toothpick—it should have a few moist crumbs but no wet batter. If your cake dries out, try adding 1 tbsp extra applesauce to the batter or covering it with a damp towel while cooling. For extra moisture, drizzle with simple syrup (equal parts sugar and water, heated until dissolved) after baking. ✨
Sticky Cake Pan
Sticking happens when the pan isn’t properly prepared. Always grease with dairy-free butter and line the bottom with parchment paper before pouring batter. For stubborn sticking, chill the pan for 10 minutes before removing the cake. If it still sticks, run a thin knife around the edges while the cake is still warm—this creates a clean release. 🔥
Flat Cake Troubleshooting
A flat cake usually means insufficient leavening or underbaked batter. Double-check your baking powder (it should be fresh) and ensure you mix just until combined—overmixing deflates the air bubbles needed for rise. For extra lift, whisk egg whites separately (if egg-free isn’t required) and fold them into the batter. If using flax eggs, rest them for 5-10 minutes before mixing to maximize binding. 💪
Chocolate Sinking Issue
If chocolate chips sink to the bottom, the batter was likely too thick or the oven temperature too high. To fix this, fold in chocolate chips last and gently stir just until distributed. For a smoother texture, melt the chocolate chips slightly (30 seconds in microwave) before folding. If the cake is already baked, reheat slices for 10 seconds to remelt the chocolate slightly. 🍫
Nutrition facts
Frequently asked questions
Can I make this allergy-free chocolate cake without applesauce?
Yes! Swap the 0.5 cup unsweetened applesauce for 0.5 cup mashed banana or 0.5 cup pumpkin puree for moisture. For a neutral flavor, use 0.5 cup dairy-free yogurt (like coconut or almond). Just note that banana may add slight sweetness, while pumpkin adds earthy notes.
Why does my allergy-free chocolate cake turn out dry?
Dry texture usually comes from overbaking or too much flour. Always check doneness with a toothpick—it should have a few moist crumbs but no wet batter. If your cake dries out, try adding 1 tbsp extra applesauce to the batter or covering it with a damp towel while cooling. For extra moisture, drizzle with simple syrup (equal parts sugar and water, heated until dissolved) after baking.
Is this recipe nut-free and soy-free?
This recipe is nut-free and soy-free as written, but always double-check your ingredients! Use certified gluten-free flour blends and verify that your dairy-free butter and chocolate chips are processed in nut-free facilities. For extra safety, opt for Enjoy Life brand chocolate chips, which are top-8 allergen free.
Can I make this cake in a different pan size?
For an 8-inch round pan, this recipe yields perfect results. For a 9-inch pan, reduce baking time by 5-7 minutes (check at 28 minutes). For a loaf pan, bake at 325°F for 50-55 minutes—cover loosely with foil after 30 minutes to prevent drying. Adjust baking times based on your oven's hot spots.
How do I store leftovers to keep them fresh?
Store baked cake in an airtight container at room temperature for 3 days or refrigerated for 5 days. The crispy top stays best at room temperature—reheat slices for 10 seconds in the microwave if refrigerated. For longer storage, freeze slices wrapped tightly in plastic and foil for up to 3 months. Thaw at room temperature before serving.