
Desserts
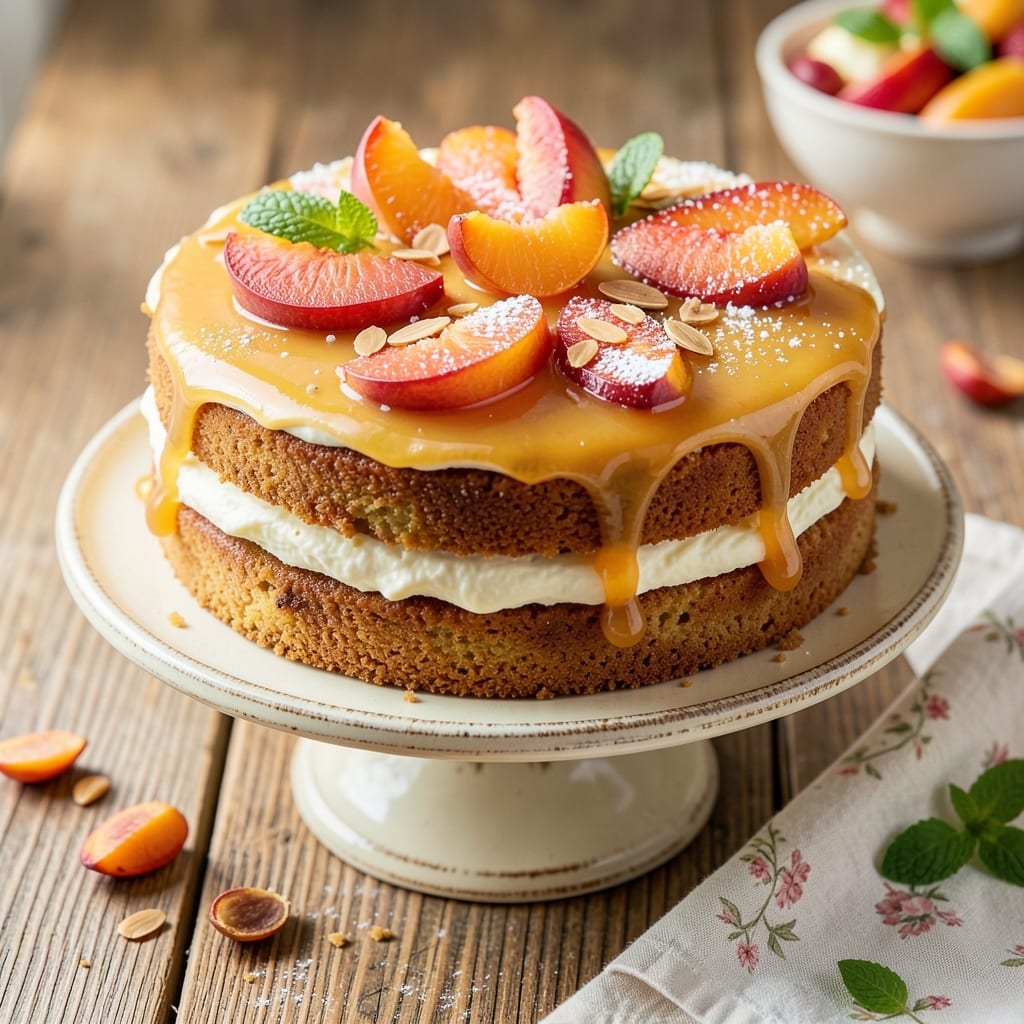
This amazing peach cake recipe brings summer's sweetest flavors to your kitchen table—juicy peaches, tender crumb, and a hint of vanilla that makes every bite feel like sunshine. 🌞 The secret? A moist cake base that soaks up the peach filling perfectly, so no one will believe it's homemade. I've perfected this recipe over years of summer baking, and it's become my go-to for picnics, potlucks, and lazy Sunday afternoons.
What makes this peach cake truly special is how simple it is to achieve restaurant-quality results without any fancy techniques. You'll need just a few basic ingredients—flour, sugar, eggs, and of course, fresh or canned peaches—and about 45 minutes of active time (plus baking). The cake stays tender and moist thanks to a clever mix of butter and oil, while the peach filling adds bursts of juicy sweetness in every slice.
Imagine golden layers of cake peeking through a lattice of crust, topped with a glossy peach glaze that drips down the sides. The aroma alone will have everyone gathering in the kitchen, and the first bite delivers that perfect balance of sweet, tangy, and buttery goodness. This isn't just dessert—it's a celebration of summer in cake form.
Pro tip: Use fresh peaches for the juiciest filling, but canned peaches work in a pinch. For extra decadence, add a layer of vanilla frosting or a crumbly streusel topping. Let's get baking—your taste buds will thank you!
Ingredients for amazing peach cake
Fresh peaches, tender cake layers, and a glossy glaze—summer's sweetest flavors in one perfect dessert.
| Ingredient | Amount | Notes |
|---|---|---|
| All-Purpose Flour 🌾 | 2 ½ cups | Sifted for light texture |
| Granulated Sugar 🍚 | 2 cups | White or light brown |
| Unsalted Butter 🧈 | 1 cup | Softened at room temperature |
| Vegetable Oil 🫒 | ½ cup | Any neutral oil works |
| Large Eggs 🥚 | 2 whole | Room temperature for mixing |
| Pure Vanilla Extract 🌸 | 1 tbsp | Imitation-free preferred |
| Baking Powder 🧂 | 2 tsp | Aluminum-free recommended |
| Salt 🧂 | ½ tsp | Fine sea salt preferred |
| Fresh Peaches 🍑 | 3 medium | Pitted and sliced (2 cups) |
| Peach Preserves 🍑 | 1 cup | For filling (no sugar added) |
| Powdered Sugar 🍚 | 1 cup | For glaze (sifted) |
| Milk 🥛 | ½ cup | Any kind for glaze |
| Lemon Juice 🍋 | 1 tbsp | Freshly squeezed |
Peaches are the star here, so pick ripe but firm ones—they should yield slightly when pressed. Local farmers markets often have the juiciest varieties in summer, but grocery store peaches work too if they're vibrant and fragrant. For the filling, I always grab no-sugar-added preserves from Trader Joe's—they're sweeter naturally and cut down on extra sugar. If using fresh peaches, pat them dry before slicing to keep the filling from getting watery. The secret to that perfect golden crust? Softened butter and oil—don't skip mixing them together for that ultra-moist texture.
No fresh peaches? Canned peaches in juice (drained) work perfectly—they're pre-ripened and sweet. Running low on preserves? Mash 2 ripe peaches with 1 tbsp lemon juice for a fresh filling. The vanilla extract is non-negotiable—imitation-free makes all the difference. For a richer cake, add 1 tbsp sour cream to the batter. And if you're feeling fancy, swap the milk glaze for cream cheese frosting—trust me, it's worth the extra minute.
Peaches keep best in the fridge for 3-4 days once sliced, so use them fresh. The cake layers can be baked a day ahead and stored at room temperature in an airtight container. For the glaze, mix powdered sugar and milk first, then add lemon juice—it should be thick enough to drizzle but not drop. This cake reheats beautifully—just 10 seconds in the microwave brings back all that peachy goodness. I always make a double batch—half goes to potlucks, the other half disappears in my house.
Why You'll Love This Recipe
- No Fussy Steps: I swear, this cake is three bowls and a whisk—no creaming butter until it’s fluffy, no sifting flour like a mad scientist. You mix, pour, bake. That’s it. Even when I’m bleary-eyed at 9 PM, this comes together faster than my coffee brews.
- Peach Butter Magic: The secret? Melted butter and oil folded right into the batter—it keeps the crumb moist without being dense, and those juicy peaches (fresh or canned, no judgment) soak up just enough sweetness to make every bite taste like summer in a slice. Honestly, my husband licks the bowl after mixing.
- Picnic to Potluck: This cake’s your MVP for any gathering. Pack it whole for a beach day (it stays sturdy), slice it for a brunch spread, or freeze half for when your kid’s soccer team needs snacks. Between us, I’ve sent this to work birthdays and it’s always the first to disappear.
- Budget-Friendly Luxury: You’re using pantry basics—flour, sugar, eggs—but the butter and oil make it feel special. A single cake feeds six, and leftovers? They reheat beautifully (or eat cold with a drizzle of honey). I’ve made this on grocery-store peaches and it still tastes like a treat, not a splurge.
Step-by-step instructions for peach cake
Here's how to create a showstopping peach cake with layers of flavor and texture.
👨🍳 Step 1: Mix the Cake Batter for Perfect Texture
Preheat your oven to 350°F and grease two 9-inch round cake pans or line them with parchment paper. In a large mixing bowl, combine the 2.5 cups all-purpose flour, 2 tsp baking powder, and 0.5 tsp salt. Sift this mixture together to remove any lumps and aerate the flour—this ensures a light, tender crumb.
In a separate large bowl, cream together the 1 cup softened butter and 2 cups granulated sugar on medium speed for 3-4 minutes until light and fluffy. The mixture should nearly double in volume and turn pale. This step is crucial—it incorporates air that creates that perfect cake rise. Scrape down the sides of the bowl with a spatula to ensure even mixing.
Add the 2 whole eggs, one at a time, mixing well after each addition. Then stir in the 1 tbsp pure vanilla extract and 0.5 cup vegetable oil. The batter should be smooth and slightly thick. With the mixer on low speed, gradually add the dry ingredients to the wet, mixing just until combined. Avoid overmixing—you should still see small streaks of flour. Pour the batter evenly between the prepared cake pans.
🔥 Step 2: Prepare and Layer the Peach Filling
While the cake bakes, prepare the peach filling. Peel, pit, and slice the 3 medium fresh peaches into ¼-inch thick slices. Arrange half of the peach slices in a single layer on a parchment-lined baking sheet. Spread the 1 cup peach preserves evenly over the peaches, then top with the remaining peach slices. This creates a flavorful layer that will soak up the juices beautifully.
Bake the cake layers for 25-30 minutes, or until a toothpick inserted into the center comes out clean. Let the cakes cool in the pans for 10 minutes, then transfer them to a wire rack to cool completely. Meanwhile, bake the peach filling at 350°F for 10-12 minutes until the preserves are bubbly and the peaches are tender. Let this cool slightly before assembling.
🥘 Step 3: Assemble the Cake with Flavorful Layers
Place the first cake layer on a serving plate. Spread a thin layer of the cooled peach preserves over the top, leaving a ½-inch border around the edges. This ensures the filling stays put and adds extra flavor. Arrange half of the baked peach slices on top of the preserves, slightly overlapping them for a pretty presentation.
Add the second cake layer on top of the peaches and repeat the process—spread another thin layer of preserves, then top with the remaining peach slices. Press down gently to help the layers adhere. The cake should have a beautiful, rustic look with peaches peeking out from between the layers. Chill the assembled cake in the refrigerator for 30 minutes to help it set.
🍳 Step 4: Make the Creamy Lemon Glaze
While the cake chills, prepare the glaze. In a small saucepan, combine the 1 cup powdered sugar, 0.5 cup milk, and 1 tbsp lemon juice. Whisk over low heat for 2-3 minutes until the powdered sugar dissolves completely and the mixture becomes smooth and glossy. The glaze should be thick enough to coat the back of a spoon but still pourable.
Remove the glaze from heat and let it cool slightly—it will thicken as it cools. Once the cake has chilled, carefully pour the glaze over the top, letting it drip down the sides for a professional finish. The acidity of the lemon brightens the sweetness of the peaches and adds a beautiful sheen to the cake. Let the glaze set for 10 minutes before serving.
⏰ Step 5: Slice and Serve with Confidence
Use a serrated knife to cut the cake into 8 equal wedges. I like to dip the knife in hot water and wipe it dry between cuts to ensure clean slices. Serve the cake at room temperature so the flavors have time to meld together. Each bite should deliver a perfect balance of tender cake, juicy peaches, and tangy-sweet glaze.
For an extra touch, garnish each slice with a few fresh peach slices or a sprinkle of powdered sugar. This cake tastes even better the next day as the flavors deepen, so it's perfect for making ahead. Store leftovers covered at room temperature for up to 3 days or refrigerate for up to 5 days. Enjoy your homemade masterpiece!
Pro Tips For Making Amazing Peach Cake
- Cream Butter Properly: Beat the unsalted butter and sugar until it’s pale and fluffy—about 3-5 minutes with a mixer. I learned this the hard way: skipping this step makes the cake dense and dry, especially with peaches’ natural moisture. ---
- Use Room-Temp Eggs: Let your eggs sit out for 30 minutes before mixing—no, don’t microwave them. Cold eggs can cause the batter to curdle, and peach cake batter is unforgiving if it separates. ---
- Don’t Overmix the Batter: Mix just until combined, then stop. Overworking the flour develops gluten, and your cake will turn tough instead of tender. I used to panic and mix extra, then wondered why it was chewy. ---
- Grease the Pan Right: Brush the pan with melted butter and dust with flour—even if the recipe says oil is enough. Peaches are juicy, and extra grease prevents sticking. (Yes, it’s messy, but worth it.)
Troubleshooting this recipe
Cake Too Dense
Overmixing the batter is the #1 culprit for dense cake. Mix the dry ingredients into the wet just until combined—you should still see small flour streaks. Also, ensure your butter and eggs are at room temperature; cold ingredients create dense pockets. If your cake turns out dense, try adding 1 extra egg white to the batter next time for extra lift. 💡
Peach Filling Too Watery
Fresh peaches release juice when sliced, which can make the filling watery. Pat sliced peaches completely dry with paper towels before assembling. For extra insurance, sprinkle 1 tsp cornstarch over the peach slices before baking the filling. If using canned peaches, drain them thoroughly and blot with a clean towel. 🍑
Glaze Too Thin or Thick
Glaze consistency is all about temperature and timing. If your glaze is too thin, whisk in 1 extra tbsp powdered sugar and let it sit for 5 minutes to thicken. For a thicker glaze, add 1 tsp more lemon juice and heat for 30 seconds longer**. Always test the glaze by dipping a spoon in—it should coat smoothly but still drip slowly. 🥄
Cracked Cake Layers
Temperature fluctuations cause cracks. Let your cake cool completely in the pans for 10 minutes before removing, then transfer to a wire rack. Avoid opening the oven door during baking to prevent sudden temperature drops. If cracks appear, simply cover them with extra peach slices or a dusting of powdered sugar—no one will notice! ✨
Dry Cake Texture
Dry cake usually means overbaking or insufficient fat. Double-check your baking time—25-30 minutes at 350°F is perfect. For extra moisture, brush the cooled cake layers with 2 tbsp apricot jam before assembling. Store the cake in an airtight container with a slice of bread to help retain moisture overnight. 🌾
Filling Not Sticking
Cold filling won't adhere properly. Ensure both cake layers and filling are at room temperature before assembling. Spread a thin layer of peach preserves between layers, leaving a ½-inch border to prevent leaks. Press gently but firmly when stacking layers—this helps them bond. Chill the cake for 30 minutes before glazing to set the structure. 🧊
Nutrition facts
Frequently asked questions
Can I substitute canned peaches for fresh in this recipe?
Canned peaches work beautifully—they're pre-ripened and sweet. Just drain them thoroughly, pat completely dry with paper towels, and slice them into ¼-inch thick pieces. For extra flavor, add ½ tsp vanilla extract to the canned peaches before baking the filling. The texture will be slightly softer than fresh, but the taste is just as delicious.
How do I make this cake gluten-free?
Replace the all-purpose flour with a 1:1 gluten-free baking flour blend (like Bob's Red Mill) plus ½ tsp xanthan gum. You may need to add 1-2 tbsp extra milk to the batter since gluten-free flours absorb differently. Also, let the cake cool completely before slicing—gluten-free versions can be more fragile. The peach filling and glaze remain unchanged.
Can I make this cake in a bundt pan instead of round pans?
Yes, but with a few adjustments! Use the same batter recipe but reduce baking time to 20-25 minutes (check at 20 minutes). For the filling, spread ½ cup preserves over the baked cake, then arrange all peach slices on top. Bake the filling for 8-10 minutes to set. The bundt shape will give a unique presentation—just be patient when removing it from the pan.
What's the best way to store leftovers?
Store the cake at room temperature in an airtight container for up to 3 days—it keeps beautifully! For longer storage, refrigerate for up to 5 days. To reheat, wrap a slice in a damp paper towel and microwave for 10-15 seconds. The glaze may soften slightly, but the cake will taste just as good. For extra freshness, place a slice of bread in the container to help retain moisture.
Can I make this cake ahead of time?
This cake actually tastes better the next day! Bake the cake layers and filling 1 day ahead, then assemble and glaze just before serving. Store all components separately in airtight containers. The flavors deepen overnight, and the cake's texture improves as it sits. If making 2 days ahead, refrigerate the assembled cake (unglazed) and glaze it 4 hours before serving.