
Desserts
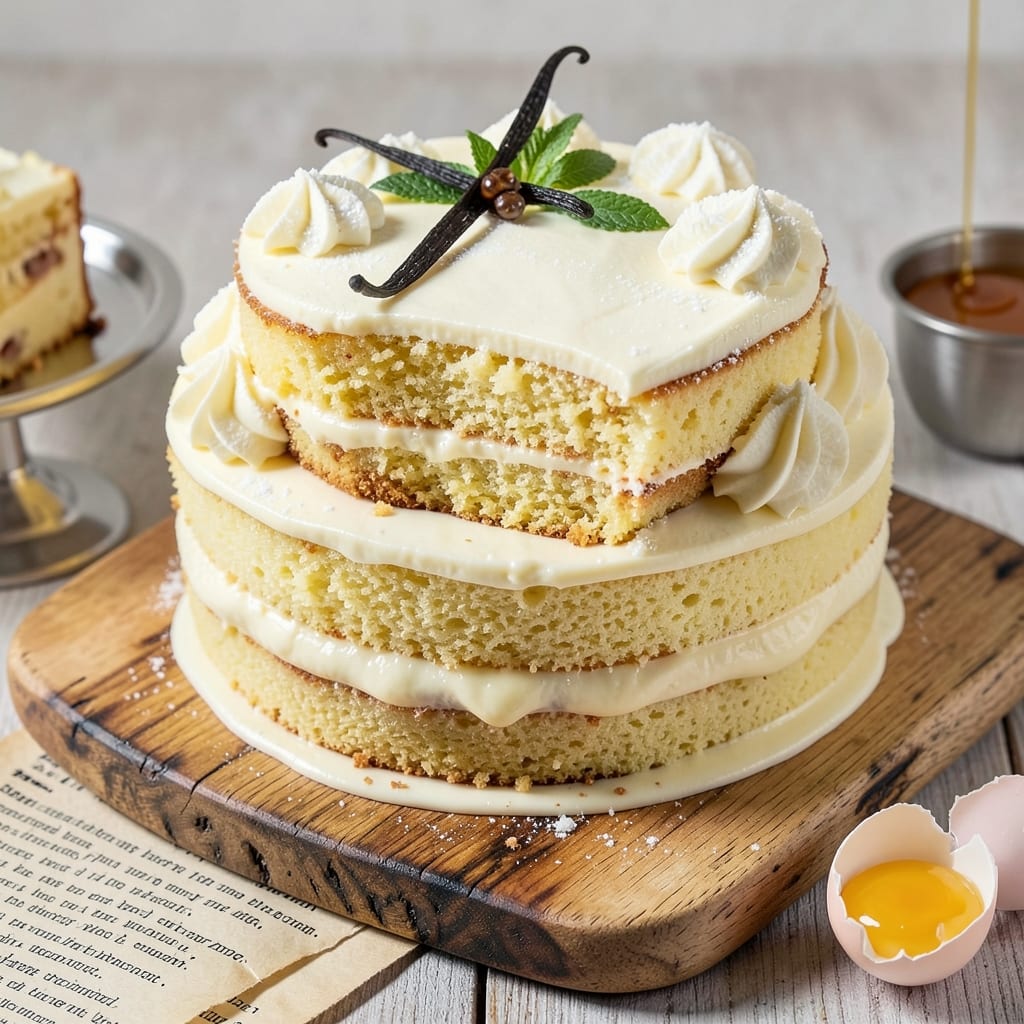
This amazing yellow cake recipe delivers the perfect balance of moist crumb, tender texture, and vanilla bean magic that’ll make your taste buds dance. ✨ I’ve baked countless cakes, and this one stands out because it’s foolproof—no dry layers or crumbly edges, just pure, buttery goodness that disappears in seconds. The secret? A touch of sour cream for moisture and real vanilla bean paste for that signature depth.
What makes this recipe truly special is how it comes together in one bowl—no fancy equipment needed, just basic pantry staples and about 30 minutes of hands-on time. The cake bakes up golden and tender, with a fine crumb that’s light yet substantial. And the frosting? A velvety vanilla bean buttercream that pairs perfectly with the cake’s rich flavor, creating a fusion that’s impossible to resist.
By the time you pull this cake from the oven, your kitchen will smell like pure comfort, and every slice will be moist, flavorful, and topped with a smooth, creamy frosting that melts in your mouth. It’s the kind of cake that’s perfect for birthdays, celebrations, or just because—simple enough for weeknights but impressive enough for special occasions.
Whether you’re a baking newbie or a seasoned pro, this recipe delivers restaurant-quality results with minimal effort. Let’s get started—your taste buds will thank you!
Ingredients for amazing yellow cake
Buttery, moist crumb meets velvety vanilla frosting—just 13 ingredients for pure magic.
| Ingredient | Amount | Notes |
|---|---|---|
| All-Purpose Flour 🌾 | 2 ½ cups | Sifted for light texture |
| Granulated Sugar 🍚 | 2 cups | White or light brown |
| Unsalted Butter 🧈 | 1 cup | Cold, cubed for even mixing |
| Large Eggs 🥚 | 4 whole | Room temperature preferred |
| Vanilla Bean Paste 🌿 | 2 tbsp | Real vanilla for depth |
| Sour Cream 🥛 | ½ cup | Full-fat for moisture |
| Baking Powder 🧂 | 2 tsp | Aluminum-free preferred |
| Salt 🧂 | ½ tsp | Fine sea salt |
| Milk 🥛 | ½ cup | Whole milk for richness |
| Vanilla Extract 🌿 | 1 tbsp | Pure vanilla extract |
| Powdered Sugar 🍚 | 3 cups | For frosting only |
| Heavy Whipping Cream 🥛 | 1 cup | Cold for buttercream |
| Vanilla Bean Seeds 🌿 | 1 tbsp | Scraped from 1 pod |
The flour and butter are your cake’s backbone. King Arthur or Gold Medal flour gives the best rise, but anything labeled 100% bleached works fine. Butter should be cold but not rock-hard—take it out 20 minutes before mixing. Plugrá or Land O’Lakes unsalted butter is my go-to, but any brand is fine. For the vanilla, Madagascar bourbon vanilla bean paste (like Nielsen-Massey) makes all the difference—it’s worth the splurge over imitation extracts. Sour cream keeps the cake tender; don’t skip it, even if you’re watching calories.
No vanilla bean paste? Double the vanilla extract and add 1 tbsp rum or bourbon for depth. Short on powdered sugar? Blend granulated sugar in a food processor for 30 seconds—it’ll work in a pinch. The frosting needs heavy cream, but whipped coconut cream works in a vegan version. For a tangier frosting, add 1 tsp lemon juice. And if your buttercream gets too stiff? Microwave for 10 seconds to soften—it’ll come together perfectly.
Store cake layers wrapped in plastic at room temp for 2 days or in the fridge for 5 days. Frosting keeps 3 days refrigerated or 1 month frozen. Pro tip: Assemble the cake 2 hours before serving—this gives the frosting time to melt slightly and blend with the cake’s flavors. Leftovers? Toast slices in a pan for 1 minute to revive the texture.
Why You'll Love This Recipe
- Buttercream’s Best Friend: I swear by this cake for birthdays, holidays, or just because—it’s the blank canvas that takes frosting like a champ. That rich butter base and vanilla bean paste mean your filling won’t taste like it’s fighting the cake.
- One-Bowl Wonder: Mix, bake, repeat. No fancy techniques here—just creamed butter, sugar, and eggs in one bowl. I’ve made this in my dorm kitchen, a tiny apartment, and even a friend’s tiny apartment (you know who you are).
- Leftover Goldmine: Slice it, wrap it, freeze it—this cake stays moist for days. Honestly, I’ve had it for breakfast, lunch, and dessert over three days without anyone complaining. (Okay, maybe I did.)
- Budget Magic: Butter and eggs make it taste luxurious, but the ingredient list won’t break the bank. Between us, this is the cake I make when I need to impress but also buy groceries. It works.
Step-by-step instructions for vanilla bean frosting fusion magic
Here's how to create a showstopping yellow cake with velvety vanilla frosting—every bite delivers pure magic.
👨🍳 Step 1: Mix Dry and Wet Ingredients Separately
First, sift together the 2.5 cups all-purpose flour, 2 tsp baking powder, and ½ tsp salt in a medium bowl. I like to use a fine-mesh sieve for this—it prevents lumps and ensures a light, airy texture. Set aside until ready. In a separate large bowl, beat the 1 cup cold, cubed unsalted butter with the 2 cups granulated sugar on medium speed for 3-4 minutes until light and fluffy. This creaming process incorporates air, which gives your cake that perfect rise and tender crumb.
Here's the thing—cold butter creates smaller air pockets than softened butter, resulting in a more stable cake structure. You'll know you've done it right when the mixture nearly doubles in volume and becomes pale and smooth. Add the 4 whole large eggs one at a time, mixing well after each addition. Then stir in the 2 tbsp vanilla bean paste and ½ cup sour cream until just combined. The paste adds that luxurious vanilla depth without being too sweet.
🍳 Step 2: Combine Wet and Dry Ingredients
With the mixer on low speed, gradually add the dry ingredients to the wet mixture. I like to alternate between the dry mix and the ½ cup milk, adding about ⅓ of each at a time and mixing just until incorporated. This gradual approach prevents overmixing, which can make your cake dense. After all the ingredients are combined, scrape the sides of the bowl with a rubber spatula to ensure everything is evenly distributed.
You'll notice the batter is thick but smooth—this is perfect for our cake. The key here is not to overmix. Once the batter is fully combined, let it rest for 10 minutes at room temperature. This brief rest allows the flour to fully hydrate and the gluten to relax, resulting in a tender crumb. I know it seems like a small detail, but this step makes a world of difference in the final texture.
🔥 Step 3: Bake to Golden Perfection
Preheat your oven to 350°F and grease two 9-inch round cake pans with butter or line them with parchment paper. Divide the batter evenly between the pans and smooth the tops with a spatula. Bake for 25-30 minutes or until a toothpick inserted into the center comes out clean. Here's where it gets fun—tap the sides of the pans gently. If the cake springs back slightly, it's done. If not, bake for another 2-3 minutes.
Don't overbake! The cake will continue cooking as it cools. Once done, let the cakes cool in the pans for 10 minutes, then transfer them to a wire rack to cool completely. I like to invert the cakes onto the rack while still warm—this helps them set properly and keeps them from sticking. The cakes should be golden on top with a slightly domed center, and they'll be tender but firm to the touch.
🥘 Step 4: Prepare the Vanilla Bean Buttercream
While the cakes cool, prepare the frosting. In a large mixing bowl, beat the 1 cup cold heavy whipping cream with the 3 cups powdered sugar on medium speed for 2-3 minutes until smooth. Add the 1 tbsp vanilla extract and 1 tbsp vanilla bean seeds (scraped from the pod) and mix until fully incorporated. The seeds add those beautiful specks and an extra layer of vanilla flavor that makes this frosting truly special.
Increase the speed to high and beat for another 2-3 minutes until the frosting is thick, glossy, and holds stiff peaks. Here's the trick—I like to chill the bowl in the refrigerator for 10 minutes before whipping. This helps the cream whip up faster and gives you a more stable, spreadable frosting. Once it reaches the right consistency, you're ready to assemble your cake. If the frosting is too thick, add a few drops of milk to loosen it up.
🎂 Step 5: Assemble and Decorate
Place one cake layer on a cake stand or plate and spread a thin layer of frosting on top to create a "crumb coat." This first layer helps seal in any crumbs and makes the final frosting look smooth and professional. Chill the cake for 15 minutes in the refrigerator to set the crumb coat. Then, spread a thicker layer of frosting on top and repeat with the second cake layer.
Use an offset spatula to smooth the sides of the cake, creating a clean, elegant finish. For extra flair, pipe swirls or rosettes on top using the leftover frosting. The beauty of this recipe is that it's forgiving—even if your frosting isn't perfectly smooth, the rich vanilla flavor and tender cake will still shine. Serve immediately or chill for up to 2 hours before slicing. Each slice will be moist, flavorful, and absolutely amazing!
Pro Tips For Making Amazing Yellow Cake
- Cream Butter Slowly: I learned this the hard way—dumping cold butter into sugar and whipping it into submission always leaves tiny butter lumps that ruin the texture. Instead, cut the butter into small cubes (about ½-inch), let it sit out for 10 minutes to soften, then mix it into the sugar gradually while beating on medium-high. The goal is to get it light and fluffy, not greasy—if it looks like wet sand, you’ve gone too far. ---
- Weigh Your Flour: Scooping flour from the bag packs in air, which means your cake will be dense instead of light. Use a scale and measure by weight (1 cup all-purpose flour = ~125g). Press the flour into the measuring cup gently with a spoon, then level it off—no shaking or tapping. This keeps the ratio consistent and avoids a brick-like crumb. ---
- Skip Overmixing Wet Ingredients: Once you add the eggs and vanilla to the butter-sugar mix, stir just until combined. Overmixing develops gluten in the flour, leading to a tough, chewy cake instead of a tender one. Stop when the batter looks smooth but still has streaks—your mixer can handle it. ---
- Test for Doneness with a Toothpick: The cake pulls away from the edges and a toothpick inserted in the center comes out with a few moist crumbs (not wet batter) when it’s done. I used to rely on the recipe’s time estimate, but ovens vary—this method guarantees perfect doneness every time. If you’re unsure, err on the side of underbaking slightly; it’ll finish steaming as it cools.
Storing and reheating this amazing yellow cake
Room-Temp Storage
Your freshly baked yellow cake layers stay moist and delicious at room temperature for 2 days when wrapped tightly in plastic wrap or stored in an airtight container. I like to place a damp paper towel over the frosting before sealing to prevent drying. Keep it in a cool, dry spot away from direct sunlight—this preserves the cake's texture and flavor without refrigeration. 🌟
Fridge Preservation
For longer storage, refrigerate the fully assembled cake for up to 5 days. The cold temperature actually enhances the frosting's flavor, making each bite even more decadent. Let the cake sit at room temperature for 10-15 minutes before serving to soften the frosting slightly. I notice the vanilla notes become more pronounced after overnight chilling.
Frosting Longevity
The vanilla bean buttercream keeps beautifully in the fridge for 3 days when stored in an airtight container. For longer storage, freeze the frosting for up to 1 month. When ready to use, thaw at room temperature for 1-2 hours or microwave for 10 seconds to soften. The texture remains smooth and spreadable—no graininess here!
Reheating Leftovers
Toast cake slices in a skillet over medium-low heat for 1-2 minutes per side to revive the texture. Add a splash of milk to prevent drying. For frosted slices, warm in the microwave for 10-15 seconds covered with a damp paper towel. This gentle heat reactivates the frosting's creaminess without melting it completely. 💫
Freezing Whole Cake
Freeze the fully assembled cake (unfrosted or frosted) for up to 3 months by wrapping tightly in plastic wrap followed by aluminum foil. Thaw overnight in the fridge, then bring to room temperature before serving. The texture remains remarkably moist—just as good as fresh! I've even refrosted thawed cakes with new buttercream for a second life.
Make-Ahead Magic
Assemble the cake 2 hours before serving to let flavors meld. The frosting softens slightly at room temperature, creating a perfect balance between cake and frosting. For parties, bake the cake layers 1 day ahead, store them separately at room temperature, then frost just before serving. This timing trick ensures your cake is always at its peak when guests arrive. ✨
Nutrition facts
Frequently asked questions
Why does this yellow cake stay moist longer than others?
The secret lies in the sour cream and cold butter combination. Sour cream adds moisture that keeps the cake tender for days, while cold butter creates smaller air pockets for a stable yet delicate crumb. The 10-minute rest before baking also helps the flour hydrate properly, locking in moisture.
Can I make this cake without vanilla bean paste?
Yes! Use 2 tablespoons vanilla extract plus 1 tablespoon rum or bourbon for depth. For extra flavor, add a pinch of salt to balance the sweetness. The vanilla bean seeds in the frosting still give beautiful speckles even without paste in the cake.
How do I fix a cake that's cracked on top?
Cracking usually means overbaking. Check your oven temperature with an oven thermometer—it may run hot. For future cakes, bake 2-3 minutes less and test with a toothpick (it should come out with a few moist crumbs, not wet batter). If cracked, cover with extra frosting or decorate with fresh fruit to hide it.
What's the best way to layer this cake for maximum flavor?
Assemble the cake 2 hours before serving to let flavors meld. First spread a thin "crumb coat" of frosting, chill 15 minutes, then add the final thick layer. This creates a clean finish and prevents crumbs. For extra richness, brush cake layers with simple syrup before frosting.
Can I substitute butter for oil in this recipe?
Not recommended—this recipe relies on butter for its signature texture. Oil would make the cake denser and less flavorful. If you must, use ⅔ cup melted butter + ⅓ cup vegetable oil, but expect a slightly different crumb. The frosting also requires butter for proper consistency.